
Early in my career, I saw a maintenance team struggle for hours to replace a valve because the wrong fitting was used. That day, I learned the critical difference between a coupling and a union.
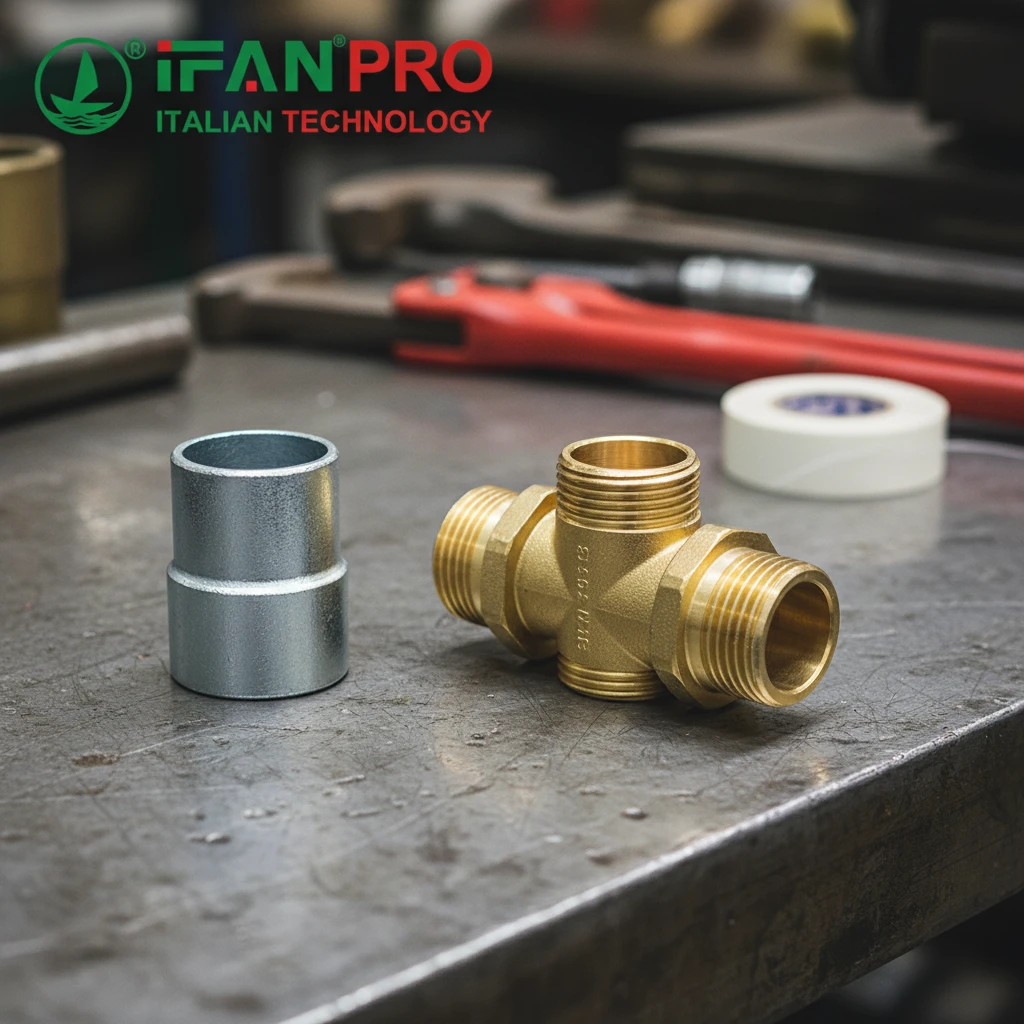
A pipe coupling is a permanent fitting that connects two pipes of the same diameter in a straight line, creating a fixed joint. A pipe union is a removable fitting that also connects two pipes but uses a threaded nut to allow for easy disassembly and reassembly without cutting the pipe, making it ideal for maintenance points.
While both connect pipes, choosing the wrong one leads to big headaches. Let’s break down their differences so you can make the right choice every time.
When Should You Use a Pipe Coupling Versus a Union for Connections?
Picture this: you’re laying out a new pipeline. Do you connect every section with a permanent joint or a removable one? The answer depends on the purpose.
Use a pipe coupling for permanent, leak-proof connections in long, straight runs of pipe where no future disassembly is needed. Use a pipe union at any point in the pipeline where you know you will need to disconnect the line for maintenance, cleaning, or replacing equipment like valves, pumps, or meters.
The Core Philosophy: Permanent vs. Serviceable
The choice between a coupling and a union comes down to one question: Will this connection ever need to be opened again? Your answer decides the fitting.
Couplings are for building the main body of the system. Think of them as the “welds” in a threaded or soldered system. Their job is to be strong, reliable, and forgotten. We use them everywhere we expect the pipe to stay connected for the life of the system. For example, connecting two 20-foot lengths of pipe to make a 40-foot run, or repairing a section of pipe that has corroded in the middle.
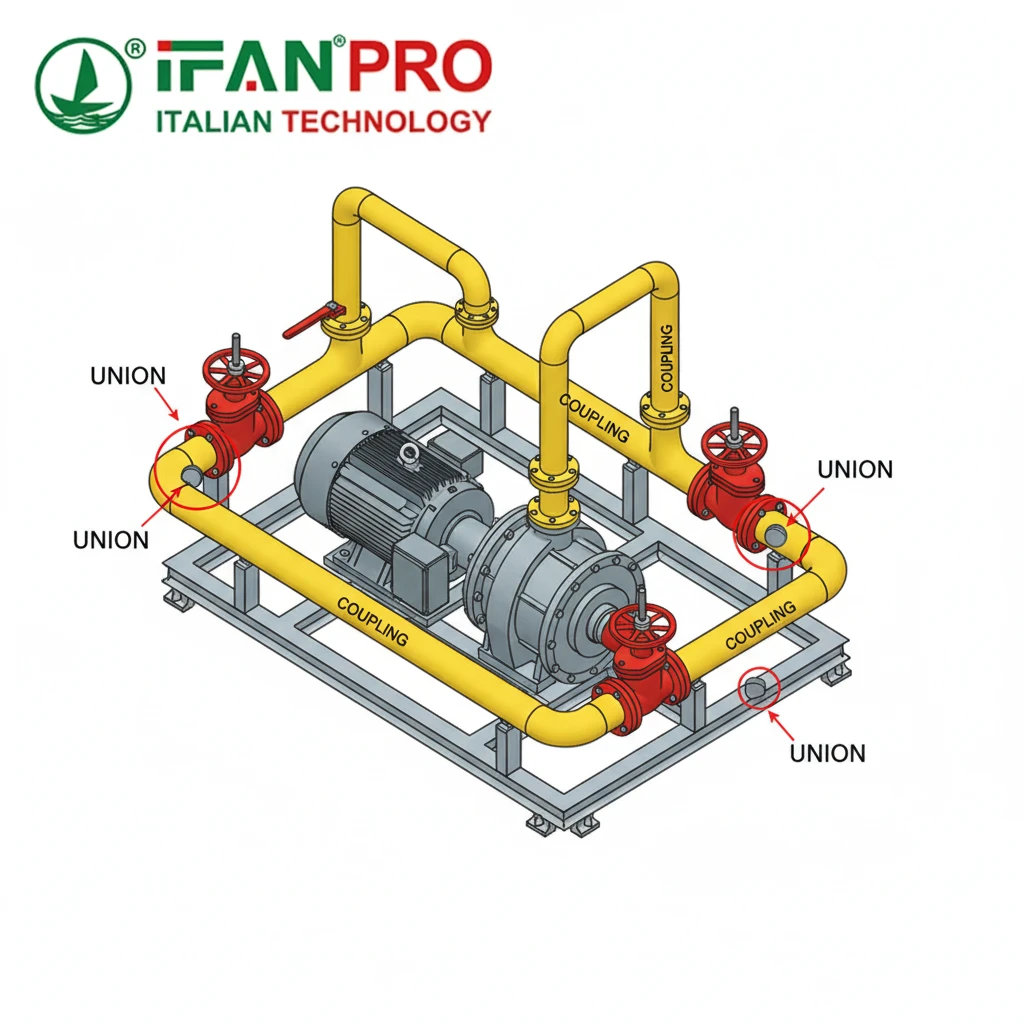
Unions are for creating strategic service points. They are the “access panels” of your piping system. You install them upstream and downstream of any component that has a limited lifespan or requires service.
- Before and after a pump or compressor: So you can remove it for repair.
- On both sides of a control valve or filter: So you can take it out for cleaning or replacement.
- At the connection to a water heater or boiler: To facilitate future replacement.
- In any hard-to-reach area: Where cutting the pipe for future repair would be extremely difficult.
Common Mistakes and How to Avoid Them
A frequent mistake we see is using couplings everywhere to save a few dollars. This creates a major problem later. When a pump fails, technicians must cut the pipe, destroying the coupling and a section of pipe, then install a new coupling and a union to make the repair. The initial savings are lost, and the repair takes three times longer.
Another error is using a union where a coupling is needed, like in the middle of a long, buried pipe run. This adds unnecessary cost and creates a potential leak point (the union’s gasket) where none should exist.
Decision Guide Table
Use this simple table to guide your initial choice:
| Scenario | Recommended Fitting | Reason |
|---|---|---|
| Connecting pipes in a long, straight, uninterrupted run. | Coupling | Creates a strong, permanent, and low-cost joint. |
| Installing a valve that may need replacement in 5-10 years. | Unions (before & after valve) | Allows valve removal without disturbing the main pipeline. |
| Repairing a cracked section of pipe. | Coupling | Permanently splices the new section into the existing line. |
| Connecting a pipe to a piece of equipment (e.g., pressure tank). | Union | Allows for easy disconnection to service or replace the equipment. |
| Making a final connection in a tight space during installation. | Union | Allows for easier alignment and future disassembly if space is limited. |
How Do Installation Methods Differ Between Pipe Couplings and Unions?
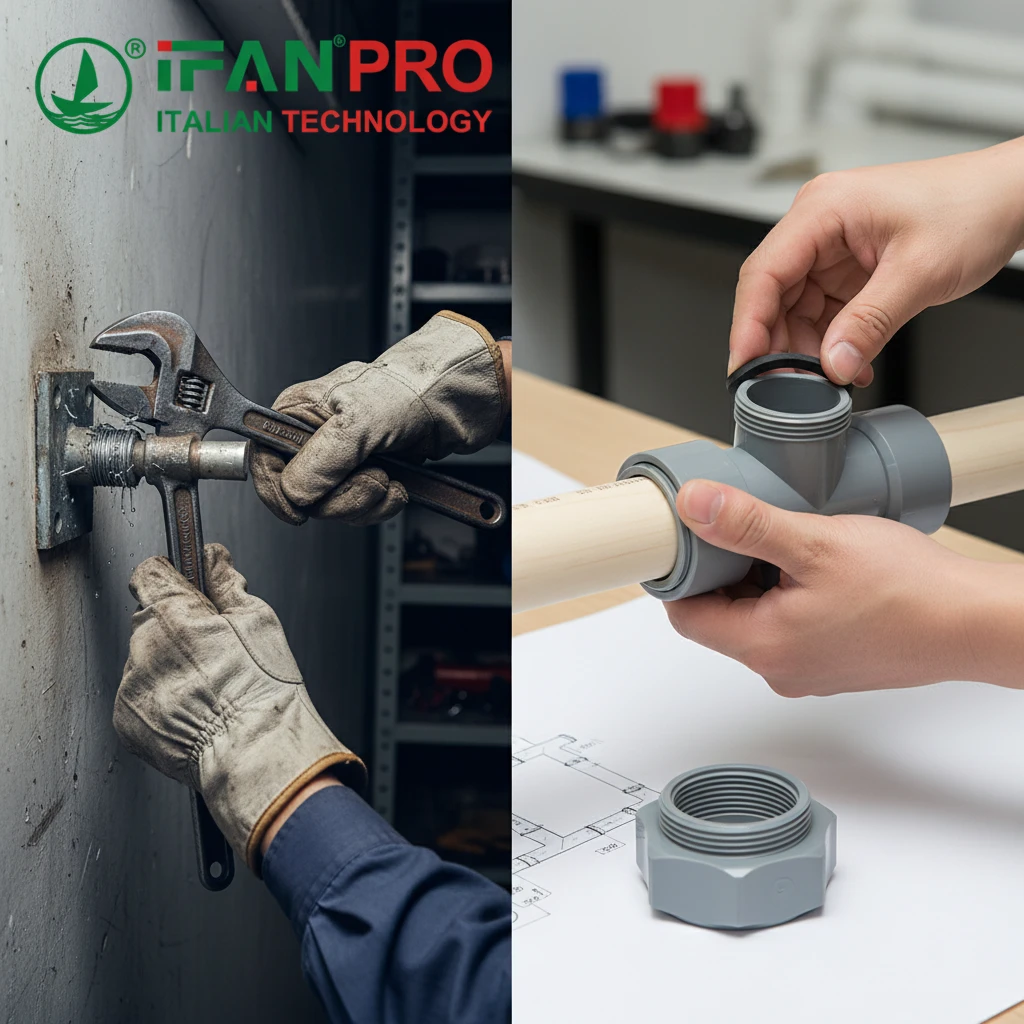
Installation defines their purpose. Watching a seasoned installer, you see the difference immediately: one is about sealing for life, the other is about sealing for service.
A pipe coupling is installed by threading it onto the ends of both pipes simultaneously or soldering/fusing it in place, creating a single, fixed unit. A pipe union is installed in three parts: one end is fixed to the first pipe, the other end to the second pipe, and then the central nut is tightened to pull and seal the two ends together, allowing for future untightening.
Installing a Coupling: Creating a Permanent Bond
The goal here is to make two pipes act as one. The method depends on the pipe material.
For threaded steel or PVC pipes:
- Apply pipe thread sealant (tape or compound) to the male threads of both pipe ends.
- Screw the female-threaded coupling onto the first pipe. You typically turn it several full rotations.
- Now, screw the second pipe into the other end of the coupling. This requires you to turn the entire pipe. The coupling itself stays in the middle, connecting both.
- Tighten with a wrench. The coupling becomes a permanent part of the line. To remove it later, you must unscrew one of the pipes, which often means disassembling a large section of the system.
For copper (soldered) or PP-R (fused) pipes:
The coupling is a simple sleeve. You heat and solder (or fuse) one side to the first pipe, then the other side to the second pipe. The joint is permanent and monolithic.
Installing a Union: Building a Disconnect Point
A union is a three-piece assembly: a female end, a male end, and a nut.
- Prepare the ends: The female end has internal threads. The male end has external threads and a flat face with a groove for a gasket or O-ring.
- Fix the ends to the pipes: First, attach the female end to your first pipe (using thread sealant). Then, attach the male end to your second pipe. These become permanent parts of their respective pipe sections.
- Join and seal: Bring the two pipe sections together. The male end fits into the female end. A seal ring (often a rubber or Teflon gasket) sits between them. Slide the nut over the threads and tighten it.
- The magic: Tightening the nut pulls the male and female ends together, compressing the seal ring to create a leak-proof joint. To disconnect, you simply loosen the nut. The two pipe sections can then be pulled apart.
Key Installation Differences Table
| Aspect | Pipe Coupling | Pipe Union |
|---|---|---|
| Number of Parts | One single piece. | Three pieces (two ends + nut). |
| Installation Sequence | Must be threaded onto both pipes in the middle of the assembly. | Ends are fixed to pipes first, then joined in the final step. |
| Sealing Method | Relies on thread sealant (tape/dope) or a soldered/fused joint. | Relies on compressing a gasket or O-ring between two machined faces. |
| Alineación | Difficult. Pipe ends must be aligned before the coupling is fully tightened. | Easier. The union nut allows for some final adjustment during tightening. |
| Tool for Disassembly | Requires two pipe wrenches to unscrew, often disturbing adjacent pipes. | Requires one or two wrenches to loosen the nut only. |
What Are the Pressure Rating Differences for Couplings and Unions?
In high-pressure systems, every fitting is a potential weak point. You can’t assume all connections are created equal.
Generally, a pipe coupling of the same material and class has a higher pressure rating than a union. This is because a coupling is a simpler, more solid piece with fewer potential leak paths. A union’s pressure rating can be limited by its gasket material and the integrity of its threaded nut connection under sustained stress.
Why Couplings Are Inherently Stronger
Think of structural integrity. A standard threaded coupling is a single, thick-walled sleeve. Its only job is to hold the threads of two pipes. The force from internal pressure acts mostly on the pipe walls. The coupling just contains the connection point. Its failure point is usually the thread strength itself, which is very high.
A union, however, is a more complex mechanical assembly. It has:
- Threaded Connections: Where the ends attach to the pipes (similar to a coupling).
- A Gasket Interface: The flat faces that are squeezed together. This is the primary seal and a potential failure point if the gasket degrades, compresses too much, or is incompatible with the fluid.
- The Nut: Which must maintain precise clamping force. Vibration or thermal cycling can sometimes cause nuts to loosen slightly, compromising the seal before the threads themselves would fail.
Because of these extra components, the union’s overall pressure rating is determined by its weakest link, which is often the gasket seal. High-performance unions use metal-to-metal seals (like cone-and-seat types) for very high pressures, but these are specialty items.
Comparing Ratings in Real Systems
Let’s look at common steel threaded fittings. A standard 150 PSI class threaded coupling is rated for, and often exceeds, 150 PSI of working pressure. A standard 150 PSI class union, using a rubber or fiber gasket, is also rated for 150 PSI. However, in practice, the union is more likely to weep or leak at pressures near this limit over time, especially with temperature changes.
For critical high-pressure applications, the entire system is derated (a safety factor applied) when unions are present, or specially rated unions are specified.
Pressure Rating Guide by Application
This table provides a general comparison. Always consult manufacturer specifications for exact ratings.
| Fitting Type | Typical Max Working Pressure (Steel, Threaded) | Key Limiting Factor | Best For |
|---|---|---|---|
| Standard Threaded Coupling | Up to 3000 PSI (depends on class) | Material strength & thread integrity. | High-pressure mains, hydraulic lines (where permanent). |
| Standard Gasket Union | 150 – 300 PSI | Gasket material and nut clamp load. | Low/medium pressure water, air, oil service lines. |
| Soldered Copper Coupling | Limited by pipe rating (e.g., 200+ PSI) | Solder joint integrity. | Domestic water lines. |
| Metal-Seal High-Pressure Union | 2000+ PSI | Precision machining of metal sealing surfaces. | Steam lines, high-pressure hydraulic disconnects. |
Important Note: The pressure rating plummets if the wrong gasket material is used. A union with a standard rubber gasket should never be used for fuel gas or steam, as the material will fail.
Why Choose a Union Over a Coupling for Maintenance and Repair Work?
Time is money during a shutdown. I’ve seen plants lose thousands per hour because a simple valve change took half a day instead of 30 minutes. The fitting choice makes this difference.
Choose a union over a coupling at any connection point you may need to open because a union allows for quick, tool-based disconnection and reconnection without damaging the pipes. Using a coupling would force you to cut the pipe, requiring new parts, more labor, and creating a permanent change to the pipeline length each time you repair.
The High Cost of the “Wrong” Fitting
Let’s walk through a real-world maintenance scenario: replacing a corroded valve.
Scenario with Unions Installed:
- Isolate the valve and drain the line.
- Use two wrenches: one to hold the valve body, one to loosen the union nut on each side.
- Remove the old valve.
- Insert the new valve, hand-tighten the union nuts.
- Use wrenches to final-tighten.
- Re-pressurize and test.
Total time: 20-45 minutes. The system is back online quickly. The original pipe length and alignment are perfectly preserved.
Scenario with Couplings Installed (the wrong choice):
- Isolate and drain the line.
- Use a pipe cutter to cut the pipe on both sides of the valve. This destroys the couplings and a piece of the pipe.
- Unscrew the damaged valve.
- You now have two unconnected pipe ends. You cannot just screw a new valve in because the pipes won’t move to align with it.
- You must install a new union on one pipe end, then a nipple (short pipe piece) to the valve, then another union on the other side, then connect it to the other pipe end. This requires precise measurement and multiple threaded connections.
- Re-pressurize and test. You now have two new potential leak points (the unions) where you previously had none.
Total time: 2-4 hours. The repair is more expensive in parts and labor, and the system is altered permanently.
Strategic Placement of Unions
Smart engineers and planners “future-proof” systems with unions. Here’s where they are non-negotiable:
- Equipment Isolation: As discussed, at every pump, compressor, heater, or tank connection.
- System Segments: In long pipe runs, installing a union every 50-100 feet allows you to isolate and remove a damaged section without dismantling the entire line.
- Final Connections: When connecting the last piece of a system in a tight space, a union allows for easier alignment. If the alignment is off with a coupling, you must unscrew many other joints to correct it.
Cost-Benefit Analysis Over Time
While a union costs 3-5 times more than a simple coupling upfront, its value is in lifecycle cost. The initial investment is recovered the first time you perform maintenance. Consider it cheap insurance against expensive, disruptive downtime.
For IFAN clients, we always recommend specifying unions on our Bill of Materials for any connection to movable or serviceable equipment. It’s a mark of a professionally designed system that considers the total cost of ownership, not just the installation invoice.
Conclusión
Couplings build permanent, strong pipelines, while unions create smart, serviceable connections. For reliable, specification-matched couplings and unions that ensure both system integrity and easy maintenance, partner with IFAN for your next project supply.


Comentarios recientes