
I once saw a plumbing project fail because a simple reducer was installed wrong. That moment taught me that even the smallest fitting needs proper attention.
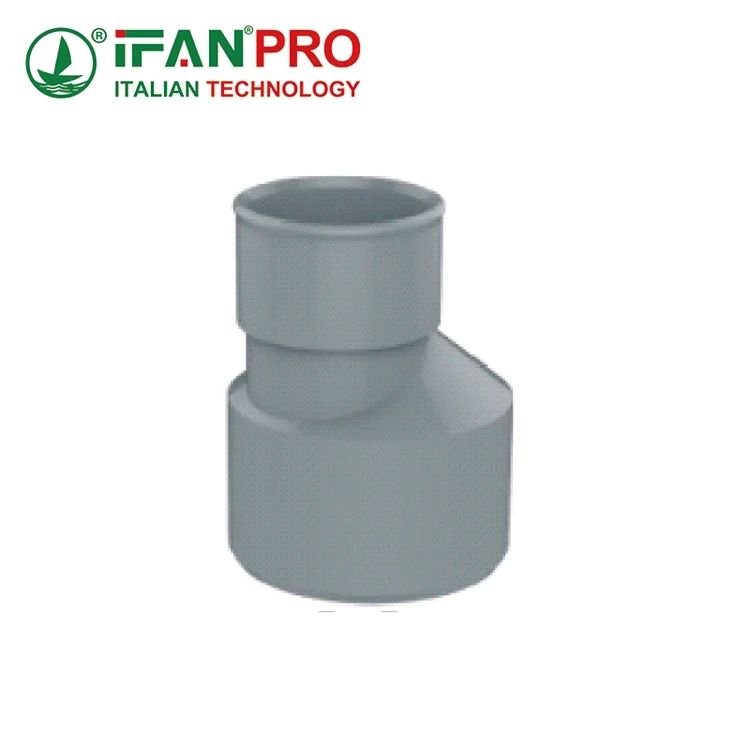
A 2″ to 1.5″ PVC reducer is a connector that joins a larger 2-inch pipe to a smaller 1.5-inch pipe. People use it to connect different pipe sizes in systems like home drains, garden watering systems, or pool pipes.
This guide will explain everything about this fitting. We will cover what it is, how to install it, and how to avoid common mistakes.
What is a 2″ to 1.5″ PVC Reducer and Where is it Used?
A client called me, confused about why their system had low water pressure. The problem was a missing reducer.
A 2″ to 1.5″ PVC reducer is a fitting that connects two pipes of different sizes. It is used in many systems like home drains, city water lines, and factory pipes to safely guide water from a big pipe into a smaller one.
Understanding the Fitting’s Job
A PVC reducer has a very clear job: it connects pipes of different sizes. The “2” to 1.5″” means one end fits a 2-inch pipe, and the other end fits a 1.5-inch pipe. This size change helps control how fast the water flows.
There are two main shapes for this reducer:
- Concentric Reducer: This one looks like a straight cone. Both ends share the same center point. You use it when the pipes are in a straight line.
- Eccentric Reducer: This one looks like a cone with one flat side. The center points of the two ends are not aligned. People use this type on flat pipes to stop air bubbles from getting stuck, which is very important for drain pipes.
Where You Will Find This Reducer
You can find these reducers in many places around homes and cities.
- Home and Building Drains: This is the most common place. For example, a large 2-inch drain from a toilet might need to connect to a 1.5-inch pipe from a sink. The reducer makes this connection.
- Garden Watering Systems: The main water line is often bigger. Reducers connect smaller pipes or sprinklers to this main line.
- Pool and Spa Pipes: Pumps and filters often have different sized openings. Reducers connect all the equipment together correctly.
- Factories and Plants: PVC does not react with many chemicals. Factories use reducers to move liquids between different machines.
Picking the Right Material
Not all PVC is the same. You need to pick the right type for your job.
| PVC Type | Where It’s Used | Pressure It Can Handle | Key Thing to Know |
|---|---|---|---|
| Schedule 40 | Most common for home drains and garden water systems. | Medium | Good strength for a good price. |
| Schedule 80 | Used in factories or for high-pressure water. | High | Has thicker walls for more durability. |
| PVC Class | Used for city water and sewer lines under streets. | Varies | Made to be buried in the ground for a long time. |
When you choose a reducer, you must match it to your pipes. For example, do not use a Schedule 40 reducer with a Schedule 80 pipe. Also, if the pipe carries drinking water, check for an NSF-pw mark on the fitting. At IFAN, we know that picking the right material is the first step to success.
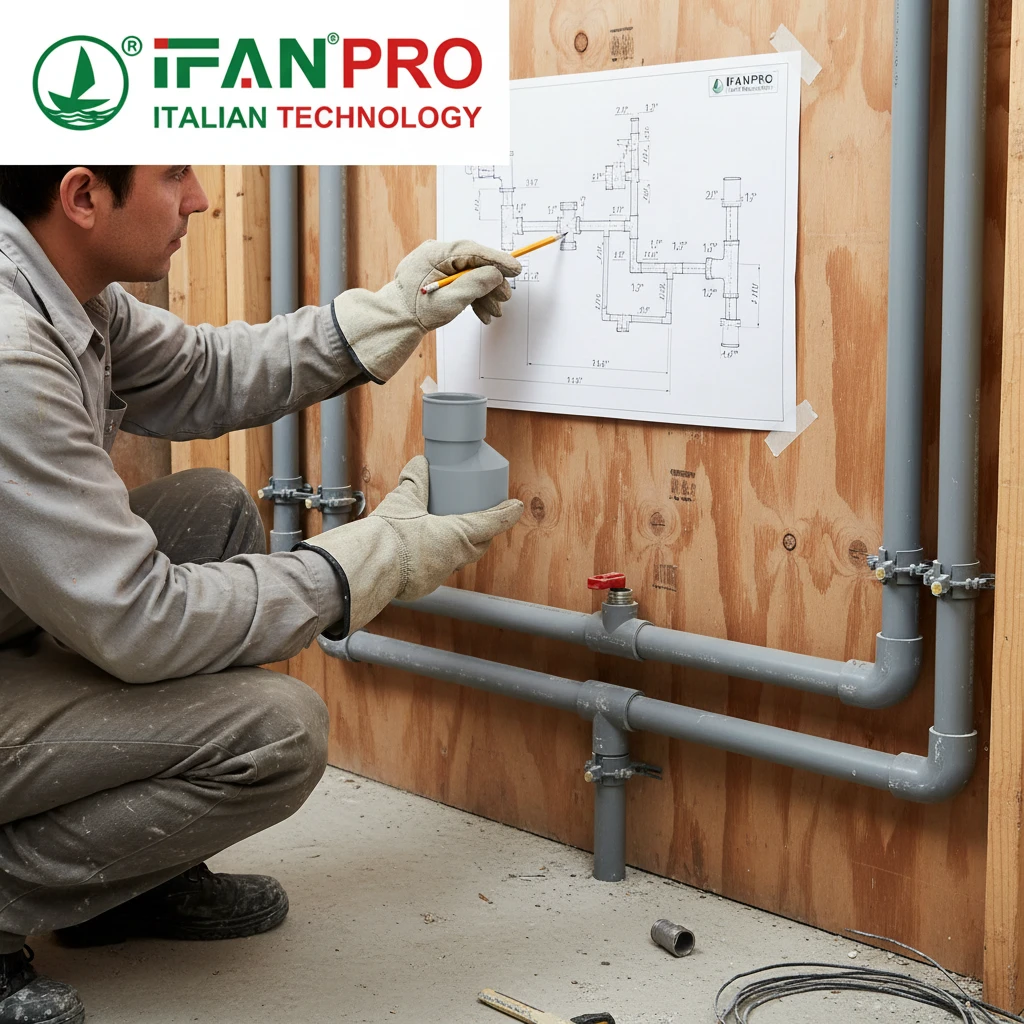
How Do You Properly Install a 2″ to 1.5″ PVC Reducer Fitting?
A good installation makes a system last for years. I always tell my team to prepare well before starting.
To install a PVC reducer, first put the pipes together without glue to check the fit. Clean the ends, apply purple primer, then apply special PVC cement. Quickly push and twist the pipe into the fitting, and hold it still for 30 seconds to create a strong, leak-proof bond.
Step-by-Step Installation Guide
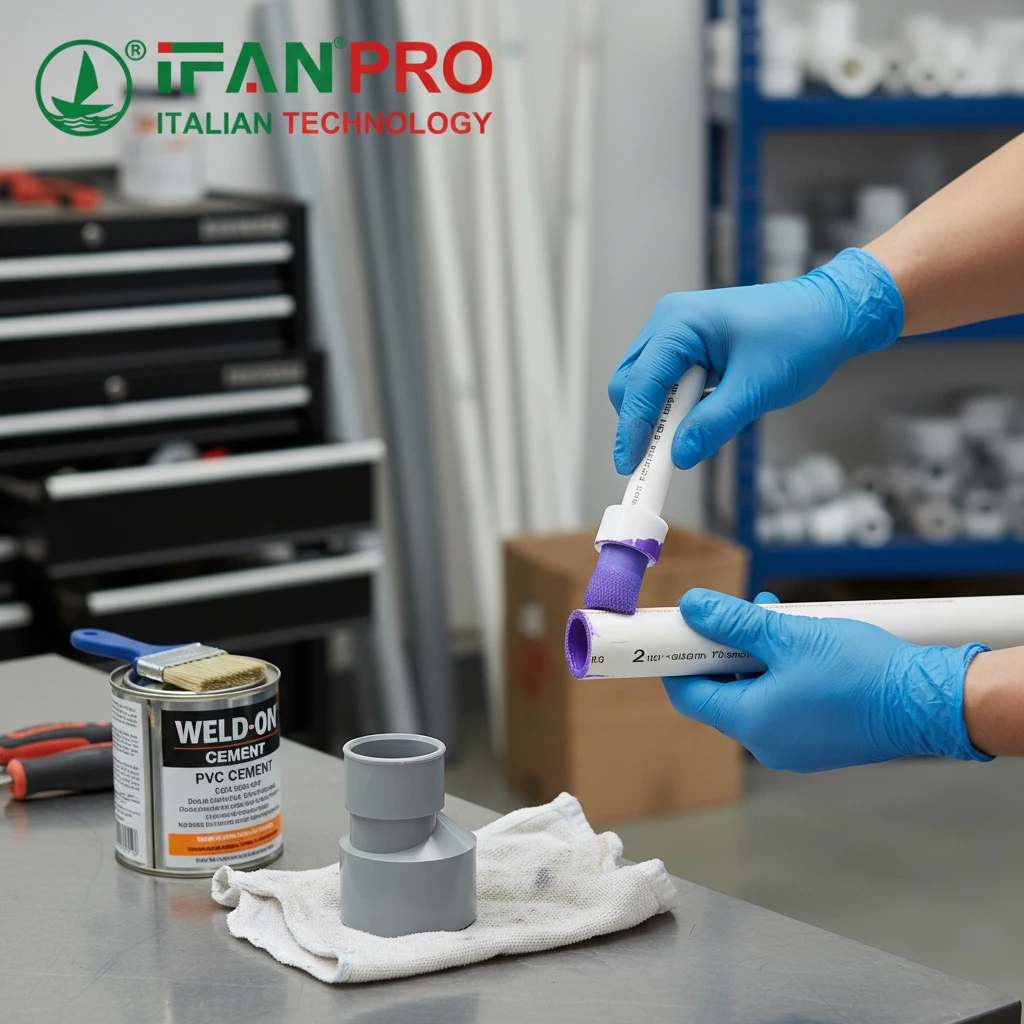
Installing a PVC reducer uses a method called chemical welding. The cement melts the plastic surfaces, joining them together as one piece. Follow these steps for a strong joint.
Step 1: Check the Fit First
First, cut the pipe so the end is perfectly straight. You can use a PVC cutter or a saw. Next, do a “dry fit.” This means putting the pipe into the reducer without any glue. Make sure the pipe goes all the way in. Draw a line across the pipe and fitting with a pencil. This mark helps you align them later when the glue is on.
Step 2: Clean and Use Primer
Wipe the pipe end and the inside of the fitting with a clean cloth to remove dirt. Then, apply purple PVC primer. Put the primer on the outside of the pipe and inside the fitting. Let it dry for 10 seconds. This primer cleans and softens the plastic so the glue works better.
Step 3: Apply Glue and Connect
Right after the primer dries, put a thick, even layer of clear PVC cement on the same spots. Quickly push the pipe into the fitting, turning it about a quarter turn as you push. Line up the pencil marks you made. Push hard until the pipe won’t go any further.
Step 4: Hold and Let It Dry
Hold the joint together without moving it for at least 30 seconds. This stops the pipe from coming back out. Wipe away any extra glue that leaks out. Then, let the joint dry. Wait 15 minutes before you touch it, 2 hours before you run water, and 24 hours for full strength.
Tools You Will Need
Having the right tools makes the job easy.
| Tool/Material | What It’s For | Why You Need It |
|---|---|---|
| PVC Cutter or Saw | To cut the pipe straight. | A clean cut makes a better seal. |
| Sandpaper | To smooth the cut pipe edge. | A smooth edge helps the glue stick. |
| PVC Primer (Purple) | To prepare the plastic. | It is necessary for a strong bond. |
| PVC Cement | To glue the joint. | It must be fresh and made for PVC. |
| Pencil & Rag | To mark and clean. | Helps with alignment and removes dirt. |
What are Common Installation Mistakes with PVC Reducer Fittings?
Most leaks happen because of simple errors during installation, not because of bad products.
Common mistakes are not using primer, using too little glue, not pushing the pipe in all the way, and moving the joint too soon. Another big mistake is using the wrong type of glue for the PVC pipe.
A Closer Look at These Mistakes
Let’s look at these common problems so you can avoid them.
Mistake 1: Skipping the Purple Primer
This is the top mistake. Some people think only glue is needed. But the primer is very important. It prepares the PVC surface so the glue can make a strong weld. If you skip primer, the joint will probably leak later. The purple color shows you did this step.
Mistake 2: Using the Wrong Amount of Glue
Too little or too much glue both cause problems.
- Too Little Glue: The glue must cover all the surfaces that touch. A thin coat leaves dry spots that will leak.
- Too Much Glue: A big glob of glue can get inside the pipe, harden, and block the water flow.
Mistake 3: Not Pushing the Pipe In Fully
You must push the pipe all the way into the fitting until it stops. Then, give it a small twist. If the pipe is not all the way in, the joint is weak. This is why the dry-fit step is so useful—you know exactly how far it should go.
Mistake 4: Moving the Joint Too Early
The glue sets fast but dries slowly. If you let go or try to adjust the pipe in the first 30 seconds, you can break the new bond. This creates tiny cracks that turn into leaks. Always hold it firmly.
How to Fix and Avoid Problems
Here is a simple guide to prevent these errors.
| Common Mistake | What Goes Wrong | The Right Way to Do It |
|---|---|---|
| No Primer Used | The bond is weak and will leak. | Always use the purple primer first. |
| Not Enough Glue | Glue doesn’t cover all surfaces, causing leaks. | Apply a thick, even layer on both the pipe and fitting. |
| Pipe Not All the Way In | The joint has less glue area and is weak. | Dry-fit first, mark it, and push firmly until it stops. |
| Using Wrong Glue | Glue for other plastics won’t work on PVC. | Use glue that clearly says “PVC Solvent Cement” on the can. |
At IFAN, we hear from clients who faced these issues before. Teaching your workers these simple steps is the key to a good project.
How Do You Test for Leaks After Installing a PVC Reducer?
You should never assume a joint is good. Always check it with a proper test.
The best way to test for leaks is with a water pressure test. After the glue dries for 24 hours, fill the pipes with water and pump the pressure to 1.5 times the normal level. Check all joints for any water drops for at least 15 minutes
Different Ways to Test for Leaks
You can use a few reliable methods to test your work. The best method depends on your system.
1. The Water Pressure Test (Best for Most Jobs)
This is the standard test for water pipes and irrigation lines.
- Step 1: Close the System. Put caps or plugs on all open ends.
- Step 2: Connect a Gauge. Attach a pressure gauge and a water hose to the system.
- Step 3: Add Water and Pressure. Fill the pipes slowly from the lowest point. Let all the air escape from the highest point. Then, use a pump to increase the pressure. Test at a pressure 1.5 times higher than normal use (e.g., test at 100 PSI for a system that runs at 65 PSI).
- Step 4: Watch and Look. Keep the pressure for 15 minutes. Watch the gauge for any drop. Also, look closely at every joint, especially the reducer, for tiny water drops. If the gauge is stable and the joints are dry, you passed.
2. The Air Pressure Test (Be Careful)
People often use air to test drain pipes, which don’t normally hold high pressure.
- Warning: Air under pressure can be dangerous. Never use high air pressure on PVC pipes. Use very low pressure (only 5-10 PSI).
- Method: Close all ends. Connect an air compressor with a pressure gauge. Gently add air until you reach the low test pressure. Spray all joints with soapy water. If you see bubbles, you have a leak. This method finds very small leaks.
Understanding Your Test Results
It’s important to know when to test and what the results mean.
| Test Type | When to Test After Gluing | What is a “Pass”? | What if it Fails? |
|---|---|---|---|
| Water Pressure Test | Wait 24 hours for the glue to fully dry. | Pressure stays the same; all joints are totally dry. | The joint did not seal. You must cut it out and redo it. |
| Air Pressure Test (Low-PSI) | Wait at least 2 hours. | Pressure holds; no bubbles form with soapy water. | Finds tiny leaks. You must fix the leaking joint. |
| Simple Water Test (for Drains) | After 24 hours. | Pour water down the pipe; check for drips below. | A quick check for sink or toilet drains. Any drip needs repair. |
A Good Tip: Always test a whole section of pipe, not just one joint. A leak at a reducer could mean that joint is bad, or it could mean another joint is leaking. Look at every joint during the test. Using good, consistent fittings like IFAN’s reduces the chance of problems, so you can be more confident.
Conclusión
Installing a PVC reducer correctly means picking the right part, gluing it carefully, and always checking for leaks. For dependable 2″ to 1.5″ PVC reducers, choose the consistent quality of IFAN products for your project.


Comentarios recientes