
I once watched a skilled plumber struggle with a leaking threaded connection for hours. That experience taught me that even the best fitting fails without proper installation techniques.
The 121UC Female Threaded PEX Union provides a reliable transition between PEX tubing and threaded fixtures, but only when installed correctly. Proper preparation of the PEX pipe, careful attachment of the threaded side, and thorough testing ensure a leak-free system that lasts for decades. Following best practices prevents the most common installation failures.
Now let’s walk through each step of the installation process to ensure your connection works perfectly.
Preparing Your PEX Pipe for a Secure Socket Connection
A bad start guarantees a bad finish. I’ve seen too many connections fail because someone rushed the pipe preparation stage.
Preparing your PEX pipe correctly means cutting it perfectly square, ensuring the cut end is clean and free of burrs, and sliding on the correct support sleeve or cinch ring before insertion. The socket connection relies on the pipe being inserted to the full depth and the ring being crimped evenly around the circumference to create a permanent, watertight seal.
Step One: The Perfect Cut
The quality of your cut directly affects the seal. If you cut the pipe at an angle, it won’t insert fully into the fitting. This creates a gap where leaks can start.
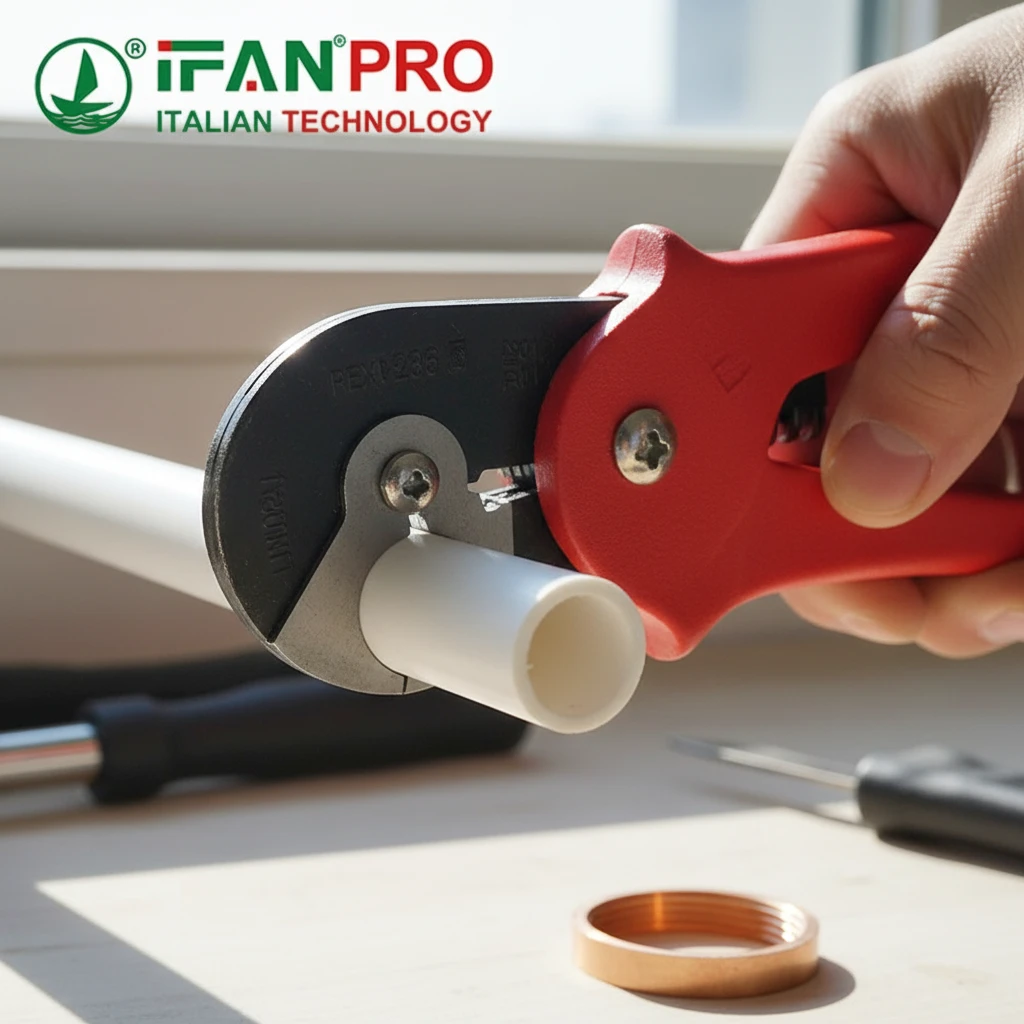
Use a dedicated PEX cutter, not a utility knife or scissors. A proper cutter gives you a clean, square cut every time. Hold the cutter perpendicular to the pipe. Rotate it around the pipe while applying steady pressure. The blade should slice through cleanly without crushing or deforming the pipe.
After cutting, inspect the end. You should see a smooth circle, not an oval. The edges should be clean, not jagged.
Step Two: Preparing the Pipe End
Even with a good cut, the pipe needs preparation. Run your finger around the inside and outside edges. Feel for any burrs or rough spots. If you feel any, use the deburring tool built into most PEX cutters or a piece of sandpaper to smooth them.
Why does this matter? Burrs can scrape the O-ring or sealing surface inside the fitting as you insert the pipe. Even a tiny scratch on the seal can become a leak path under pressure.
Also check for dirt or debris. A quick wipe with a clean cloth removes anything that might contaminate the connection.
Step Three: Installing the Crimp Ring or Sleeve
Before inserting the pipe into the fitting, you must slide on the correct type of ring. For the 121UC union, this is typically a copper crimp ring or a stainless steel cinch clamp.
Slide the ring onto the pipe first. Push it far enough down so it won’t interfere with insertion. Make sure you have the right size ring for your pipe diameter. A 1/2-inch pipe needs a 1/2-inch ring.
Step Four: Full Insertion
Now push the pipe into the fitting’s socket. Apply firm, steady pressure. Push until the pipe bottoms out in the fitting. You should feel it stop. Many fittings have a depth marker or a shoulder inside. The pipe must reach this point.
Some installers mark the insertion depth on the pipe with a pen before starting. This gives you a visual check to confirm full insertion after crimping.
The table below summarizes the critical preparation steps:
| Preparation Step | Common Mistakes | Why It Matters |
|---|---|---|
| Cutting | Using wrong tool; cutting at an angle | Angled cuts prevent full insertion, creating leak paths. |
| Deburring | Skipping this step | Burrs can scratch internal seals during insertion. |
| Ring Placement | Forgetting ring; using wrong size | No ring means no compression; wrong size won’t seal. |
| Insertion Depth | Not pushing to full depth | Partial insertion leaves the seal uncompressed. |
Take your time with preparation. It takes two minutes but saves hours of rework later.
Properly Attaching the Female Thread to Existing Fixtures
Threaded connections fail more often than any other type. I’ve learned that the problem is rarely the thread itself, but how people treat it.
Attaching the female thread correctly requires using thread sealant tape or pipe dope on the male threads, hand-tightening first to avoid cross-threading, and then snugging with a wrench without over-tightening. The goal is to compress the sealant into the threads without stressing the fitting body, which is plastic and can crack under excessive force.
Understanding Thread Types
The 121UC has female threads designed to connect to male threaded pipes or fittings. These are typically either NPT (National Pipe Taper) or BSP (British Standard Pipe) threads. They are tapered, meaning they get tighter as you screw them in. The seal comes from the threads wedging together, not from bottoming out.
Check what thread standard your existing fixture uses. Mixing NPT and BSP threads rarely works well. IFAN products clearly specify the thread type to avoid this confusion.
Applying Thread Sealant
Never connect threaded pipes without sealant. The threads alone will not stop water. You need something to fill the microscopic spiral path between them.
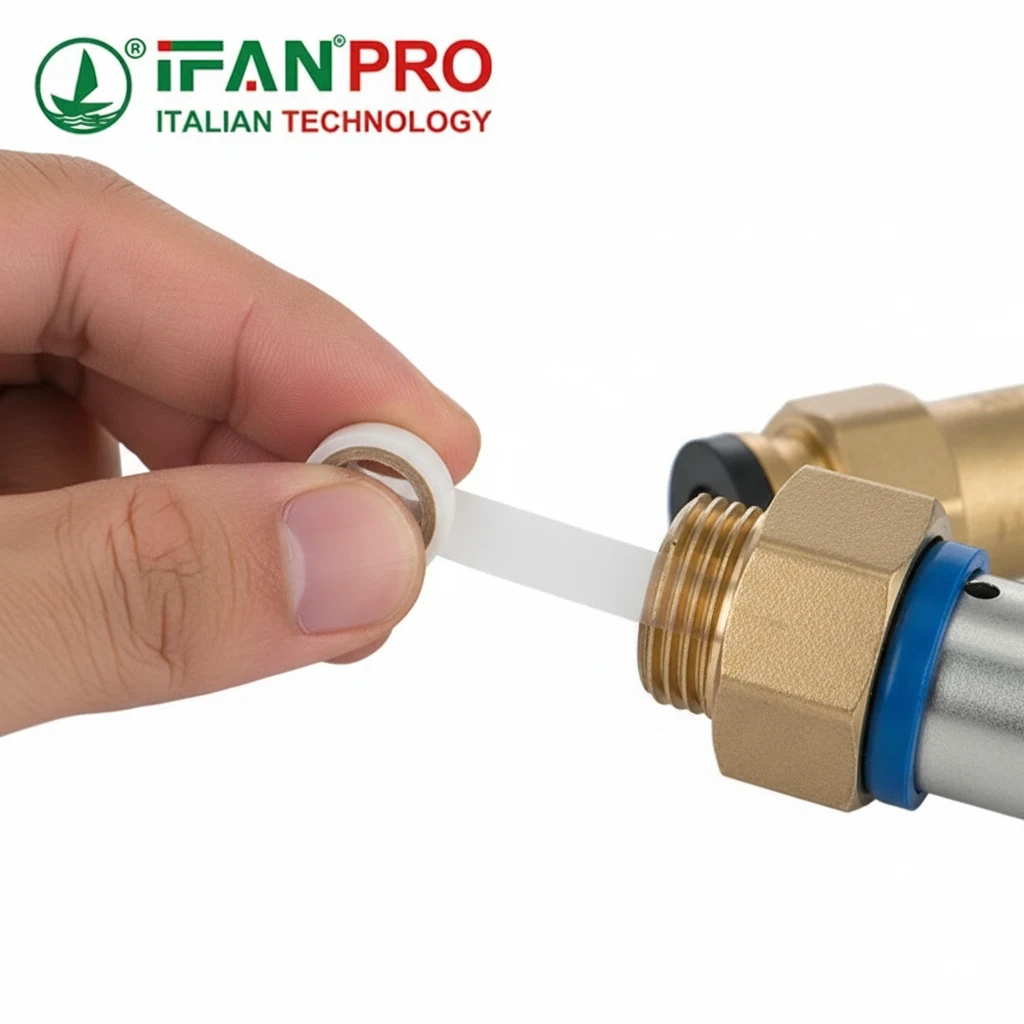
Option 1: PTFE Tape (Teflon Tape)
Wrap the tape clockwise around the male threads. Why clockwise? So the tape doesn’t unravel as you screw on the fitting. Start at the second thread from the end and wrap toward the base. Use two to three wraps for standard water applications. Stretch the tape slightly as you wrap to press it into the threads.
Option 2: Pipe Dope (Thread Sealant Paste)
Brush a thin, even layer onto the male threads. Cover all the threads completely. Some installers use both tape and dope for extra security on critical connections.
The Tightening Process
Start by hand. Screw the female threaded end onto the male pipe until it stops. This ensures you haven’t crossed the threads. Cross-threading happens when the fitting goes on crooked. It damages both sets of threads and almost always leads to leaks.
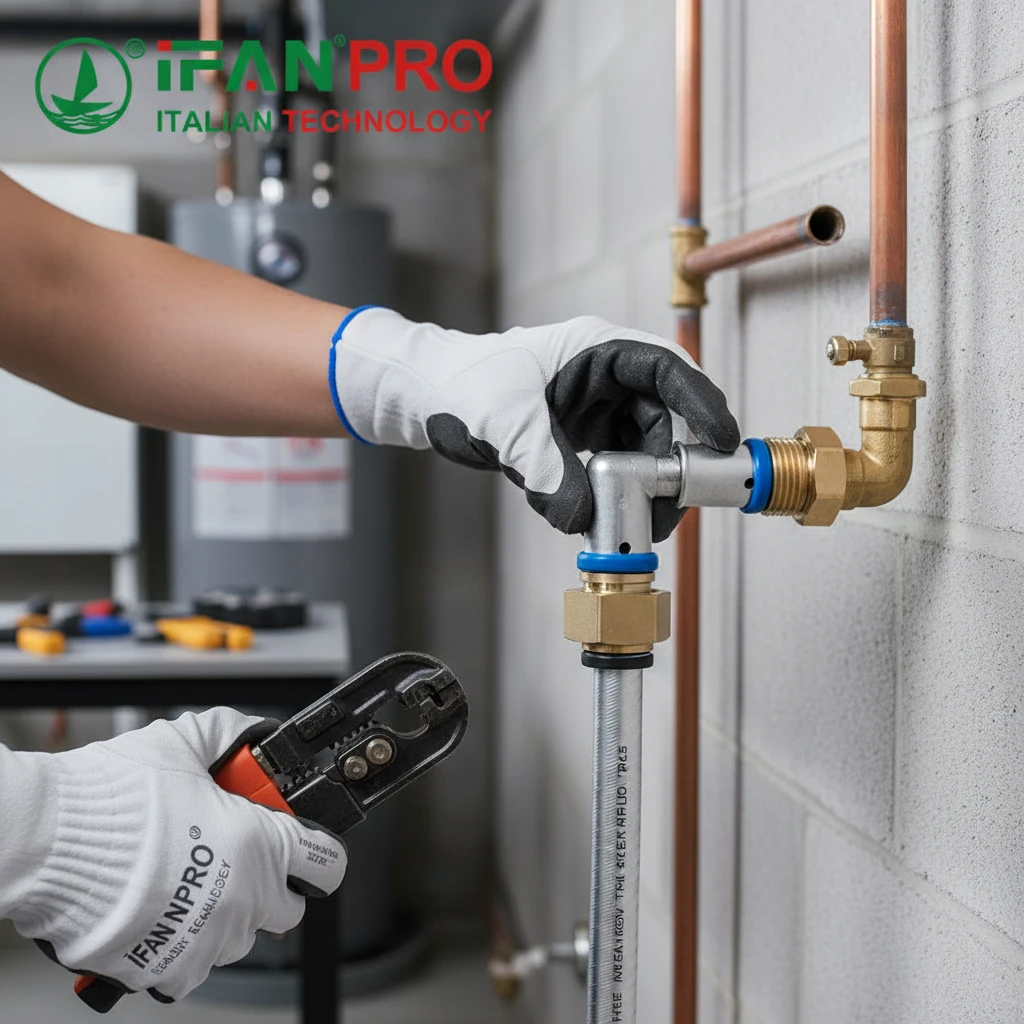
Once hand-tight, use wrenches to finish. Hold the main body of the union with one wrench to keep it from twisting. Use another wrench on the male pipe or fitting to snug the connection.
How tight is tight enough? For plastic threads, “snug” means about one to two turns past hand-tight, or until you feel firm resistance. Do not crank it as hard as you can. Plastic is strong but can crack if over-stressed. Metal threads can take more force, but the plastic female thread will fail first.
The table below shows proper tightening guidelines:
| Pipe Size | Hand-Tight Turns | Wrench Turns Past Hand-Tight | Notes |
|---|---|---|---|
| 1/2-inch | 3-4 turns | 1-2 turns | Stop when you feel solid resistance. |
| 3/4-inch | 4-5 turns | 1.5-2.5 turns | Slightly more due to larger diameter. |
| 1-inch | 5-6 turns | 2-3 turns | Use a second wrench to support the fitting. |
If you see the fitting body twisting as you tighten, stop. You are stressing the PEX connection. Always counter-hold with a second wrench.
Common Installation Mistakes to Avoid
Over the years, I’ve compiled a mental list of errors I never want to repeat. Sharing these might save you the same frustration.
The most common installation mistakes with the 121UC include over-tightening the threaded side, failing to support the fitting during tightening, using the wrong crimp tool or ring, and forgetting to fully insert the PEX pipe before crimping. Each of these errors creates a specific failure mode that leads to leaks under pressure.
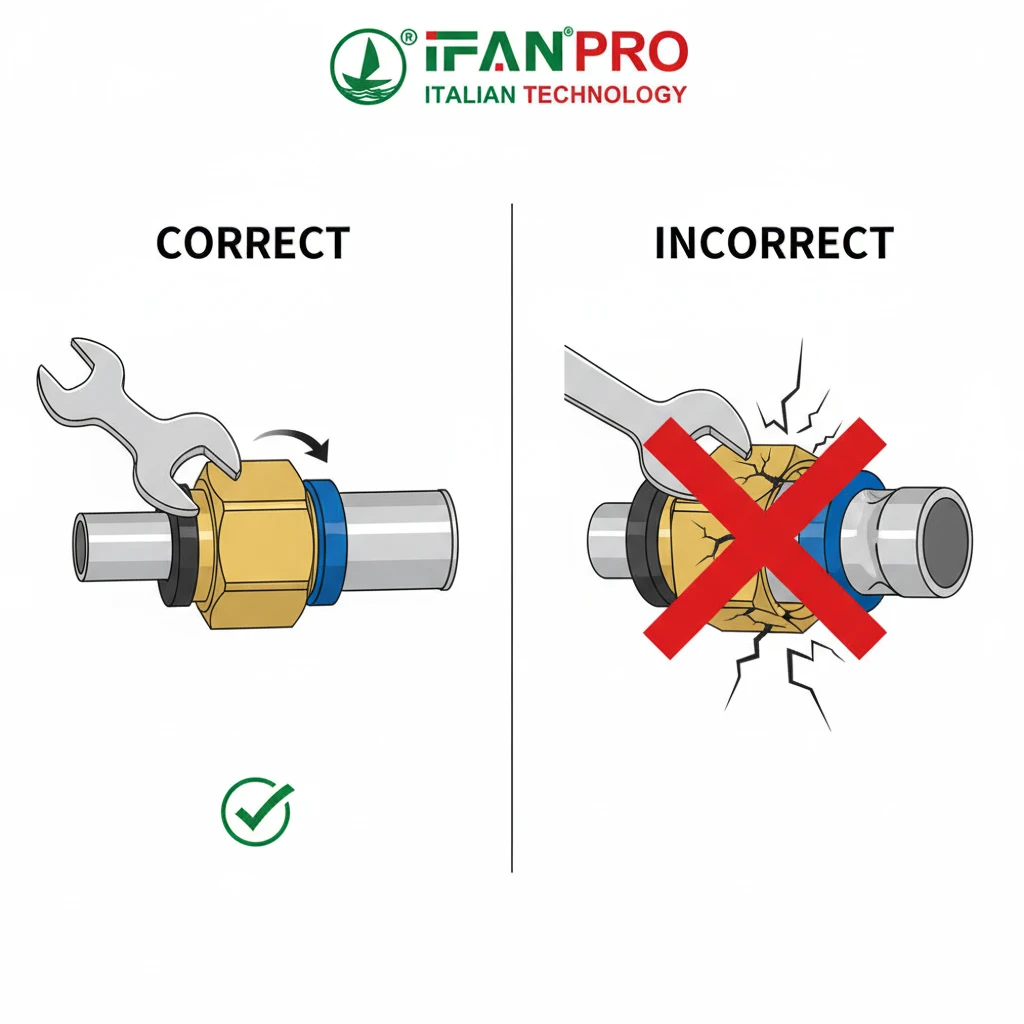
Mistake One: Over-Tightening the Threads
This is the number one killer of threaded plastic fittings. Installers used to metal fittings apply the same force to plastic. The result is a cracked fitting body.
When you over-tighten, one of two things happens. Either the female thread splits radially, creating an immediate leak. Or you create micro-cracks that grow over time with pressure cycles. The fitting may pass the initial test but fail six months later.
The solution is simple. Tighten until snug, then stop. If it leaks when you test, disassemble, check for damage, add more sealant, and try again. Do not just keep tightening.
Mistake Two: Not Supporting the Fitting
The 121UC has two sides: the PEX connection and the threaded connection. When you tighten the threads, torque transfers through the fitting body to the PEX side.
If you don’t hold the fitting body steady with a second wrench, that torque twists the PEX connection. This can loosen the crimp ring or distort the pipe inside the fitting. Even if it doesn’t leak immediately, you’ve weakened the joint.
Always use two wrenches. One on the fitting body, one on the pipe you are connecting to. Counter-hold firmly.
Mistake Three: Wrong Crimp Tool or Ring
PEX connections require the correct tool for the ring type. Using pliers on a crimp ring won’t work. You need a calibrated crimp tool that applies even pressure all around.
Similarly, using the wrong ring size or type guarantees failure. A 1/2-inch ring on 3/4-inch pipe won’t compress enough. A stainless steel clamp requires a different tool than a copper crimp ring.
Check your tool and ring compatibility before starting. IFAN provides clear specifications for which rings work with their fittings.
Mistake Four: Rushing the Insertion
I’ve seen people push the PEX pipe in partway, crimp it, and move on. The pipe looks connected, but it’s not sealed. The crimp ring compresses air, not pipe and fitting together.
Always push until you feel the pipe bottom out. If you’re unsure, mark the insertion depth on the pipe with a marker before starting. After crimping, check that the mark lines up with the edge of the fitting. If it’s still visible outside, you didn’t push far enough.
Mistake Five: Skipping the Pressure Test
This isn’t a mistake during installation, but immediately after. Some installers turn the water on, see no drips, and call it done. Small leaks may not show at low pressure. They only appear when the system reaches full operating pressure or when temperature cycles stress the joint.
Always pressure test before closing up walls or burying pipes. It takes an extra hour but prevents disaster later.
The table below summarizes these mistakes and their consequences:
| Mistake | What Happens | How to Prevent |
|---|---|---|
| Over-tightening threads | Cracked fitting body | Tighten snug only; use two wrenches. |
| No support during tightening | Twisted PEX joint; loose crimp | Counter-hold fitting body with second wrench. |
| Wrong tool/ring | Incomplete compression; leak | Use correct, calibrated tool for ring type. |
| Partial pipe insertion | No seal; immediate leak | Mark depth; push to full stop before crimping. |
| No pressure test | Hidden leak causes damage later | Always test at 1.5x operating pressure. |
Testing Your New System for Leak-Proof Reliability
A connection isn’t finished until you prove it holds. I never trust a joint until I’ve seen it pass a proper test.
Testing your system means pressurizing it to 1.5 times the normal operating pressure, holding that pressure for at least one hour, and monitoring for any drop. You must also visually inspect all joints during the test for any signs of moisture. This method finds leaks that would otherwise remain hidden until they cause damage.
Why Pressure Testing Matters
Water seeks the path of least resistance. At low pressure, a tiny gap may stay sealed by surface tension. At full pressure, water forces its way through. Temperature changes also matter. Hot water expands pipes and can open gaps that cold water doesn’t reveal.
A proper pressure test simulates the worst-case conditions your system will face. It pushes the joints to their limit in a controlled way. If they hold here, they’ll hold in normal use.
Step-by-Step Pressure Test Procedure
Step 1: Isolate the Section
Close valves to isolate the section containing your new connections. If you’re testing the whole house, close the main shutoff valve.
Step 2: Attach the Test Pump
Connect a hand-operated or electric test pump to a drain valve or dedicated test port. For water systems, use water for the test, not air. Compressed air stores tremendous energy and can cause explosive failures.
Step 3: Fill and Bleed Air
Open the highest fixture in the system. Slowly pump water in until it flows from that fixture without bubbles. Close the fixture. Air in the system compresses and gives false pressure readings.
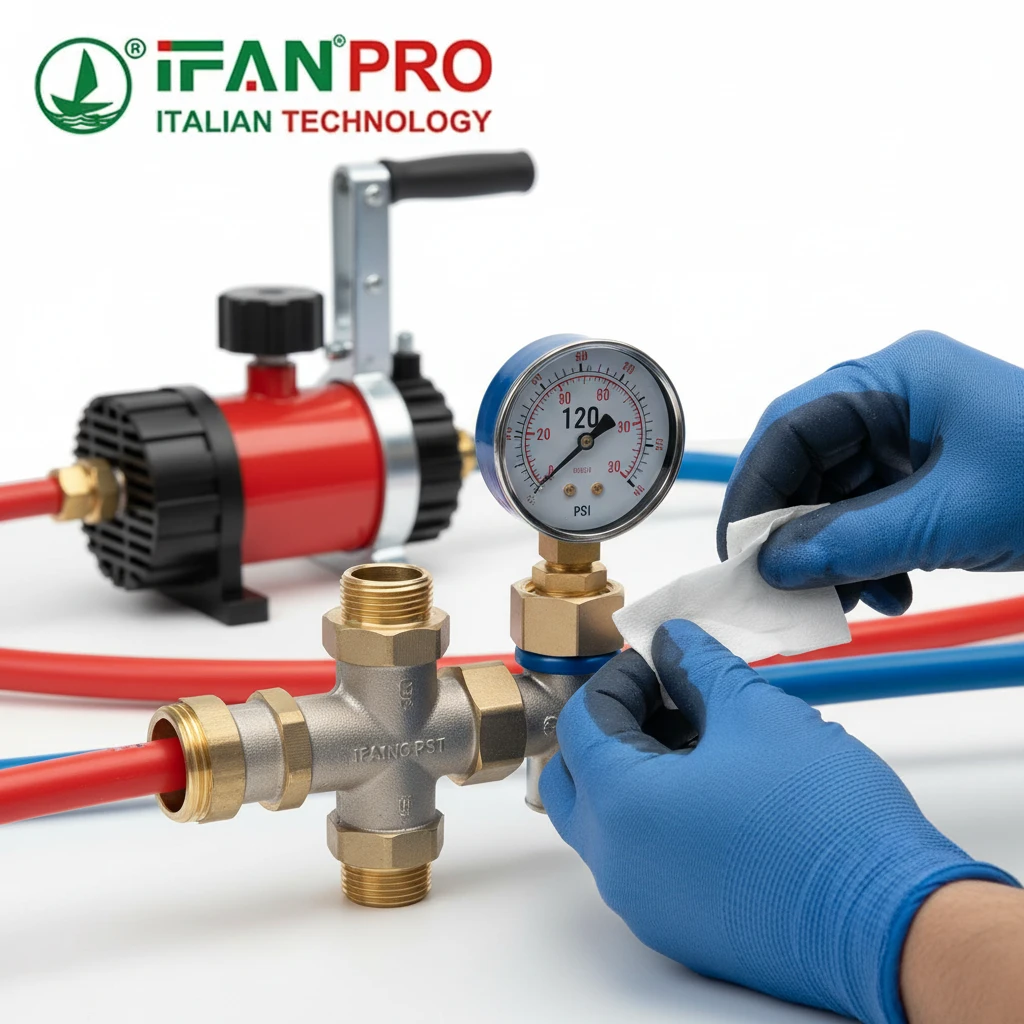
Step 4: Pressurize
Pump until the gauge reads 1.5 times your maximum working pressure. For a typical home with 80 PSI max, test at 120 PSI. Close the valve on the pump.
Step 5: Hold and Monitor
Watch the gauge for 60 minutes. A drop of more than 5 PSI indicates a leak. During this time, walk through and inspect every joint. Look for tiny droplets or damp spots. Wipe joints with a dry paper towel for a more sensitive check.
Step 6: Pass or Fail
If pressure holds and no moisture appears, the system passes. If pressure drops, find and fix the leak before repeating the test.
Alternative Test Methods for Small Jobs
Air Test with Soap Solution
For small repairs, you can test with low-pressure air. Pressurize to about 30-40 PSI maximum. Spray a soapy water mix on all joints. Bubbles reveal the leak. Warning: Do not use high-pressure air. It is dangerous.
Visual Inspection with Tissue
For a quick check after a minor adjustment, wipe all joints with dry tissue paper. Turn water on at full pressure for a few minutes. Check the tissue for damp spots. This catches very small weeps.
Documenting Your Test
For professional jobs, document the test. Note the date, test pressure, hold time, and result. Take photos of the gauge reading. This record proves the system was tested and passed, which matters for warranties and future troubleshooting.
The table below shows test parameters for different applications:
| Application | Test Pressure | Hold Time | Acceptance Criteria |
|---|---|---|---|
| Residential Water | 1.5x max working pressure | 60 minutes | No drop >5 PSI; no visible leaks |
| Commercial System | 1.5x max or 150 PSI min | 2 hours | No drop; no moisture |
| Small Repair Check | Full operating pressure | 15 minutes | No visible drips |
| Air Test (Caution) | 30-40 PSI max | Until bubbles stop | No bubbles with soap solution |
Conclusión
Proper installation of the 121UC Female Threaded PEX Union ensures decades of reliable, leak-free service. For guaranteed quality and performance, choose IFAN’s precision-engineered PEX fittings, designed for easy installation and long-term durability.


Comentarios recientes