
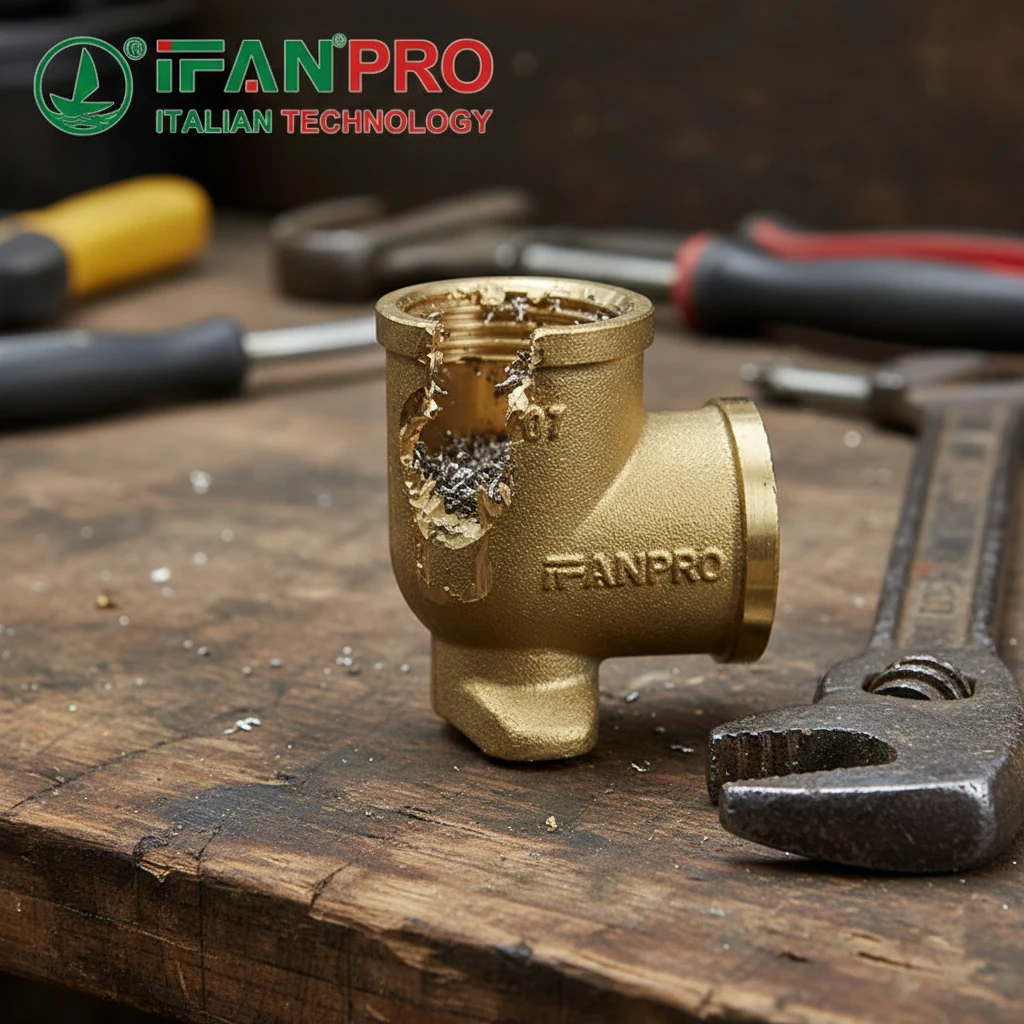
I once saw a beautiful, expensive brass fitting ruined in seconds by a well-meaning installer with a wrench. That moment taught me that preventing galling isn’t just a suggestion—it’s a necessary skill.
You can prevent galling when tightening threaded brass elbows by using a compatible anti-seize lubricant on clean threads, following a careful hand-tightening technique, and finally applying precise, measured torque with a calibrated tool. This process minimizes direct metal-to-metal friction and plastic deformation, which are the root causes of seizing.
Galling turns a simple connection into a costly repair. Let’s explore the science behind the problem and the practical steps for a perfect, seizure-free assembly every time.
Why Are Brass Threads Particularly Susceptible to Galling or Seizing?
Many installers treat brass like steel, and that’s where the trouble starts. Its softness, which is a benefit for sealing, becomes a liability under friction.
Brass threads are particularly susceptible to galling because brass is a soft, ductile metal. When two brass surfaces rub under high pressure during tightening, the friction generates heat and shears off microscopic high points. These particles then weld themselves onto the opposing surface, creating roughness, increased friction, and eventually a completely seized, cold-welded joint that cannot be loosened.
The Science of Soft Metal Friction
Galling, also called cold welding, is a form of adhesive wear. To understand why brass is a prime candidate, we need to look at its properties.
First, brass is an alloy of copper and zinc. This mix makes it excellent for machining and corrosion resistance, but it also means it’s relatively soft compared to steel or stainless steel. Under the immense localized pressure of threaded connections, the asperities (tiny high points) on the thread surfaces easily deform.
When you turn a brass fitting into a brass port, these soft asperities slide against each other. The friction creates significant heat. Because brass conducts heat well, this heat doesn’t stay localized—it can soften the metal further in the immediate area. The combination of pressure, heat, and soft metal causes fragments from one thread to tear off and molecularly bond to the other thread. This creates a “speed bump.” As you continue tightening, this bump causes more resistance, more tearing, and more bonding. The process escalates rapidly until the threads are essentially fused together.
Comparing Brass to Other Common Fitting Materials
Not all metals gall equally. Here’s how brass compares:
| Material | Galling Susceptibility | Primary Reason |
|---|---|---|
| Brass (CuZn) | Very High | Soft, ductile, and prone to adhesive wear under friction and heat. |
| Stainless Steel (304/316) | High | Forms a passive oxide layer; when scraped off, clean metal can cold-weld. |
| Carbon Steel | Moderate | Harder surface resists deformation, but can still gall without lubrication. |
| PVC/Plastic | Very Low | Material deforms or strips rather than galls; different failure mode. |
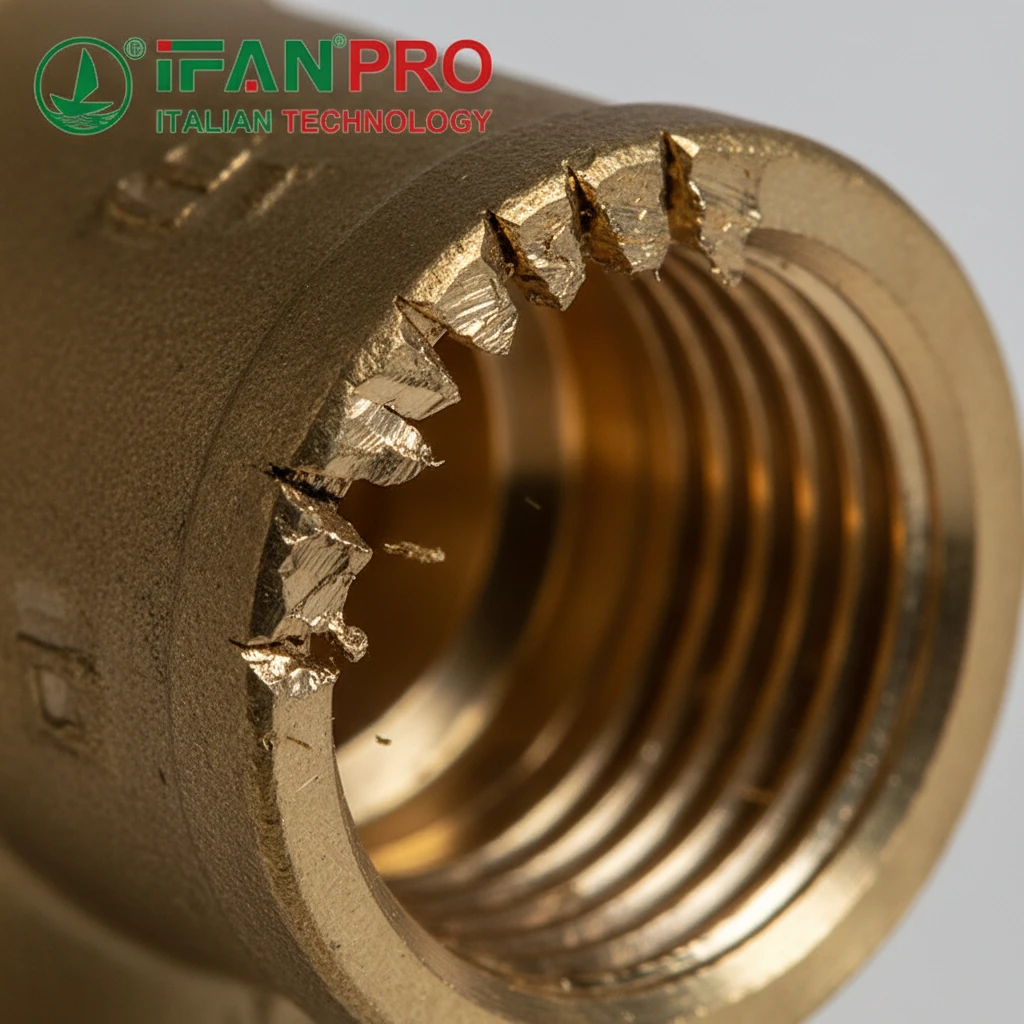
The Role of Surface Finish and Debris
Even on a microscopic level, no thread is perfectly smooth. Manufacturing leaves behind minute burrs or debris. In hard metals, these might just flatten. In soft brass, they tear off and become the seeds for galling. This is why cleaning threads before assembly is non-negotiable. A single grain of sand or metal shaving acts like a grinding compound, accelerating the damage exponentially.
In short, brass’s very qualities that make it a great plumbing material—malleability and corrosion resistance—are what make it so vulnerable during the assembly process if not handled correctly.
What Anti-Seize Lubricants Are Recommended for Brass-to-Brass Connections?
Using the wrong lubricant can be as bad as using none at all. I’ve seen pipe dope containing ammonia crack brass, a problem called stress corrosion cracking.
**For brass-to-brass connections, you must use a non-metallic, non-conductive, and ammonia-free anti-seize compound. The best options are formulations based on *high-purity graphite*, *polytetrafluoroethylene (PTFE/Teflon)*, or **specialized nickel-free pastes. These lubricants create a protective barrier that reduces friction without causing galvanic corrosion or chemical attack on the zinc in the brass.

The “What Not to Use” List
Before discussing the right choices, let’s rule out common mistakes:
- Metallic Anti-Seize (Copper, Zinc, or Aluminum based): These contain metal powders that are harder than brass. Under torque, they can act as abrasives, embedding into the soft metal and increasing wear. They also set up galvanic corrosion cells.
- Pipe Dope with Ammonia: Many common pipe thread sealants contain ammonia derivatives to aid curing. Ammonia causes stress corrosion cracking in brass, leading to catastrophic fitting failure months later.
- Petroleum Greases or Oils: These can break down over time, dry out, or attract debris. They don’t provide the consistent, long-lasting lubricity needed.
Recommended Lubricant Types and Their Benefits
Here are the safe and effective choices for brass:
1. Pure Graphite Paste: This is a classic, high-temperature choice. Graphite platelets slide over each other easily, providing excellent lubricity. It’s chemically inert and won’t react with brass.
- Best for: High-temperature applications, potable water systems (if food-grade), and situations where a non-melting lubricant is critical.
2. PTFE (Teflon) Based Paste or Tape: PTFE has one of the lowest coefficients of friction of any solid. PTFE tape is common, but for critical assemblies, a paste ensures 100% thread coverage. It’s also immune to almost all chemicals.
- Best for: General plumbing, oxygen systems, chemical lines, and where a very clean, non-messy application is preferred.
3. Specialty Nickel-Free, Non-Metallic Paste: These are modern formulations designed specifically for soft, non-ferrous metals like brass, aluminum, and copper. They often use a blend of synthetic oils and advanced solid lubricants.
- Best for: Precision assemblies, instrument lines, and where the manufacturer specifically recommends a non-metallic anti-seize.
Application Guide: Less is More
The goal is a thin, complete film—not to fill the threads like paste. Apply a small amount to the male threads only. Screw the fitting in by hand a few times to evenly distribute the lubricant. Wipe away any excess that squeezes out. A proper application should be almost invisible once the fitting is tightened.
How Does Proper Hand-Tightening Technique Reduce the Risk of Thread Damage?
The wrench is for the final turn, not the whole journey. Rushing this step guarantees cross-threading, the quickest way to ruin a fitting.
Proper hand-tightening technique reduces the risk of thread damage by ensuring perfect alignment before any significant force is applied. By screwing the fitting in by hand until it snugs up, you guarantee the threads engage correctly and smoothly, distributing initial load evenly. This prevents cross-threading, which instantly cuts and damages threads, creating stress points that inevitably lead to galling when wrench pressure is applied.
The Critical Alignment Phase
The first few threads are the most vulnerable. If they are not aligned perfectly, the sharp edge of the male thread will cut a new path into the female thread instead of following the existing groove. This is cross-threading. Once cross-threaded, the connection is compromised. Even if it seems to tighten, the damaged threads have reduced contact area, leading to higher stress and a certain path to galling or leaks.
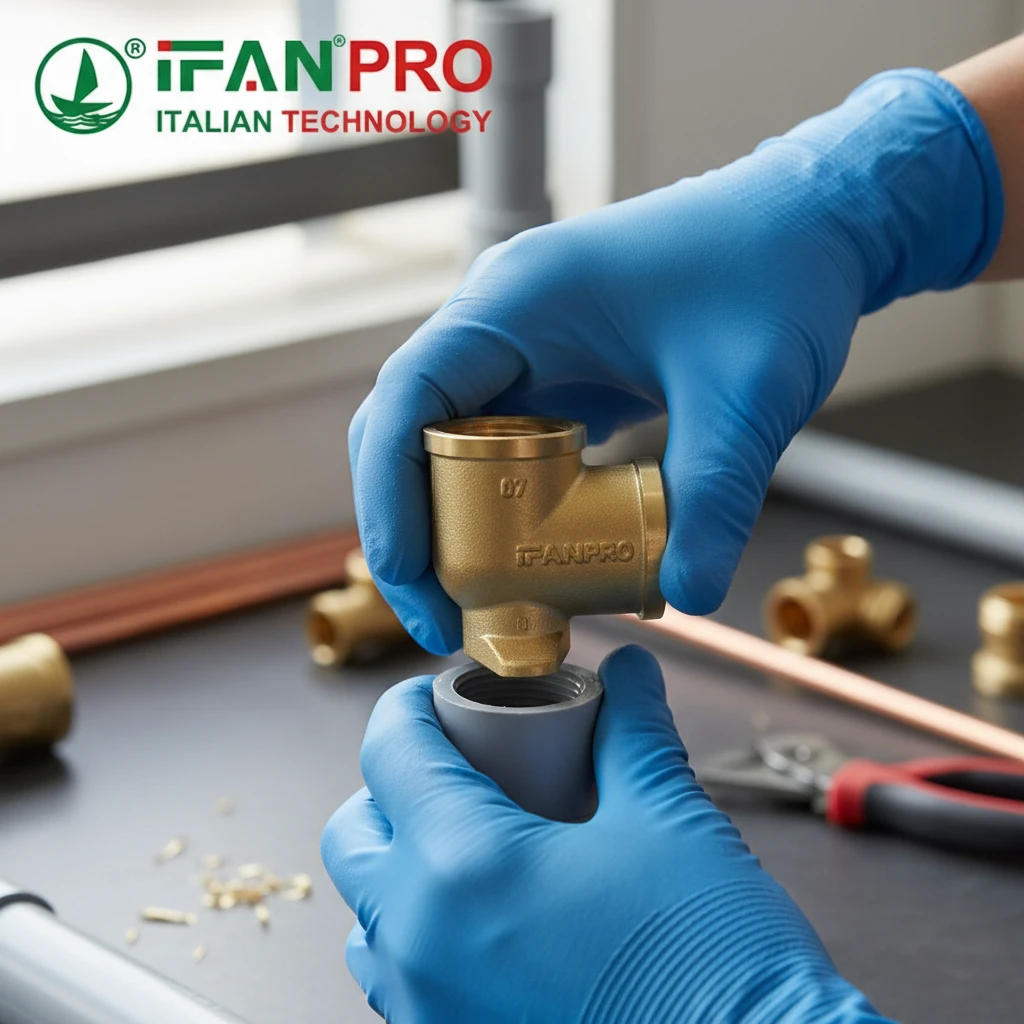
Hand-tightening forces you to feel the engagement. Here is the correct process:
Step 1: Clean and Lubricate. Ensure both sets of threads are clean and have a light application of the correct anti-seize.
Step 2: Initial Engagement. Place the elbow onto the port and rotate it counter-clockwise (left) until you feel or hear a faint “click.” This aligns the thread peaks.
Step 3: Hand-Tighten Clockwise. Now, rotate clockwise. You should feel smooth, even resistance with no binding or grating. Continue turning until the fitting is “hand-tight”—that is, you cannot turn it any further using just your fingers without significant force.
What You Are Feeling For
During this hand-tight phase, you are performing a critical diagnostic check:
- Smooth & Even: Good. Proceed.
- Sudden Tightness or Binding: STOP. You are likely cross-threading. Unscrew completely, realign, and try Step 2 again.
- Gritty Feeling: STOP. There is likely debris in the threads. Unscrew, clean both sides again, and re-lubricate.
This technique does more than prevent damage; it ensures the fitting seats squarely. A crooked start means the fitting will try to straighten as you apply wrench torque, putting a bending force on the threads and massively increasing the risk of galling. Hand-tightening sets the stage for a perfect, axial final tightening.
What Is the Correct Final Torque to Achieve a Seal Without Causing Galling?
Guessing torque is guessing failure. “One more turn for good luck” is the most expensive turn you’ll ever make on a brass fitting.
**There is no single “correct” torque for all brass elbows, as it depends on size, thread type (NPT, BSP), and the sealant used. The goal is to achieve a seal at the *root* of the threads, not by crushing the fitting. A safe rule is to turn the wrench *1 to 2 full rotations past hand-tight* for tapered threads (NPT). For precise work, always consult a torque specification chart and use a calibrated torque wrench to avoid under or over-tightening.**

Understanding Tapered Thread Mechanics
Most plumbing brass elbows use NPT (National Pipe Taper) threads. These threads are designed to create a seal by metal-to-metal interference at the roots and peaks as they are drawn together. The seal happens in the middle of the thread engagement, not at the end.
Overtightening is the primary cause of galling here. Excessive torque does two bad things:
- It increases friction and heat exponentially, directly triggering the galling process.
- It over-stresses the brass, causing it to yield (permanently deform). This can distort the fitting body, crack it, or thin the wall, leading to future failure.
Practical Torque Guidelines and Tools
Since most plumbers don’t carry a torque wrench for every fitting, the “turn-of-the-nut” method is a reliable field standard for NPT threads:
- After achieving a proper hand-tight position, mark the fitting and the port with a marker.
- Using the appropriate wrench, turn the fitting 1 to 1.5 additional turns for sizes 1/2″ to 1″. For larger sizes, 1.5 to 2 turns may be needed.
- The fitting should be oriented correctly at the end of this turn count. If it’s not, do NOT force it further; back it off and re-evaluate using tape or dope for sealing.
For critical applications, a torque wrench is essential. Here is a general reference table for lubricated brass NPT fittings:
| Nominal Pipe Size | Recommended Installation Torque (ft-lbs) | Approx. Turns Past Hand-Tight |
|---|---|---|
| 1/4″ | 7 – 10 ft-lbs | 1 – 1.5 turns |
| 3/8″ | 10 – 15 ft-lbs | 1 – 1.5 turns |
| 1/2″ | 15 – 20 ft-lbs | 1.5 – 2 turns |
| 3/4″ | 20 – 30 ft-lbs | 1.5 – 2 turns |
| 1″ | 35 – 40 ft-lbs | 2 – 2.5 turns |
Important Note: These values are for guidance. Always prioritize the manufacturer’s published torque specifications for your specific fittings.
The Final Check: Listening and Looking
After torquing, perform a final check. There should be no visual distortion of the fitting hex. For pressurized systems, a proper leak test (as discussed in our previous article) is mandatory. Remember, a properly tightened brass connection will last for decades; an overtightened one is a time bomb of galling and stress failure.
Conclusión
Preventing galling in brass threads requires the right lubricant, careful technique, and measured force. For reliable, precision-machined IFAN brass elbows and fittings that pair perfectly with these best practices, visit our product page for specifications and support.


Comentarios recientes