
I once saw a beautiful brass plumbing system ruined by rushed soldering. That job taught me that perfect results depend on respecting each step of the process.
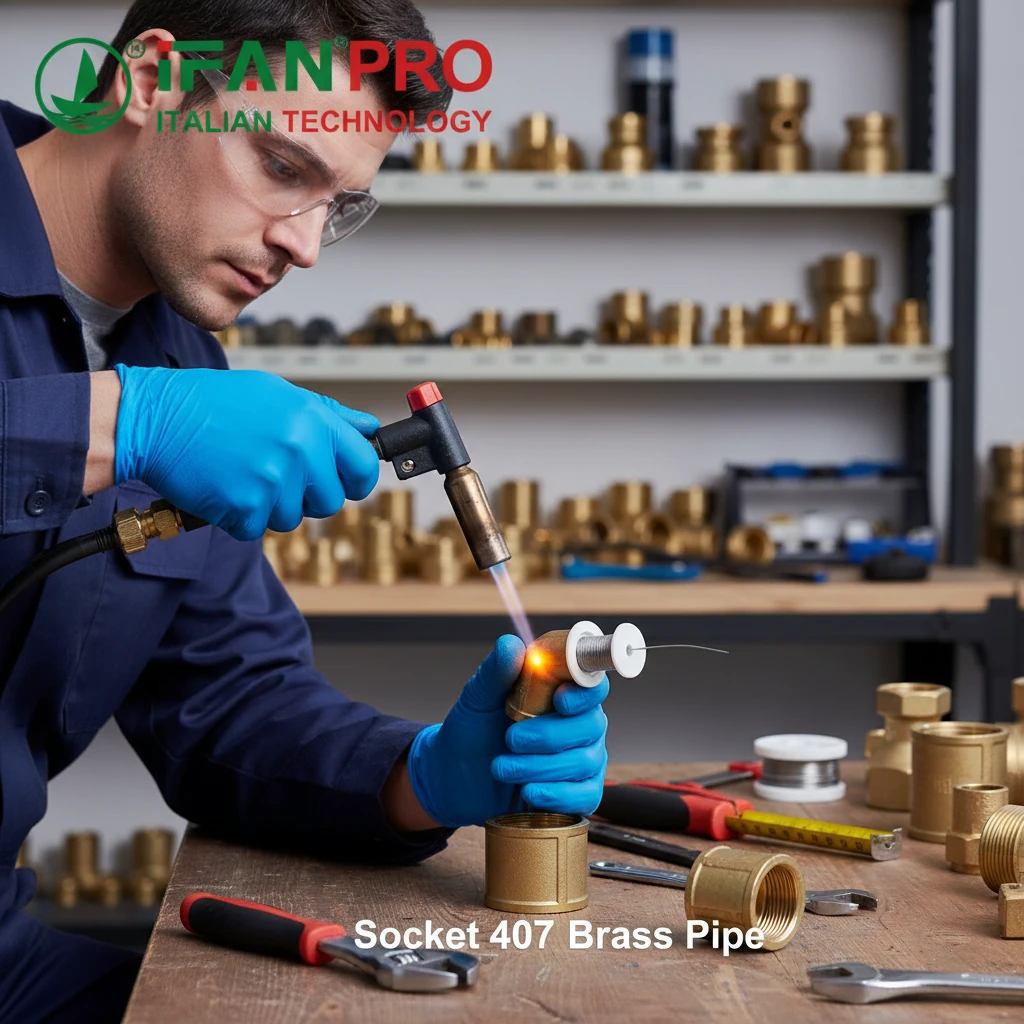
To install a socket 407 brass pipe with soldering, you must meticulously clean the parts, apply flux, heat the fitting evenly to draw solder in by capillary action, apply lead-free solder, and finally, inspect the cooled joint. Skipping any step risks a weak connection that can leak or fail under pressure.
Soldering brass, or “sweating” a joint, is a reliable skill. Let’s break down the process to ensure your next installation is strong, safe, and leak-free.
What Are the Essential Steps for Cleaning and Fluxing Brass Pipe Ends?
A dirty pipe is the number one reason solder won’t flow properly. I’ve fixed many joints where failure started right here.
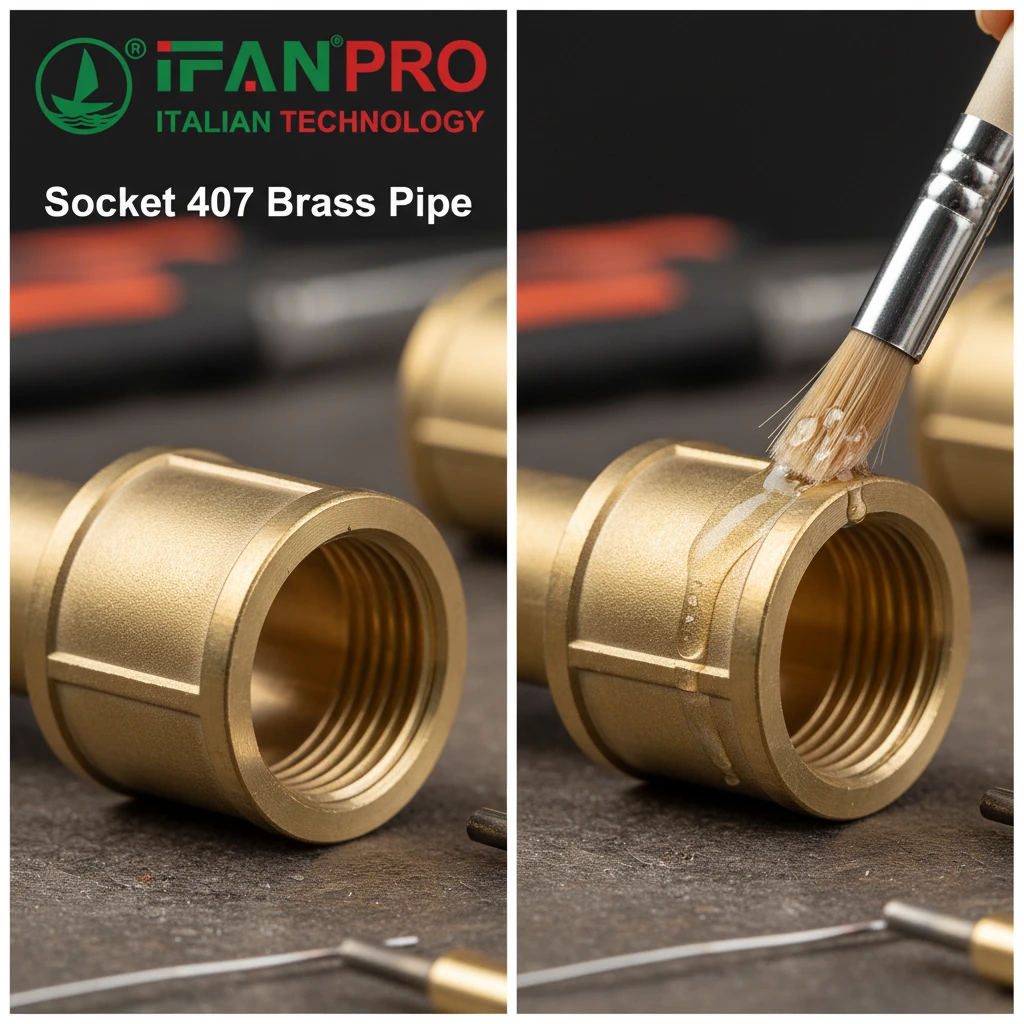
The essential steps are to first clean the outside of the pipe end and the inside of the fitting socket with abrasive cloth until they shine like a new penny, removing all oxidation and dirt. Then, immediately apply a thin, even layer of flux to both cleaned surfaces to prevent re-oxidation during heating and to enable proper solder flow.
Why Cleaning is Non-Negotiable
Cleaning is the most critical preparation step. Brass develops an oxide layer when exposed to air. This layer prevents the molten solder from bonding directly to the base metal. If you solder over oxidation, the joint will be weak and likely to leak.
First, use a dedicated plumbing abrasive cloth or sandpaper designed for metals. Emery cloth works very well. You need to clean both mating surfaces:
- The Pipe End: Scrub the last inch of the pipe’s outside diameter.
- The Fitting Socket: Scrub the inside of the fitting where the pipe will insert.
Your goal is to see bright, shiny, bare brass—no dark spots, no grease, no fingerprints. A good test is that the metal should look like a new coin.
The Role and Application of Flux
After cleaning, you must act quickly. The shiny metal will start to re-oxidize in minutes. This is where flux comes in.
Flux is a chemical paste that serves three main purposes:
- It dissolves any remaining minor oxides during heating.
- It protects the cleaned metal from oxidizing when the torch flame hits it.
- It helps the molten solder flow smoothly into the joint via capillary action.
Apply flux with a small brush. You need a thin, even coating on the cleaned outside of the pipe and the cleaned inside of the fitting. Do not apply too much. Excess flux will bubble and boil when heated, which can actually push the solder out of the joint. A common mistake is using flux like glue; a light coat is all you need.
Common Mistakes to Avoid
Here is a table outlining frequent errors in this stage:
| Mistake | Consequence | Correct Action |
|---|---|---|
| Incomplete Cleaning | Solder will not adhere to tarnished spots, creating voids and leaks. | Clean until the brass is uniformly shiny. |
| Touching Cleaned Surfaces | Oils from your skin create a barrier. | Handle pipes with clean gloves or cloth after cleaning. |
| Delaying Flux Application | Oxidation forms, breaking the solder bond. | Flux immediately after cleaning. |
| Using Old/Contaminated Flux | Inactive flux won’t clean or protect properly. | Use fresh flux and keep the lid on tight. |
Once the pipe is fluxed and inserted fully into the fitting, give it a slight twist to spread the flux evenly. Now, the joint is ready for heat.
How Do You Properly Heat the Brass Fitting to Ensure Capillary Solder Flow?
The torch is where science meets skill. Even heating is the secret, not just making the metal glow.
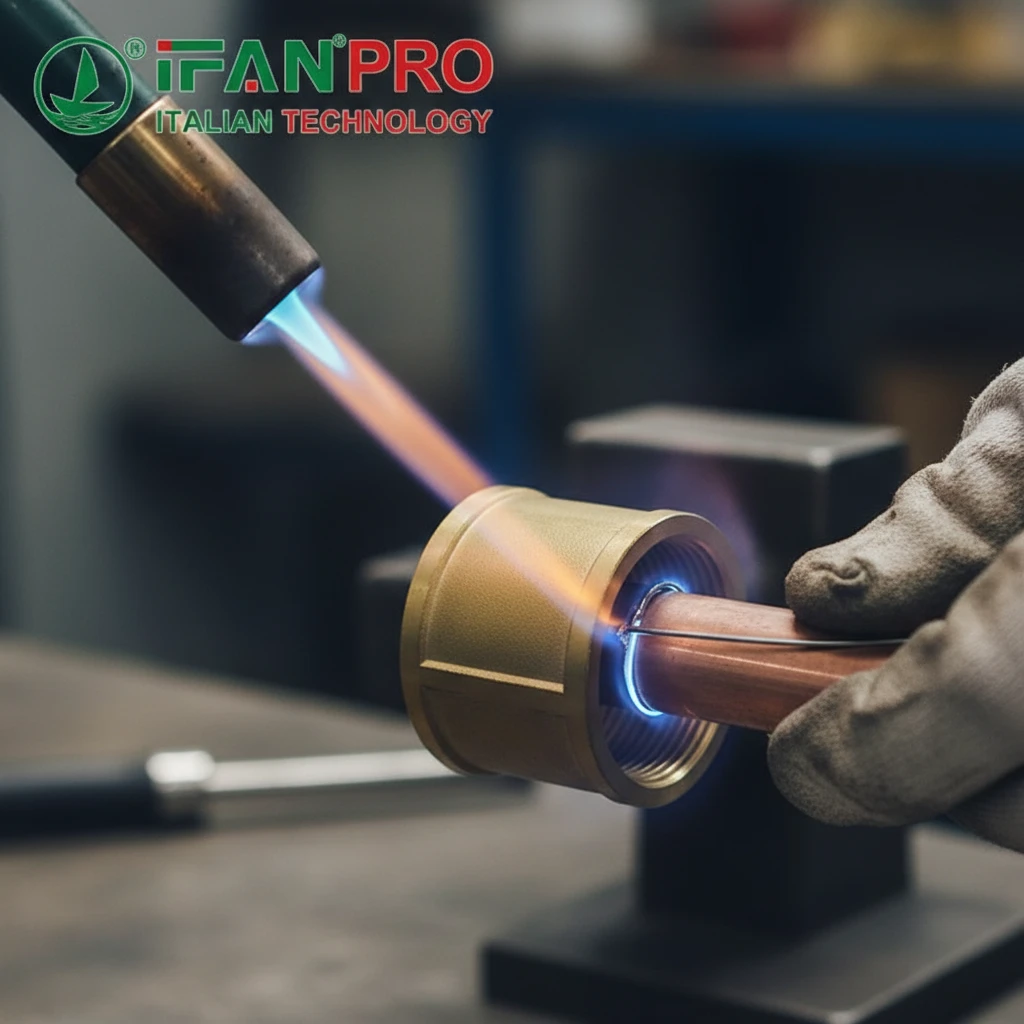
You properly heat the brass fitting by applying the torch flame evenly around the entire body of the fitting, not directly to the pipe or the solder. The goal is to heat the fitting until the flux sizzles and the metal is hot enough to instantly melt solder upon contact. The heated fitting will then draw the liquid solder into the joint gap by capillary action.
Understanding Heat Distribution
The principle is simple: heat the larger mass (the fitting), not the smaller one (the pipe). The fitting acts as a heat reservoir, transferring warmth to the pipe end inside it. If you heat the pipe directly, the solder will melt and stick to the hot pipe but will not be drawn into the joint.
Use a propane or MAP-gas torch with a fine flame. Start by playing the flame around the middle of the fitting. Keep the torch moving in a slow, steady motion to avoid creating one super-hot spot, which can burn the flux.
Signs of Correct Heating Temperature
Watch for these visual cues:
- Flux Activity: The flux will first bubble and water as it heats, then it will become quiet and smooth, like a clear liquid. This is a good sign.
- Solder Test: The most reliable test is to touch the tip of your solder wire to the joint where the pipe enters the fitting. If the metal is hot enough, the solder will melt instantly and be drawn into the joint. If it only sticks or melts slowly, the fitting needs more heat.
Important: Never melt the solder with the direct flame of the torch. You are using the flame to heat the metal, and the hot metal should melt the solder. This ensures the solder flows into the space between the pipe and fitting, which is where the bond forms.
Technique for Different Fitting Sizes
- Small Fittings (up to 1/2″): Heat can travel quickly. Focus on the center of the fitting, and the heat will reach both sides.
- Large Fittings (3/4″ and above): You may need to heat both sides of the fitting, slightly favoring the back (cup) side, as it has more mass. Move the flame in a figure-eight pattern.
A table can help visualize the heating focus:
| Fitting Size | Primary Heating Zone | Key Technique |
|---|---|---|
| Small (1/2″ and under) | Center of the fitting body. | Keep flame moving; test with solder frequently to avoid overheating. |
| Medium (3/4″) | Center, sweeping towards the back cup. | Ensure even heat distribution before applying solder. |
| Large (1″ and over) | Back (cup) of the fitting, then sweep to the front. | Patience is key. It takes longer for the entire mass to reach temperature. |
Once solder melts on contact, you know the fitting is at the right temperature. Now, you can feed solder into the joint.
What Type of Solder is Recommended for Safe and Strong 407 Brass Joints?
Using the wrong solder is a silent mistake. It looks fine but can fail or contaminate water.
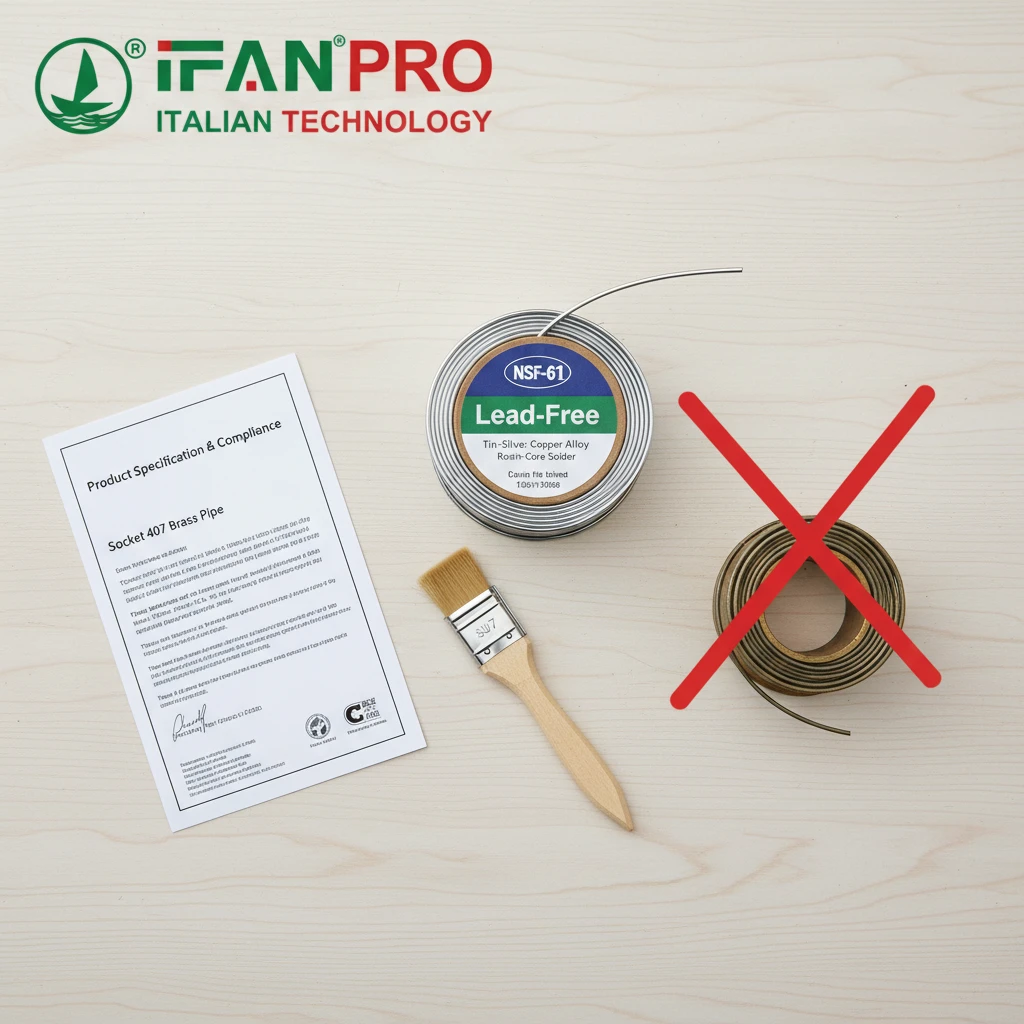
For safe and strong joints on 407 brass pipes carrying potable water, you must use lead-free solder with a rosin core. The best choice is a tin-silver-copper alloy (often labeled as 95/5 or similar). This type is strong, melts at a suitable temperature, and is legally required for drinking water lines to ensure safety.
The Shift to Lead-Free
For decades, plumbers used 50/50 solder (50% tin, 50% lead). Lead is toxic, and it can leach into drinking water, especially in acidic or soft water conditions. Modern plumbing codes worldwide now strictly prohibit the use of lead-based solder for potable water systems. Therefore, for any residential plumbing, including 407 brass joints, lead-free solder is the only acceptable choice.
Understanding Alloy Compositions
Lead-free solders are typically made from combinations of tin, silver, copper, and sometimes antimony. Each alloy has slightly different properties:
- Tin-Silver-Copper (e.g., 95.5% Tin, 4% Silver, 0.5% Copper): This is often considered the premium standard. The silver increases strength and slightly lowers the melting point compared to pure tin. It creates very reliable, durable joints.
- Tin-Copper (e.g., 97% Tin, 3% Copper): A common and cost-effective option. It has a higher melting point than tin-silver-copper, which means you need to apply more heat to the fitting.
- Tin-Antimony: Less common, but used in some applications.
Choosing the Right Solder Form
Solder comes in wire form, often with a “core” of flux inside. For plumbing:
- Use Rosin-Core Solder: This solder wire has flux embedded in the middle. As you feed the solder into the hot joint, the core melts and provides additional flux right where it’s needed, ensuring a clean bond. Do not use acid-core solder, which is for electronics or non-plumbing metals and can corrode pipes.
Comparison of Solder Types for Potable Water
| Solder Type | Common Alloy | Características principales | Best For |
|---|---|---|---|
| Lead-Free (Premium) | Tin (95.5%), Silver (4%), Copper (0.5%) | High strength, reliable flow, good for high-stress joints. | All potable water lines, including main supplies and hot water. |
| Lead-Free (Standard) | Tin (97%), Copper (3%) | Cost-effective, meets code, slightly higher melting point. | General potable water lines. |
| Lead-Based (OBSOLETE) | Tin (50%), Lead (50%) | Toxic. Illegal for drinking water. Flows easily. | Should not be used. Only for historical reference or non-potable, closed loops. |
For your 407 brass joints, a lead-free, rosin-core solder with a tin-silver-copper alloy offers the best combination of safety, strength, and ease of use. Always check the label to confirm it’s approved for potable water (look for NSF/ANSI 61 certification).
How Can You Visually Inspect a Soldered Joint for Quality and Completeness?
A good inspection catches problems before you turn on the water. I always do this final check.
You inspect a soldered joint by looking for a smooth, concave fillet of solder all around the joint’s edge, with a shiny, silver-bright appearance. The solder should be visible as a continuous ring where the pipe enters the fitting. Check for gaps, dull grey spots (cold joints), or excessive solder drips, which indicate poor quality.
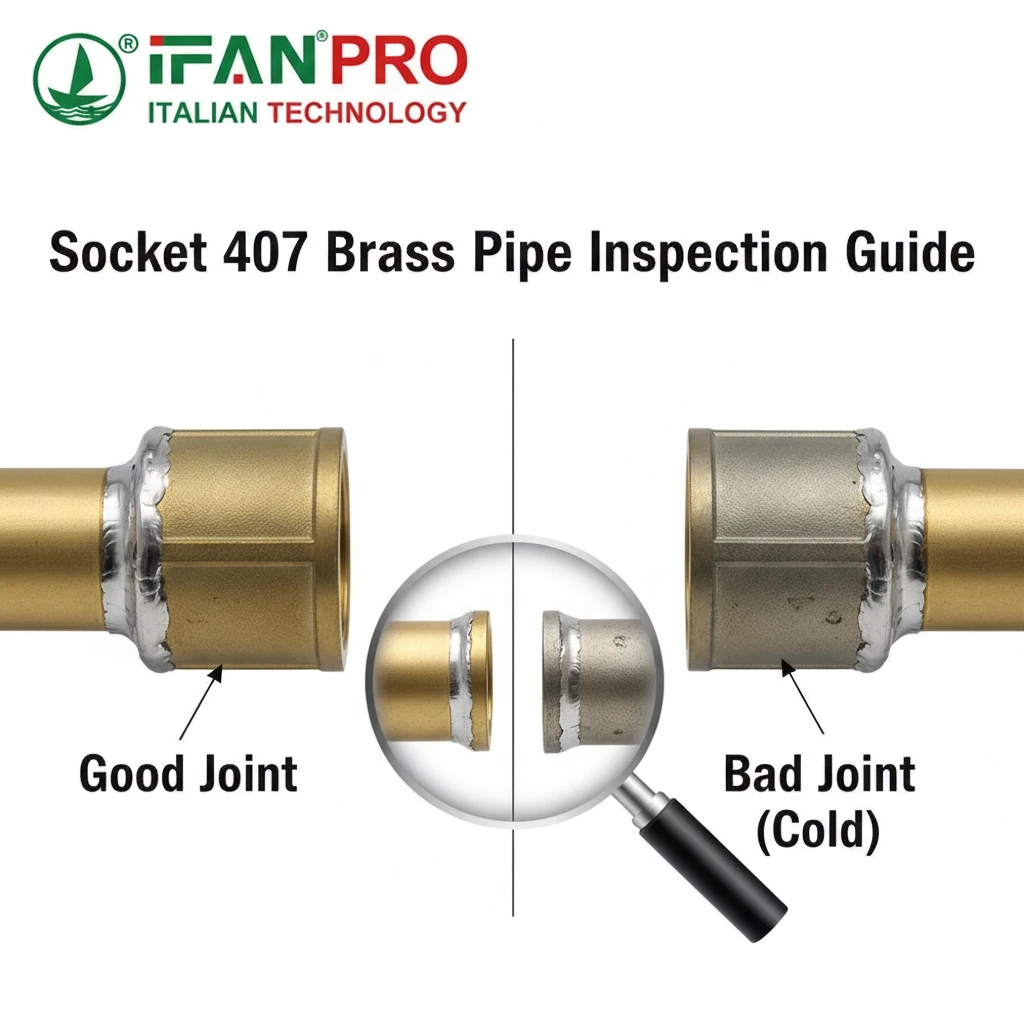
The “Visual Signature” of a Good Joint
After the joint cools completely, wipe away any residual flux with a damp cloth. A properly soldered joint has a distinct look:
- Shape: The solder should form a small, concave meniscus (a gentle curve) at the rim of the fitting. It should look smooth and uniform.
- Coverage: You must see a complete 360-degree ring of solder. If any section is missing, it’s a “void” and will leak.
- Color & Texture: It should be bright and shiny. A frosted or crystalline look is acceptable as it cools, but it should not be dull, grey, and porous.
Identifying Common Defects
Learn to recognize these signs of trouble:
- Cold Joint: This is the most common defect. It appears dull, lumpy, and grainy. It happens when the fitting wasn’t hot enough, or the solder was applied before the metal reached the proper temperature. The solder didn’t flow; it just globbed on. A cold joint is weak and must be re-heated and re-soldered.
- Solder Not Drawn In: You see a ring of solder only at the very front edge of the fitting. This means the heat was insufficient or applied incorrectly, so capillary action didn’t pull the solder into the gap. The joint lacks internal strength.
- Burnt Flux/Joint: If you overheat the joint, the flux burns up, leaving a dark, hardened residue. This burnt flux can block the solder flow, creating voids. The joint area will look blackened and dirty.
- Excessive Solder: Drips or icicles of solder hanging from the joint are not just ugly; they indicate too much solder was applied. It doesn’t make the joint stronger and can actually hide a void behind it.
Inspection Checklist Table
Use this simple checklist after each joint cools:
| Feature | Good Sign | Bad Sign (Requires Re-work) |
|---|---|---|
| Solder Ring | Continuous, unbroken circle. | Gaps or missing sections. |
| Surface Appearance | Shiny and smooth. | Dull, grey, grainy, or porous. |
| Solder Shape | Concave fillet (curved inward). | Bulging outward or forming drips/icicles. |
| Flux Residue | Cleanable, minimal. | Blackened, charred, or crusty. |
| Joint Context | No discoloration on nearby pipes/fittings. | Discoloration (blue/brown) from extreme overheating. |
Finally, the ultimate test is a pressure test. After completing your system, pressurize it with water or air (following local code procedures) and check every joint for leaks. A visual inspection catches most issues, but a pressure test provides final confidence.
Conclusión
Proper soldering of 407 brass fittings requires careful cleaning, even heating, lead-free solder, and thorough inspection. For reliable, high-quality 407 Brass Pipes and Fittings that solder perfectly every time, trust IFAN for your project supplies.


Comentarios recientes