
I once received a panicked call about a leak at a client’s site. The issue? An improper connection between a multi-layer pipe and a valve. This is why the right method matters so much.
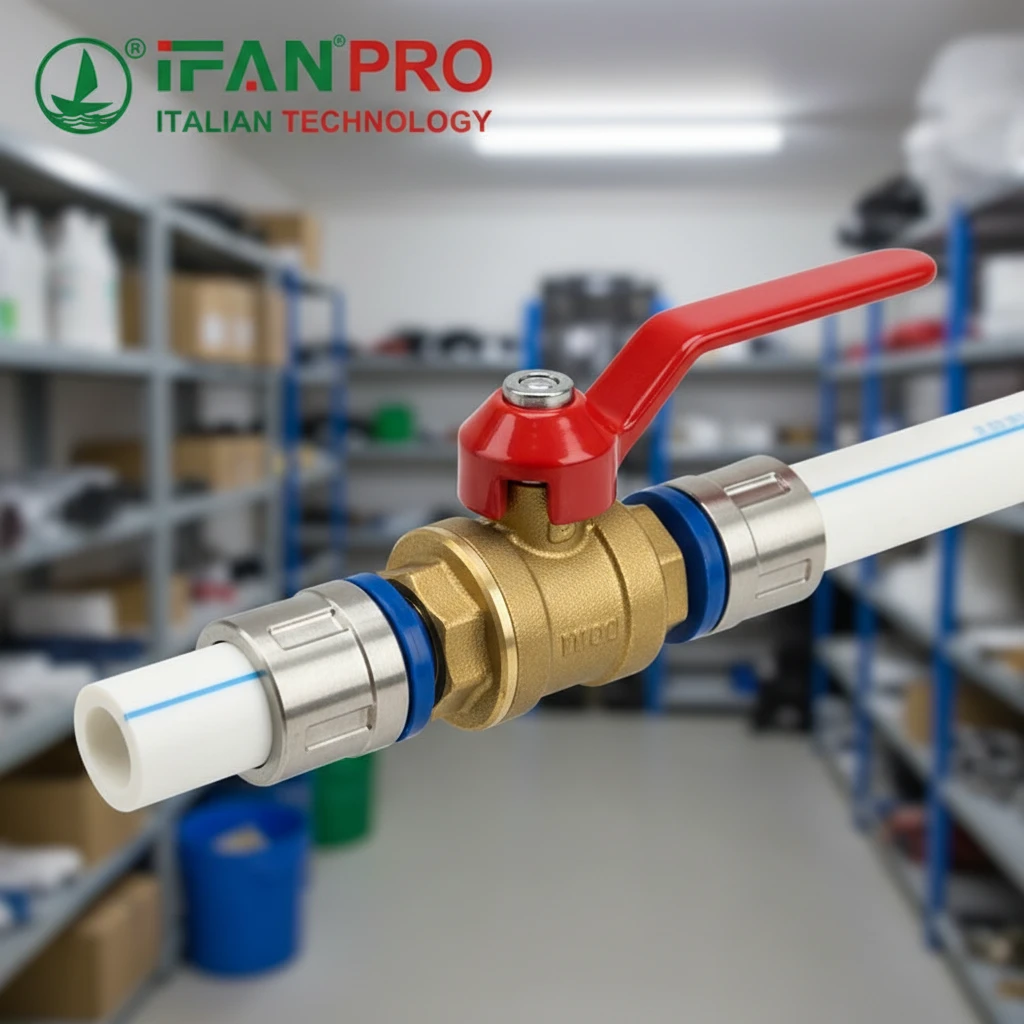
The recommended method to securely connect a 121UC-type valve to PEX-AL-PEX pipe is a press or crimp connection. These methods apply uniform, permanent pressure around the entire circumference of the fitting, ensuring a reliable seal with both the inner PEX and outer aluminum layers of the composite pipe. Threaded connections are not suitable for the pipe end itself.
A wrong connection can lead to catastrophic failure. Let’s walk through the correct steps to ensure a secure, long-lasting joint.
What is the Recommended Method: Crimping, Press, or Threaded Connection?
Choosing the wrong method is the most common and costly mistake. I always advise my clients against improvisation here.
For connecting a 121UC valve to PEX-AL-PEX pipe, the press connection method is generally the top recommendation for its speed and reliability, while crimping is a proven, cost-effective alternative. A threaded connection is only used to connect the valve body to other threaded components, never directly onto the composite pipe itself.
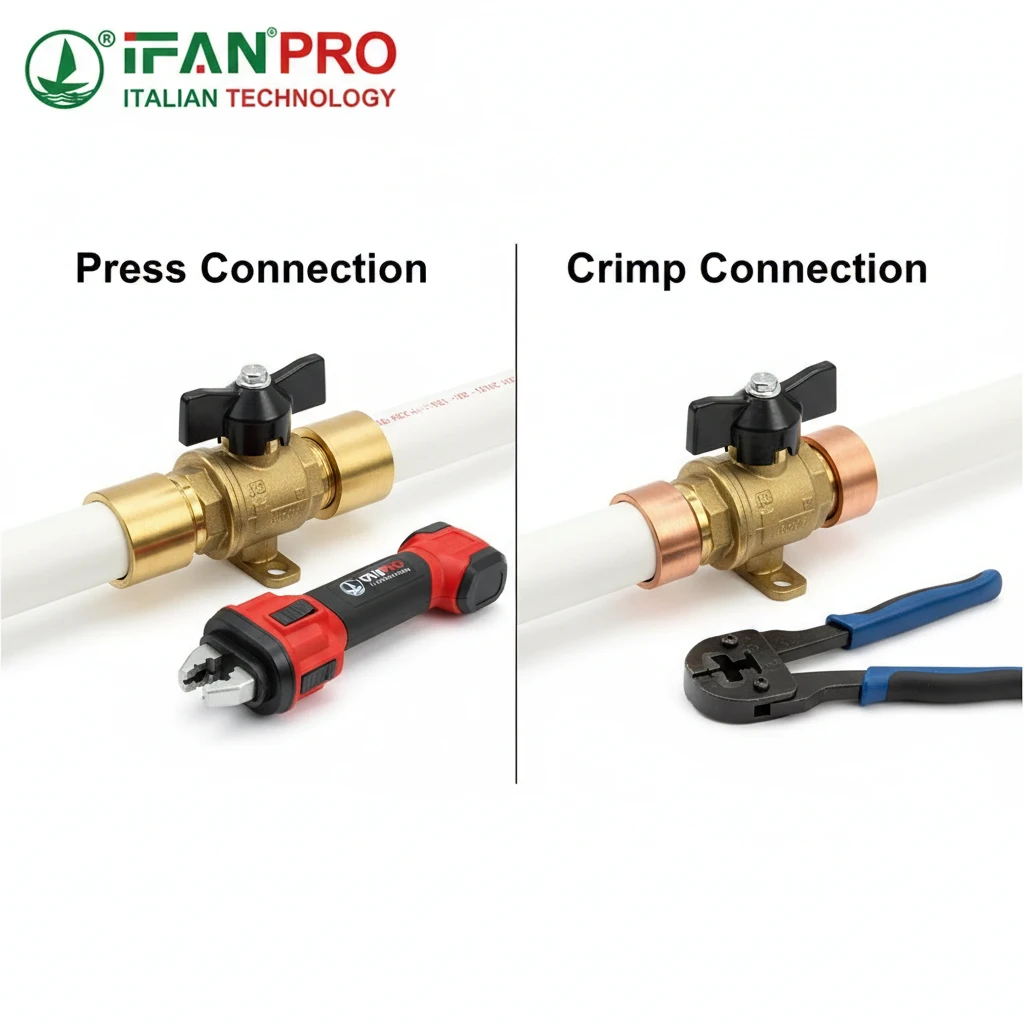
Why Press and Crimp Are the Only Real Options
You must understand the structure of PEX-AL-PEX pipe to know why these methods work. The pipe has an aluminum core layer sandwiched between PEX plastic layers. A secure connection must grip and seal this composite structure permanently. Only press and crimp tools can do this correctly.
Press Connection: This method uses a specially designed pressing tool with jaws. You slide a press fitting and a matching stainless steel sleeve onto the pipe. The tool’s jaws apply immense, perfectly even radial pressure around the entire sleeve in seconds. This action:
- Compresses the sleeve permanently onto the pipe.
- Creates a strong mechanical grip on the aluminum layer.
- Forms a tight seal with the inner PEX layer.
- Advantage: It is extremely fast, consistent, and requires less manual skill. The tool often gives a visual or audible confirmation when done correctly.
Crimp Connection: This is the classic method. You use a copper or stainless steel crimp ring and a crimping tool. After inserting the pipe into the fitting, you slide the ring over and use the tool to compress it.
- Advantage: The tools are less expensive and very common.
- Important: You must use a full-circle crimp tool, not a pinch-style clamp tool. The pinch style does not provide even pressure and can fail with multi-layer pipes.
Why Threaded Connections Are Not for the Pipe
A 121UC valve may have threaded ports, but these are for connecting to other valves, gauges, or adapters—not for screwing a pipe onto. Trying to thread a soft composite pipe is impossible and will destroy it.
Choosing the Right Method for Your Job
Consider these factors when deciding:
| Method | Best For | Key Tool Needed | Skill Level |
|---|---|---|---|
| Press Connection | Professional installers, large projects, where speed and absolute consistency are critical. | Electric or manual press tool with specific jaw sets. | Medium – Training is needed, but the tool minimizes error. |
| Crimp Connection | DIYers, small projects, contractors who already own the tools. | Full-circle crimping tool (calibrated). | High – Proper technique and tool calibration are essential. |
| Threaded Connection | Not applicable for connecting pipe. Used only for valve-to-valve or valve-to-adapter connections. | Wrenches. | Low |
My advice based on IFAN’s field experience: For guaranteed results, especially on critical systems, invest in or hire a professional with a press system.
How Do You Prepare the Composite Pipe End Before Inserting It into the Valve?
Poor preparation is the leading cause of connection failure. Rushing this step will guarantee problems later.
To prepare the PEX-AL-PEX pipe end, you must 1) Cut it squarely using a pipe cutter, 2) Deburr the inner and outer edges to remove sharp aluminum fragments, and 3) Calibrate it by inserting a specific tool to round the pipe back to its perfect shape and remove the inner plastic burr. This three-step process is mandatory for a leak-proof connection.
Step 1: Making a Perfectly Square Cut
You cannot use a saw. A saw will leave a crooked, ragged end that will never seal properly.
- Use a proper pipe cutter: A rotary pipe cutter for plastic/metal composite pipe is essential. Tighten it and rotate it around the pipe until it cuts through.
- Result: You get a clean, 90-degree cut with no deformation.
Step 2: The Crucial Deburring Process
When you cut the pipe, you create sharp aluminum shavings and a small plastic ridge (a burr) on the inside. If you don’t remove these, they will cause big trouble:
- The aluminum shavings can get pushed into the valve during connection, blocking it or damaging seals.
- The inner plastic burr creates a restriction in water flow (reducing pressure) and can break off later, traveling to damage other components.
- How to deburr: Use a deburring tool. First, use the side with the blade to gently scrape the outer edge, removing the sharp aluminum lip. Then, use the rounded reamer side to scrape the inner edge, removing the plastic burr. Wipe the pipe clean.
Step 3: Calibration – The Most Skipped, Most Important Step
This is the step even some professionals forget, and it leads directly to leaks. When you cut the pipe, the aluminum core can contract slightly, making the end slightly oval or smaller than the rest of the pipe.
- The Problem: If you try to insert an oval pipe into a round fitting, the sealing O-ring inside the fitting will not contact the pipe evenly. This creates a leak path from day one.
- The Solution: You must use a PEX-AL-PEX calibrator. This is a simple, cone-shaped tool. You insert it into the cut end of the pipe and twist. This does two things:
- It rounds out the pipe perfectly, ensuring it matches the fitting’s interior shape.
- It smooths out any remaining inner burr from deburring.
- Visual Check: After calibration, the pipe end should look perfectly round and smooth, both inside and out.
Skipping calibration is the #1 reason for mysterious leaks in otherwise perfectly installed systems. Never skip it.
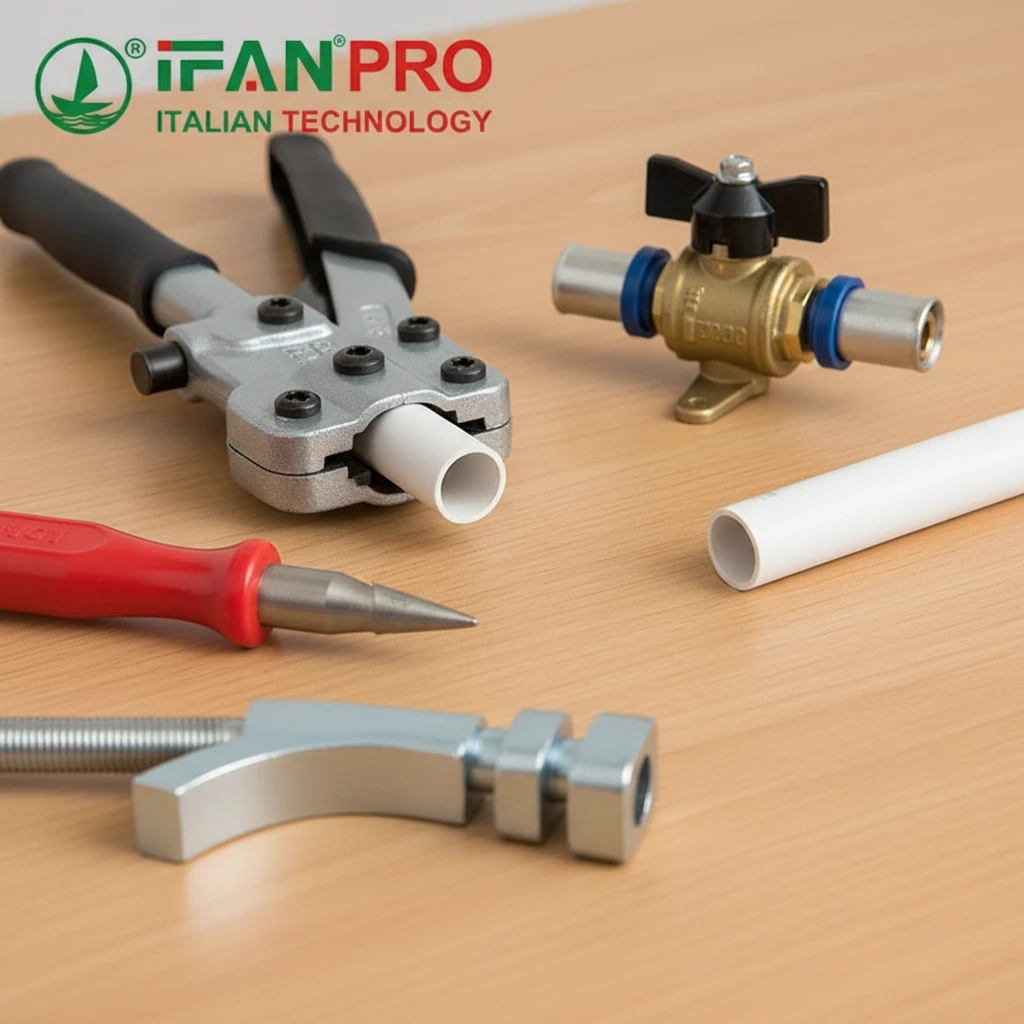
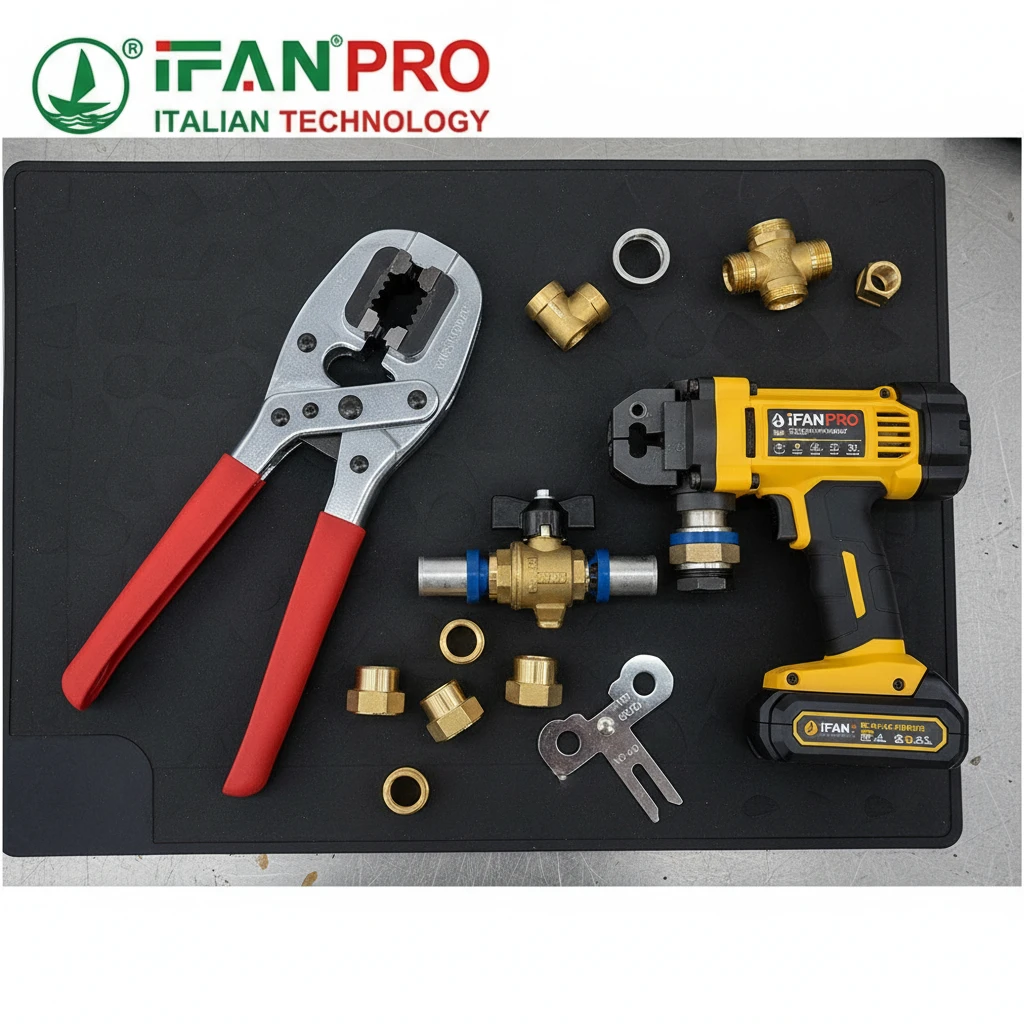
What Tools Ensure a Proper and Permanent Connection with the Pipe’s Layers?
Using the wrong tool is like using a hammer to screw in a lightbulb. It might seem to work at first, but it will fail.
Three specialized tools ensure a proper connection: 1) A deburring/calibration tool to prepare the pipe, 2) A full-circle crimp tool (for crimp method) or a calibrated press tool with correct jaws (for press method), and 3) A go/no-go gauge to verify every single crimp ring’s compression is perfect before use.
The Non-Negotiable Tool List
Let’s break down why each tool is critical and what happens if you use an alternative.
1. Deburring and Calibration Tool:
- Purpose: As discussed, it prepares the pipe for a perfect seal.
- Risk of Substitution: Using a utility knife or sandpaper is not precise and will not properly round the pipe. This leads to poor O-ring contact.
2. The Correct Crimp or Press Tool:
- For Crimping: You need a full-circle crimping tool that compresses the ring evenly from all sides. Never use a pinch-clamp tool (like for PEX-b). Pinch clamps create uneven pressure points that can distort the aluminum layer and cause the ring to fail over time due to stress.
- For Pressing: You need a press tool (manual or electric) and the exact jaw set specified for the size and brand of fitting you are using. Jaws are not universal. Using the wrong jaws can apply incorrect pressure, damaging the fitting or creating a weak connection.
- Tool Maintenance: These tools must be kept clean and, for crimpers, periodically calibrated. A worn-out tool makes bad connections.
3. The Go/No-Go Gauge (For Crimp Systems):
- Purpose: This is a small, inexpensive piece of metal with two slots. After you crimp a ring, you try to slide the gauge over it. One side (Go) should fit snugly over the crimped ring. The other side (No-Go) should not fit. This confirms the crimp is within the perfect tolerance range—not too loose and not too tight (which can crack the fitting).
- Why it’s vital: A crimp can look and feel tight but still be under-compressed. This gauge provides objective, immediate quality control on every single connection you make.
Tool Investment Table
| Tool | Purpose | Consequence of Not Using It |
|---|---|---|
| Rotary Pipe Cutter | Creates a clean, square cut. | Crooked cut prevents proper pipe insertion and seal contact. |
| Deburring Tool | Removes sharp aluminum and plastic burrs. | Burrs cause flow restriction, block valves, and damage O-rings. |
| Calibrator | Rounds the pipe end to perfect shape. | Oval pipe end creates an immediate, invisible leak path. |
| Full-Circle Crimp Tool | Applies even, radial pressure to the crimp ring. | Uneven pressure from pinch tools causes long-term joint failure. |
| Go/No-Go Gauge | Verifies every crimp is within perfect tolerance. | Undetected under-crimping leads to leaks that appear weeks or months later. |
Having the right tools is 80% of the job. They remove guesswork and ensure repeatable, professional results.
How Do You Verify the Connection Integrity Before System Pressurization?
Turning on the water without checking is a gamble. A proper verification process eliminates surprises and protects your project.
You verify the connection integrity with a two-stage process: First, perform a thorough visual and tactile inspection of every joint. Second, and most importantly, conduct a static pressure test by filling the system with water, pressurizing it to 1.5 times its operating pressure, and monitoring for any pressure drop over at least 60 minutes.
Stage 1: The Pre-Test Visual and Physical Inspection
Before you add any pressure, carefully check every connection you made.
- Check for Full Insertion: Ensure you can see the depth mark on the pipe through the inspection window of the press sleeve or crimp ring. The pipe must be fully seated against the fitting’s internal stop.
- Check Ring/Sleeve Position: Verify the crimp ring or press sleeve is positioned correctly, not crooked or too far back on the pipe.
- Check for Tool Marks: Look for a complete, circular indent from the crimp or press tool. An incomplete mark indicates a bad crimp.
- Tug Test: Gently try to pull the pipe out of the fitting. It should not move at all. Any movement means the connection is not secure and will leak under pressure.
Stage 2: The Mandatory Static Pressure Test
This is the only way to be sure. Air tests can be dangerous with plastic systems, so a water pressure test is standard and safest.
Follow this procedure:
- Close all outlets: Ensure all valves leading to fixtures are closed.
- Connect a test pump: Isolate the newly installed section if possible. Connect a hand-pump or a system fill pump to a test port.
- Fill and purge: Slowly fill the entire section with cold water. Open the highest faucet briefly to let all air escape, then close it. Air pockets can give false pressure readings.
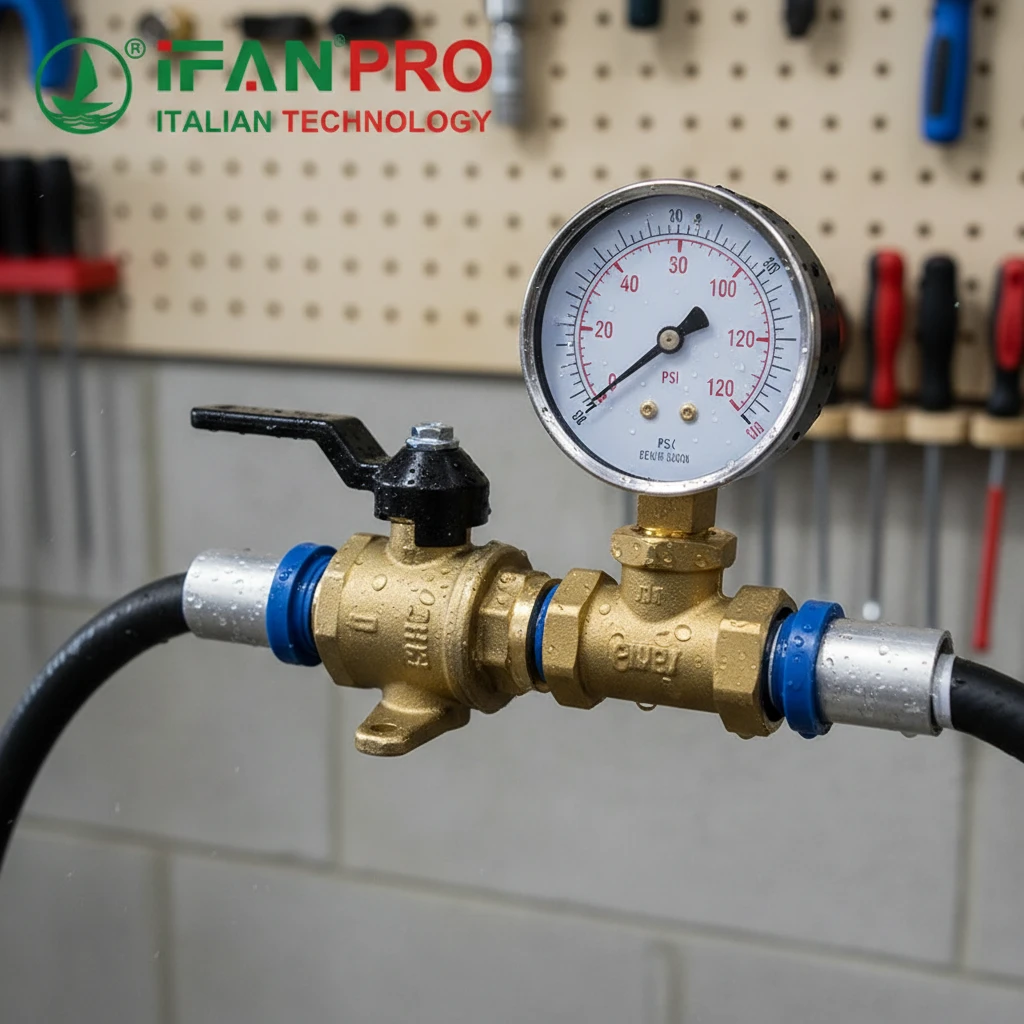
- Pressurize to test level: Using the pump, raise the pressure to your test level. The industry standard is to test at 1.5 times the maximum operating pressure of the system. For a residential system with a 80 psi maximum, test at 120 psi.
- Hold and observe: Close the inlet valve from the pump. Start a timer. The pressure must remain perfectly stable for a minimum of 60 minutes. For critical systems, a 2-hour or overnight test is better.
- Inspect during test: While the pressure holds, walk the entire length of the new piping. Look closely at every joint for the tiniest bead of moisture (a “weep”). Feel the joints with a dry paper towel.
- Interpret results: If the pressure gauge drops, you have a leak. You must find and repair it before proceeding. A stable pressure confirms integrity.
Post-Test Protocol
After passing the pressure test, depressurize the system slowly. You can now connect it to the main supply. This two-stage verification—inspect then test—is what separates professional work from amateur attempts. It saves immense time and cost by catching problems before walls are closed up.
Conclusión
A secure connection requires the right method, meticulous preparation, proper tools, and mandatory pressure testing. For reliable 121UC valves and compatible PEX-AL-PEX fittings, trust IFAN for system integrity.


Comentarios recientes