
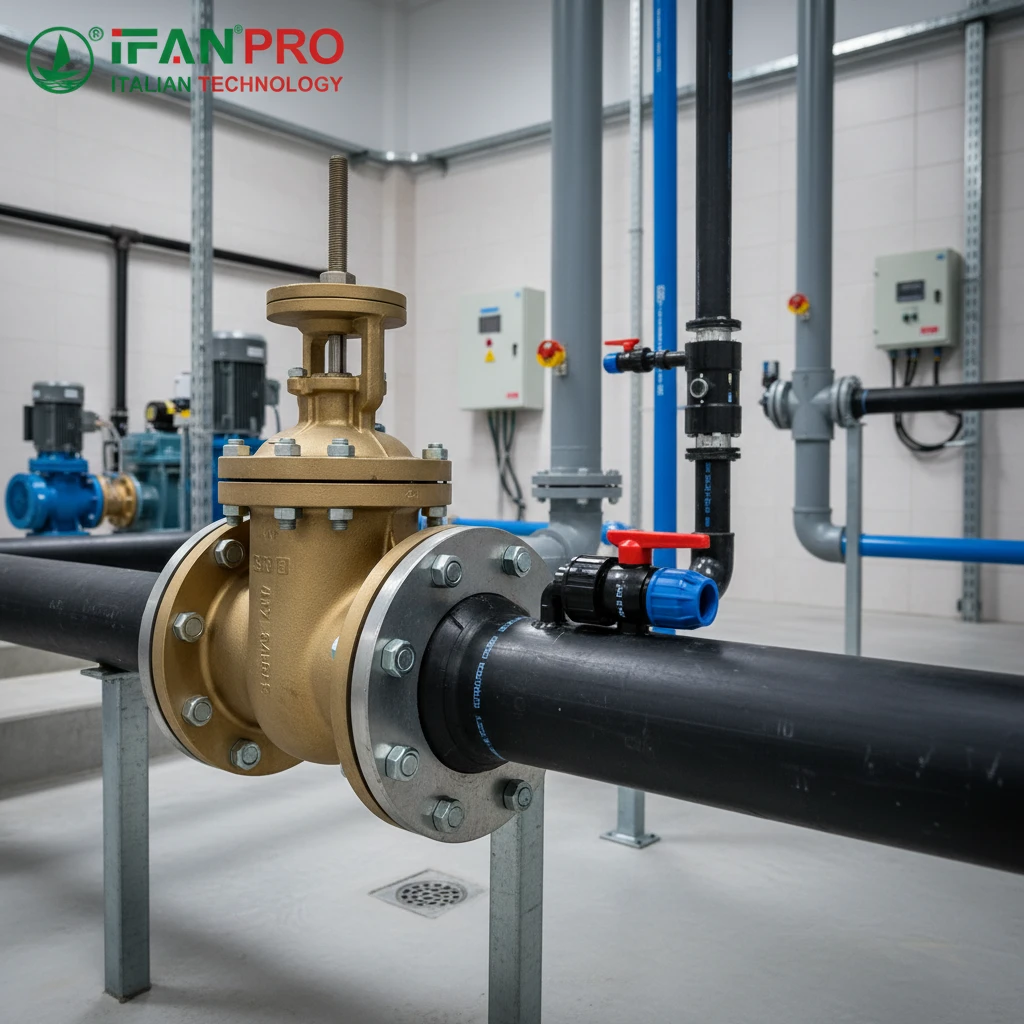
I once saw a poorly connected valve fail under pressure, causing a major leak. That moment taught me that the right connection method is everything for a secure system.
You can connect a female valve to HDPE pipe securely by using the correct transition fittings and proven techniques. The most reliable methods involve using HDPE flange adapters, threaded fusion fittings, or electrofusion sockets. These create strong, leak-proof seals by bridging the difference between the HDPE pipe and the valve’s female threads.
A weak connection risks leaks and system failure. Therefore, let’s look at the proven ways to make a secure and lasting joint.
What Are the Reliable Methods for Connecting a Female Valve to HDPE Pipe?
Choosing the wrong method is a common mistake. For this reason, I advise clients to match the method to their system’s pressure and needs.
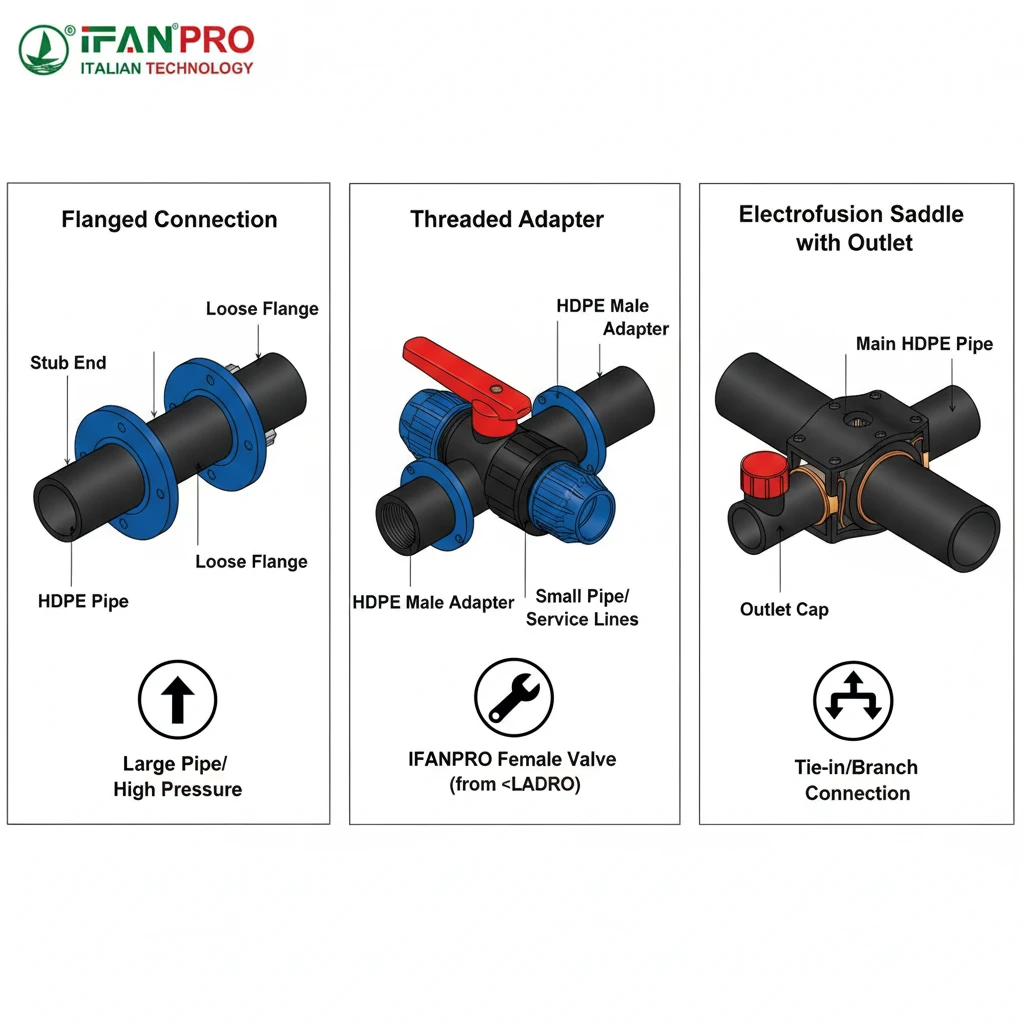
The three most reliable methods are: 1) using a stub end and a back-up flange, 2) using a threaded HDPE male adapter fused to the pipe, or 3) using an electrofusion saddle with a threaded outlet. Each method securely transitions from the HDPE pipe to the female valve’s threads, providing a pressure-rated seal.
Understanding the Connection Challenge
First, you must understand the core challenge. HDPE pipe is typically joined by heat fusion (butt or socket) or with mechanical fittings. However, a standard female valve has internal (female) threads or a flange face. As a result, you cannot directly thread or fuse HDPE to this valve. Therefore, you need a reliable transition. Your goal is to connect the non-threaded HDPE to the threaded valve without creating a weak point. Here are the three best methods.
Method 1: The Flanged Connection (Most Common & Robust)
This is the preferred method for larger pipes (2 inches and above) and higher-pressure systems. It uses two main parts:
- An HDPE Stub End: This is a short piece of HDPE pipe with a welded-on flange face on one end. The other end is fused directly to your main HDPE pipe line using standard butt fusion.
- A Loose Back-Up Flange (or Companion Flange): This is a steel flange that bolts to the valve.
How it works: First, you fuse the HDPE stub end to the pipe. Then, the steel back-up flange slides onto the HDPE stub end. After that, you bolt the female valve, which has its own flange, to the back-up flange with a gasket in between. The bolt pressure squeezes the gasket, creating a tight seal between the metal valve and the HDPE system.
Why it’s reliable: It handles high pressure and stress very well. Additionally, the flange bolts allow for easy disassembly and maintenance. For this reason, this method is standard in water, industrial, and mining applications.
Method 2: The Threaded Fusion Adapter Connection (Ideal for Smaller Lines)
This method is best for smaller diameter pipes (under 3 inches) in lower to medium pressure applications.
It uses one key part:
- An HDPE Male Threaded Adapter: This fitting has HDPE on one end (for fusion) and external (male) NPT or metric threads on the other.
How it works: First, you fuse the HDPE end of the adapter onto the HDPE pipe. This creates a permanent, leak-free joint on the pipe side. Then, you screw the male threads of the adapter directly into the female threads of the valve. Remember to use pipe sealant tape or thread compound on the metal-to-plastic threads.
Why it’s reliable: It is simple, cost-effective, and compact. The fused joint on the HDPE side is strong, and the threaded connection is easy to make.
Method 3: The Electrofusion Connection (For Repairs or Tight Spaces)
This method is highly versatile and excellent for repairs, tie-ins, or where fusion equipment for other methods is not available.
It uses one key part:
- An Electrofusion Saddle with a Threaded Outlet: This is an electrofusion fitting that bonds to the side of the HDPE pipe. It has a built-in threaded outlet.
How it works: First, clamp the saddle onto the HDPE pipe. Then, energize the built-in heating wires with a special tool. This process fuses the saddle to the pipe wall and creates a reinforced outlet. Next, screw a male threaded nipple into the saddle’s outlet. Finally, attach the female valve to that nipple.
Why it’s reliable: It provides a full-strength, leak-free fusion joint to the main pipe. Moreover, it doesn’t require cutting the main line, which is great for adding a valve to an existing system.
Comparison of Connection Methods
| Method | Best For Pipe Size | Presión nominal | Key Advantage | Main Consideration |
|---|---|---|---|---|
| Flanged (Stub End) | 2″ and larger | High | Strongest, easy to maintain | Requires more space; needs proper bolt tightening |
| Threaded Adapter | Under 3″ | Low to Medium | Simple and compact | Threads can strip; not for high vibration |
| Electrofusion Saddle | All sizes | Medium | No main line cut; versatile | Requires special electrofusion tool |
Which Specific Fittings Ensure a Secure HDPE Pipe to Female Valve Connection?
Using the wrong fitting guarantees problems. Therefore, I always specify fittings by their exact function and material grade.
The specific fittings that ensure security are: HDPE stub ends with matching steel back-up flanges, HDPE male threaded adapters (NPT or metric), and electrofusion saddles with threaded outlets. For flanged systems, you also need the correct gasket (like EPDM or Nitrile) and ASTM-grade bolts, nuts, and washers.
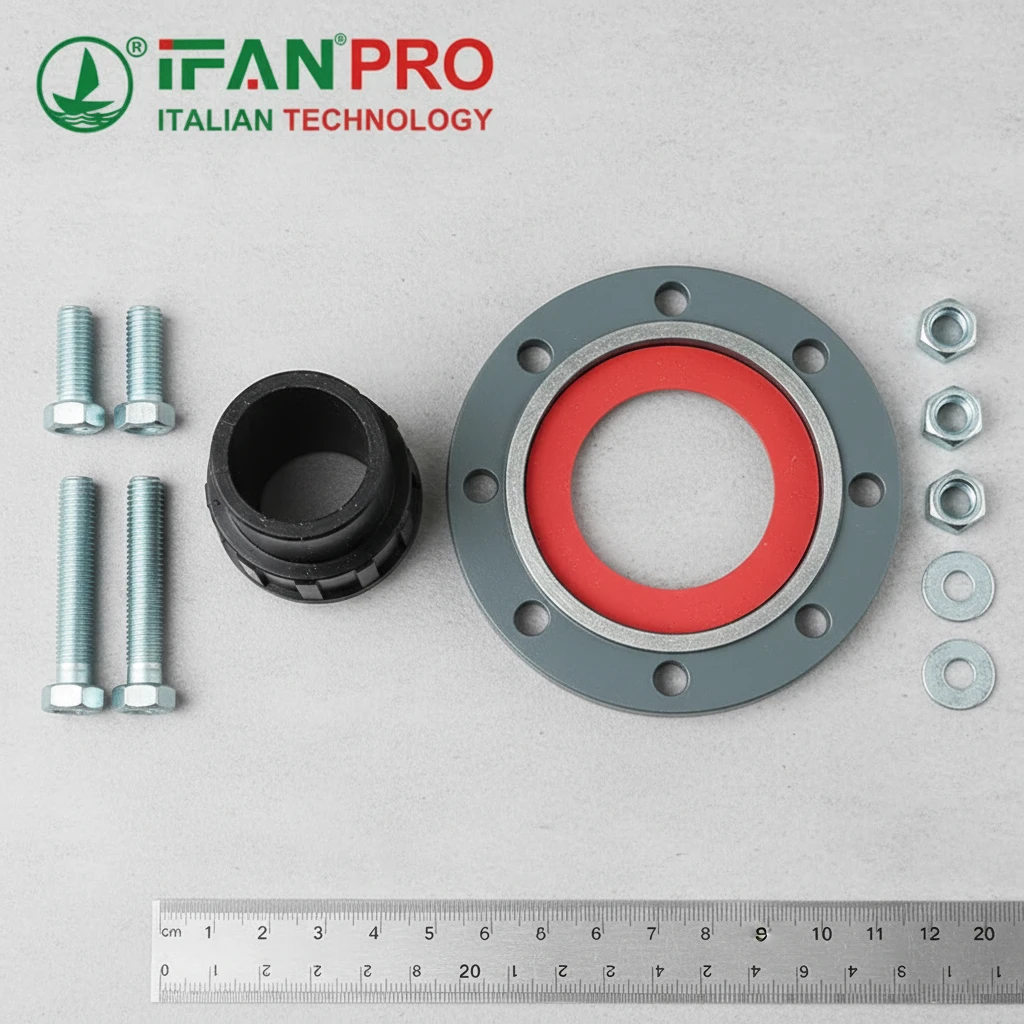
Critical Fitting #1: The HDPE Stub End & Flange Set
This is not a single fitting, but a matched system. For a secure connection, every part must be correct.
- HDPE Stub End: Ensure it is made from PE100 or PE4710 material that matches your pipe’s pressure rating. The flange face must be flat and true. Also, you must butt fuse it to the pipe correctly; this step is the most critical weld in the assembly.
- Back-Up Flange (Companion Flange): This must be the correct pressure class (e.g., Class 150) and drilling pattern to match your valve’s flange. Manufacturers typically make it from carbon steel with a corrosion-resistant coating.
- The Gasket: This creates the seal between metal and plastic. A full-face, rubber EPDM gasket is most common. It must be the right size and material for your service (e.g., potable water, chemicals).
Critical Fitting #2: The Male Threaded Adapter
Selecting this adapter carefully prevents thread failure.
- Material: It must be a molded or machined fitting from premium HDPE (PE100).
- Thread Type: You must know the valve’s thread type. Common types are NPT (National Pipe Taper) or BSPP (British Standard Pipe Parallel). Using the wrong thread type will not seal.
- Fusion Type: The HDPE end must suit the fusion type you will use—socket fusion or butt fusion. For example, do not try to fuse a socket-fit end using a butt fusion machine.
Critical Fitting #3: Electrofusion Saddle with Outlet
This fitting’s quality determines the integrity of the fusion.
- Integral Heater Coils: The embedded wire coils must be evenly distributed to create a uniform fusion zone.
- Outlet Reinforcement: The area around the threaded outlet should have reinforcement with extra material to handle the stress from the valve.
- Brand & Compatibility: Use saddles from reputable manufacturers that are compatible with your pipe’s resin type (e.g., PE100). Most importantly, follow the manufacturer’s fusion parameters exactly.
Fitting Selection Guide
| Your Situation | Primary Fitting Needed | Secondary Components Needed | Pro Tip |
|---|---|---|---|
| New, large-diameter mainline valve | HDPE Stub End | Steel Back-Up Flange, Gasket, Bolts/Nuts/Washers | Use a torque wrench to tighten bolts evenly in a star pattern. |
| Adding a small branch line valve | HDPE Male Threaded Adapter (Socket or Butt) | PTFE Thread Seal Tape, Two Pipe Wrenches | Use two wrenches: one to hold the adapter, one to turn the valve. This prevents twisting the fused joint. |
| Tapping a valve into an existing pressurized line | Electrofusion Saddle with Threaded Outlet | Electrofusion Controller, Scraper, Clamp, Male Nipple | First, thoroughly clean and scrape the pipe area before fusion. |
How Do You Achieve a Leak-Proof Seal When Installing a Female Valve on HDPE?
A perfect-looking connection can still leak. In fact, the seal depends on the details of execution.
You achieve a leak-proof seal by ensuring two things: 1) a perfect, uncontaminated fusion joint between the HDPE pipe and its adapter, and 2) a properly compressed gasket (for flanged) or sealed threads (for threaded). This requires clean surfaces, correct procedures, and calibrated tools.
Step 1: The Foundation – A Perfect Fusion Joint
For flanged or threaded adapter methods, the fusion between the HDPE pipe and the transition fitting is the most important seal. If this fails, the entire connection fails.
- Cleanliness is Critical: Dirt, moisture, or oxidation on the pipe or fitting end will ruin the fusion. First, wipe surfaces with 99% isopropyl alcohol. Then, use a dedicated scraping tool to remove the oxidized surface layer immediately before heating.
- Correct Heat and Pressure: Use a properly maintained fusion machine. Specifically, follow the manufacturer’s recommended heating time, based on the pipe’s diameter and wall thickness. Also, apply the correct fusion pressure.
- Cooling Time: Do not disturb the joint during the specified cooling time. Moving it too soon will create a weak, defective joint.
Step 2A: Sealing the Flanged Interface
Once you have a stub end fused to the pipe, the next seal is between the stub end’s face and the valve’s flange.
- Gasket Placement: Use a new, undamaged gasket. Center it perfectly between the two flange faces.
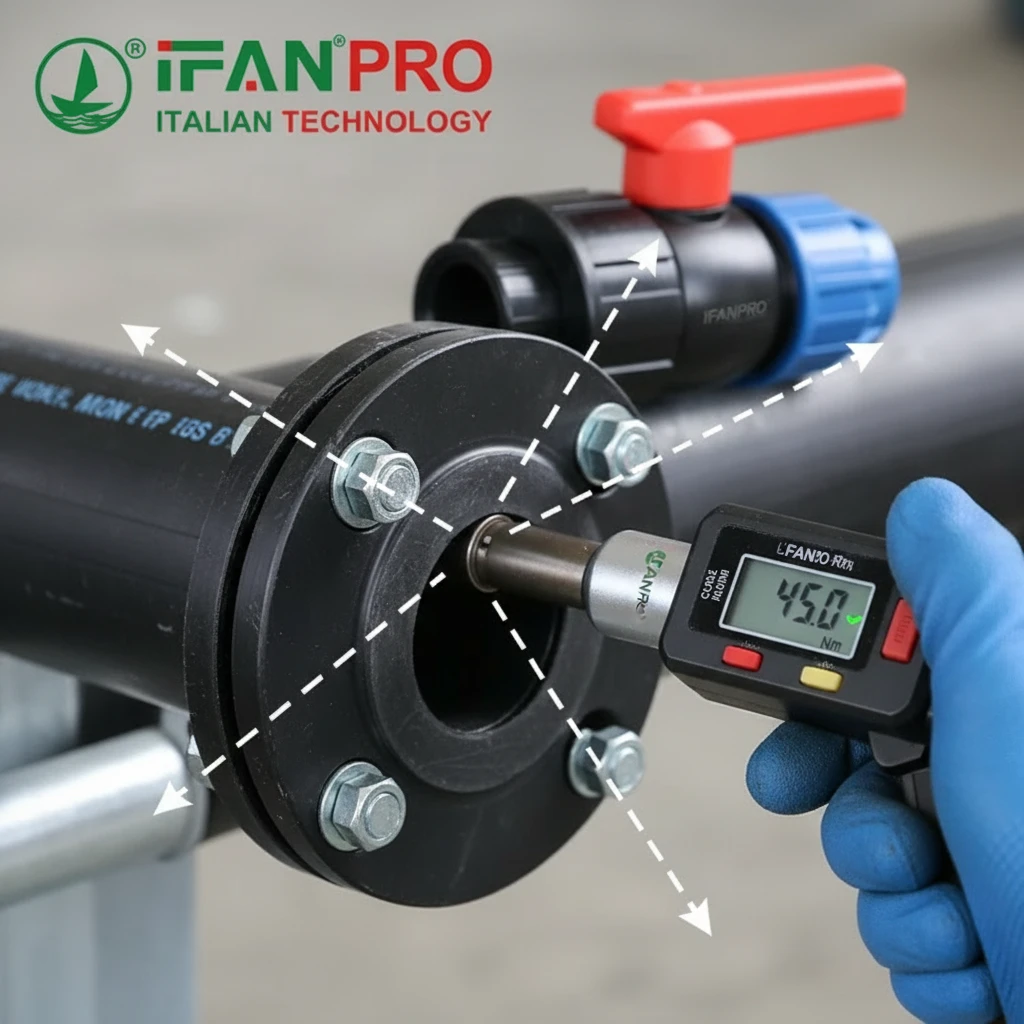
- Bolt Tightening Sequence: This is the most common cause of flange leaks. First, hand-tighten all bolts. Then, using a calibrated torque wrench, tighten the bolts in a star or criss-cross pattern (like tightening a car tire). Go around multiple times, increasing the torque gradually to the final specified value. This process ensures even gasket compression.
Step 2B: Sealing the Threaded Interface
For the threaded adapter method, the seal is on the threads.
- Use the Right Sealant: For plastic-to-metal threads, use PTFE (Teflon) tape. Wrap the male threads 4-6 times in the direction of the threads (clockwise when looking at the end). Importantly, do not use liquid pipe dope that contains solvents, as they can crack the HDPE over time.
- Engagement: First, screw the adapter into the valve by hand to ensure clean thread engagement. Then tighten with wrenches. Avoid over-tightening, which can crack the HDPE adapter or strip the threads.
Common Pitfalls That Cause Leaks
Here is a table of mistakes to avoid:
| Pitfall | Consequence | How to Prevent |
|---|---|---|
| Dirty or wet fusion surfaces | Weak, porous fusion joint that will leak under pressure. | Clean with alcohol and scrape just before heating. |
| Incorrect bolt tightening | Uneven gasket compression, leading to a path for leaks. | Use a star-pattern sequence with a torque wrench. |
| Old or damaged gasket | Gasket fails to compress and seal properly. | Always use a new gasket from a fresh package. |
| Wrong thread sealant | Chemical attack on HDPE or inadequate sealing. | Use only PTFE tape for HDPE-to-metal threads. |
| Insufficient thread engagement | Threads bottom out before the seal is made. | Ensure adapter has adequate threaded length for the valve. |
What Are the Critical Steps to Test the Security of a Female Valve Connection?
Never assume a connection is good. Testing is the only way to be sure, and you must do it safely.
The critical steps are: 1) a thorough visual and mechanical inspection, 2) a low-pressure air test to check for major leaks, followed by 3) a hydrostatic pressure test at 1.5 times the system’s maximum operating pressure. The connection must hold this pressure without any drop or visible leakage for the specified test duration.
Phase 1: The Pre-Test Inspection (Visual & Mechanical)
Before putting any pressure in the system, check everything with your eyes and hands.
- Check the Fusion Joint: Look at the bead of melted plastic (the “bead roll”) around the fusion joint. It should be even and consistent all around. An uneven bead can indicate a bad fusion.
- Check Flange Alignment: The two flange faces (stub end and valve) should be parallel and aligned. They should not be forced into position by the bolts.
- Check Bolt Tightness: Use the torque wrench to verify all bolts are at the correct final torque value.
- Check Valve Position: Ensure the valve is in the OPEN position before pressure testing. Testing a valve while closed puts unnecessary pressure on the bonnet and seat seals.
Phase 2: The Low-Pressure Air Test (Initial Check)
This is a safe way to find big leaks before filling the system with water.
- First, isolate the new section with the valve.
- Then, connect an air compressor with a pressure regulator and a pressure gauge.
- Slowly introduce air to a low pressure (e.g., 10-15 PSI).
- Soap Test: Next, spray a soapy water solution on every part of the connection: the fusion joint, all flange edges, the valve stem, and the threaded areas. Look for bubbles forming, which indicate an air leak.
- Finally, fix any leaks you find before proceeding.
Phase 3: The Hydrostatic Pressure Test (Final Proof)
This is the definitive test. It uses water, which is safer and more revealing than air at high pressure.
- First, fill the isolated test section completely with water, venting all air. Air pockets can make the test dangerous and inaccurate.
- Then, connect a high-pressure pump and a calibrated test gauge.
- Gradually increase the pressure to the test pressure. Standard practice is 1.5 times the system’s Maximum Operating Pressure (MOP) for at least 2 hours. For example, if the MOP is 100 PSI, test at 150 PSI.
- The Critical Observation: Once at test pressure, shut off the pump. Then, watch the pressure gauge closely. A secure system will hold the pressure steady or show a very minor drop (within acceptable limits per standards like ASTM F2164). However, a continuous, significant pressure drop indicates a leak.
- Final Visual Check: While under pressure, physically inspect the entire connection again for any weeping or dripping water.
Testing Protocol Summary Table
| Test Phase | Method | Pass/Fail Criteria | Safety Note |
|---|---|---|---|
| Visual/Mechanical | Physical inspection | Even fusion bead, aligned flanges, correct bolt torque. | Valve must be open. |
| Air Test | Soapy water bubble check at low PSI. | No bubble formation at any point on the connection. | Use low pressure only. Wear eye protection. |
| Hydrostatic Test | Pressure hold test with water at 1.5x MOP. | Pressure remains stable (minimal acceptable drop) for 2+ hours with no visible leaks. | Ensure system is vented of air. Never test with air at high pressure. |
Conclusión
A secure connection needs the right method, quality fittings, careful sealing, and thorough testing. For reliable HDPE stub ends, flanges, and fusion fittings that ensure a leak-proof system, trust IFAN for your project components.


Comentarios recientes