
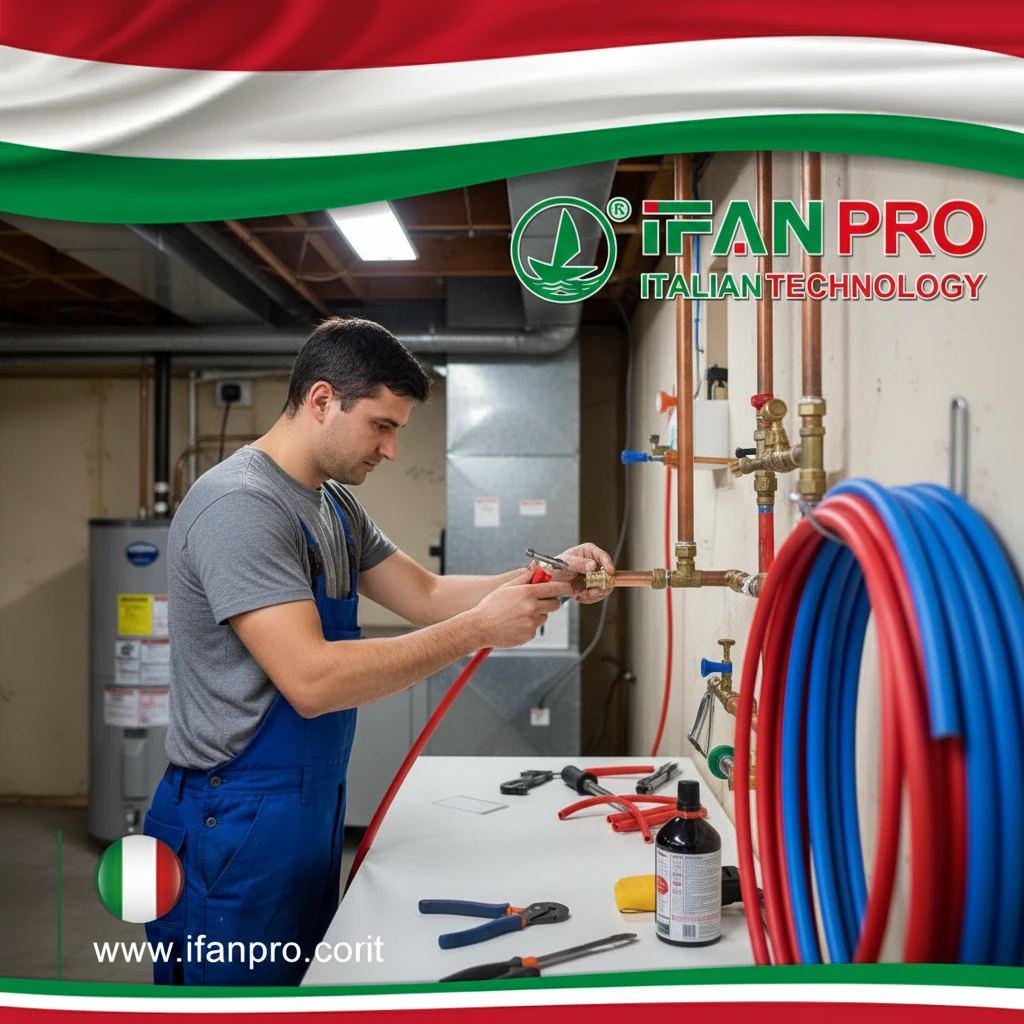
As a project manager, I’ve seen many failed DIY connections that lead to leaks. Connecting different pipe materials is a common task, and doing it right is critical.
You connect a copper water pipe to PEX using a specific transition fitting, either a sweat adapter or a push-to-connect fitting, after properly cutting, cleaning, and preparing both pipes. The key is selecting the right fitting and following a meticulous step-by-step process to ensure a permanent, leak-free seal.
This guide will walk you through the entire process, from choosing the right part to making the final safety check.
What Are the Best Transition Fittings for Connecting Copper to PEX?
Choosing the wrong fitting is the first step toward a leak. I always recommend using the most reliable method for the job.
The best transition fittings are either sweat-solder adapters or push-to-connect fittings. Sweat adapters provide the most permanent and professional connection, while push-to-connect fittings offer the easiest and fastest solution for DIYers, requiring no special tools besides a cutter.
Understanding Your Fitting Options
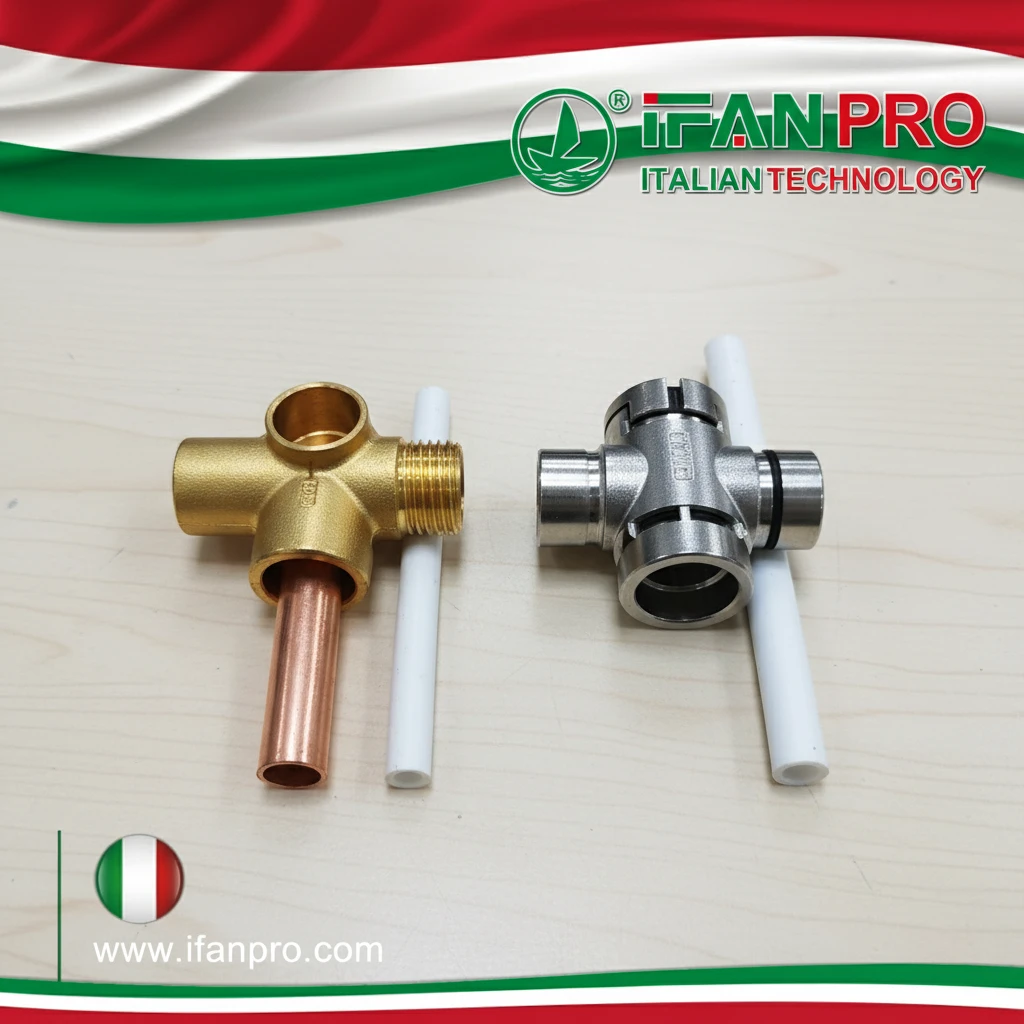
You cannot glue or thread PEX to copper directly. You need a special fitting that has a copper end for one side and a PEX-compatible end for the other. There are two main types, each with pros and cons.
First, let’s talk about the sweat adapter (or solder adapter). This is a brass fitting with a plain copper end on one side and a threaded or barbed end for PEX on the other. You solder the copper end directly onto your existing copper pipe, just like any other copper joint. Then, you connect the PEX pipe to the other end.
Pros of Sweat Adapters:
- Very Strong: Creates a permanent, metal-to-metal bond.
- Reliable: Considered the professional standard for long-term performance.
- Low Profile: The fitting is compact and unobtrusive.
Cons of Sweat Adapters:
- Requires Skill: You need to know how to solder (sweat) copper pipes safely.
- Needs Tools: Requires a propane torch, solder, flux, and heat protection.
- Fire Risk: Involves open flame, which can be dangerous near walls or wood.
A Simpler Alternative
Second, we have push-to-connect (or push-fit) fittings. Brands like SharkBite are popular examples. These are brilliant for transitions. You simply push the cleaned copper pipe into one end and the PEX pipe into the other. An internal O-ring and metal grab ring create a watertight seal.
Pros of Push-to-Connect Fittings:
- Extremely Easy: No soldering, glue, or special tools needed.
- Fast: Connection is made in seconds.
- Removable: You can disconnect and reconnect them if needed, which is great for repairs.
- Safe: No open flame or chemicals.
Cons of Push-to-Connect Fittings:
- Cost: Each fitting is more expensive than a sweat adapter.
- Space: They are bulkier and may not fit in tight spaces.
- Long-Term Perception: Some professionals still prefer soldered joints for absolute permanence, though push-fittings are highly reliable when installed correctly.
Fitting Selection Guide
Here is a table to help you choose:
| Fitting Type | Best For | Skill Level Needed | Tools Required |
|---|---|---|---|
| Sweat Adapter | Permanent installations, behind walls, professional work. | Intermediate to Advanced | Torch, solder, flux, cutter, emery cloth. |
| Push-to-Connect | DIY projects, quick repairs, temporary lines, areas where soldering is unsafe. | Beginner | Pipe cutter, deburring tool, go/no-go gauge. |
For most permanent plumbing work, professionals use sweat adapters. For a quick fix or a confident DIYer, a push-to-connect fitting is an excellent, code-approved choice.
How Do You Properly Prepare Copper and PEX Pipes Before Connection?
Poor preparation causes most joint failures. I always say the time you spend preparing the pipe is more important than the time you spend connecting it.
You must cut both pipes perfectly straight, remove all burrs, and clean the ends thoroughly. For copper, clean the outside until it shines. For PEX, ensure the cut is smooth and the pipe is round. Dry-fit everything before making the final connection to avoid mistakes.

Step-by-Step Preparation Guide
A good connection is 90% preparation. Rushing this part will guarantee problems later. Follow these steps in order.
Step 1: Cut the Pipes
- Copper: Use a tubing cutter. Place it around the pipe, tighten the knob, and rotate it around the pipe. Tighten a little more each rotation until the pipe snaps cleanly. Do not use a hacksaw as it will leave a jagged, uneven end.
- PEX: Use a sharp PEX tubing cutter or a very sharp utility knife. The goal is a perfectly square, clean cut. A dedicated PEX cutter makes this easy.
Step 2: Deburr and Clean
- Copper: After cutting, a sharp ridge (burr) will be left inside the pipe. Use the deburring tool on your tubing cutter or a round file to remove it. Then, use emery cloth or a special sanding pad to scrub the outside of the copper end (about 1 inch back) until it is bright and shiny. This removes oxidation and helps the solder flow.
- PEX: Check the cut end. If there are any rough spots or a slight “oval” shape from squeezing the cutter, trim it again. The end must be smooth and round. Wipe the inside and outside with a clean cloth to remove any dust or plastic shavings.
Step 3: Dry Fit and Mark
Before you solder or push, always do a dry fit. Slide the fitting onto the copper pipe (or push it in slightly if using a push-fit) and mark the pipe with a pencil to show how far it goes in. For PEX, if using a barbed fitting with a clamp, mark how far the pipe slides onto the barb. This “depth mark” is crucial to ensure the pipe is fully seated during the final assembly.
Preparation Checklist Table
Use this list to ensure you don’t miss a step:
| Task | Tool Needed | Goal | What Happens If You Skip It? |
|---|---|---|---|
| Cut Copper Straight | Tubing Cutter | Clean, square end. | Jagged cut prevents proper fitting seat, causing a leak. |
| Remove Copper Burr | Deburring Tool | Smooth inner edge. | Burr restricts water flow and causes turbulence/ noise. |
| Clean Copper End | Emery Cloth | Shiny, clean metal. | Solder won’t bond, creating a weak, leaky joint. |
| Cut PEX Straight | PEX Cutter | Square, round end. | Pipe won’t seat correctly in fitting; O-ring can fail. |
| Dry Fit & Mark | Pencil | Verify fit and depth. | Pipe may not be fully inserted, leading to instant failure. |
Taking these five extra minutes to prepare will give you total confidence when you make the final, permanent connection in the next step.
What Is the Correct Technique to Create a Leak-Free Copper to PEX Joint?
The moment of truth. Applying the right technique turns good preparation into a perfect joint.
For a sweat adapter, heat the fitting evenly, apply solder to the joint’s edge until a ring of solder appears, and let it cool naturally. For a push-to-connect fitting, ensure pipes are fully inserted to the depth mark. The technique is all about patience and following the manufacturer’s instructions exactly.
Method A: Soldering a Sweat Adapter
This is a skill that requires practice. If you are new to soldering, practice on scrap pipes first.
Step 1: Apply Flux.
After cleaning, immediately apply a thin layer of water-soluble flux to the outside of the shiny copper pipe and the inside of the fitting’s copper cup. Flux cleans the metal and helps the solder flow.
Step 2: Assemble and Heat.
Slide the fitting onto the copper pipe, twisting slightly to spread the flux. Use a propane torch to heat the middle of the fitting, not the solder. Move the flame around to heat the fitting evenly. Hold the solder wire to the joint between the fitting and the pipe. When the fitting is hot enough, the solder will melt instantly and be drawn into the joint by capillary action.
Step 3: Feed the Solder.
Keep feeding solder around the entire joint until you see a shiny silver ring of solder appear all the way around. This means the joint is full. Use only a small amount – typically 1/2 to 3/4 inch of wire for a 1/2″ fitting.
Step 4: Cool and Clean.
Remove the heat and the solder. Let the joint cool completely and solidify on its own. Do not spray it with water or touch it. Once cool, wipe away any excess flux residue with a damp cloth to prevent corrosion.
Method B: Using a Push-to-Connect Fitting
This method is much simpler but requires careful attention to the marks you made.
Step 1: Check the Pipes.
Verify that your copper and PEX ends are cut straight, deburred, and clean. Use the “go/no-go” gauge that comes with the fitting to check if your pipe diameter is correct and the cut is square.
Step 2: Insert the Pipes.
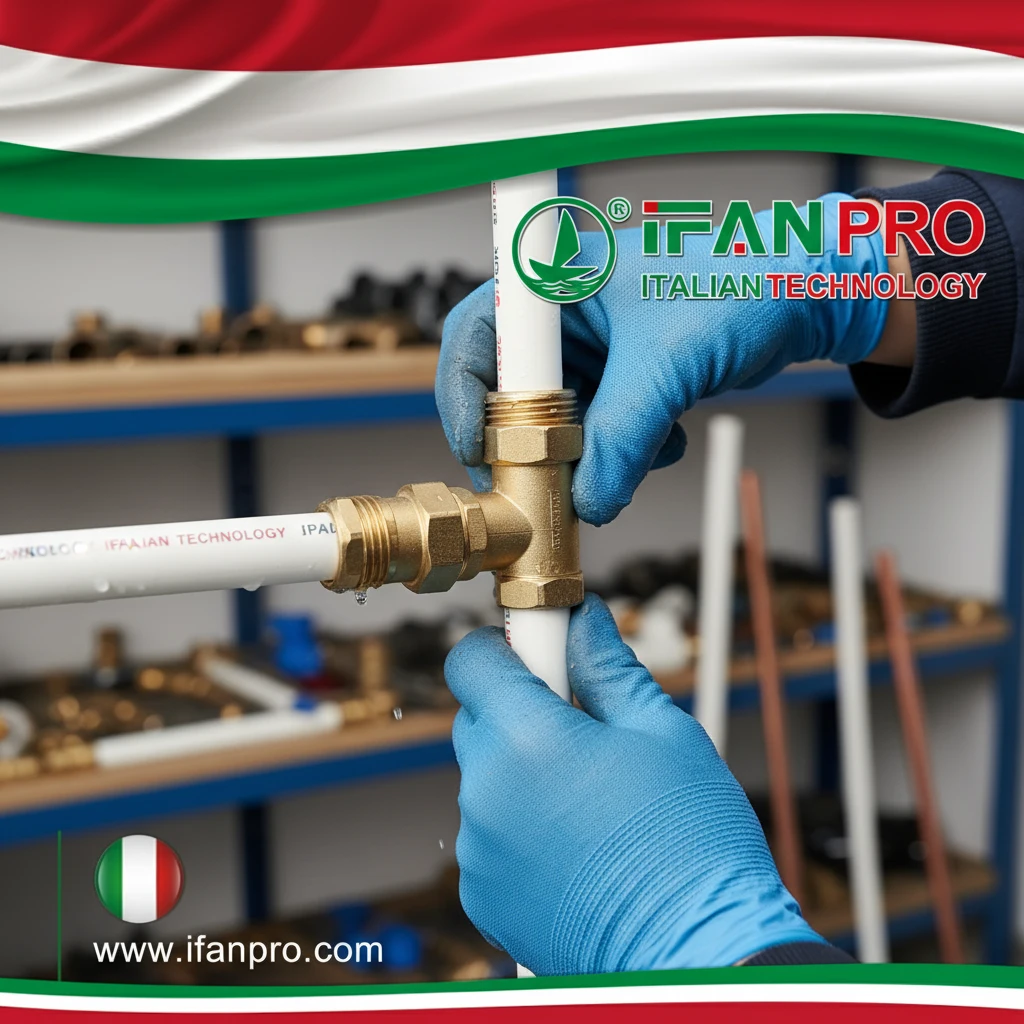
Push the copper pipe straight into one end of the fitting. Push firmly until you feel it stop and the pipe hits the internal shoulder. Your depth mark should now be right at the fitting’s edge. Repeat the process with the PEX pipe on the other end. You should hear or feel a slight click as the grab rings engage.
Step 3: Tug Test.
After inserting, give each pipe a firm pull and twist to ensure it is locked in place. It should not pull out. Do not rotate the fitting on the pipe after insertion.
Critical “Do Not” List
| Action | Why It’s Bad |
|---|---|
| Overheat a solder joint. | Burns the flux, ruins the solder bond, and can damage valves. |
| Underheat a solder joint. | Solder will bead up and not draw in, creating a weak “cold joint.” |
| Use pipe sealant on push-fits. | Can damage the O-ring and is not required or recommended. |
| Disconnect & Reuse push-fits repeatedly. | Can damage the internal sealing components. |
| Forget to support the pipes. | Stress on the joint can lead to failure over time. |
Whether you solder or push, the key is to work carefully and not rush. A good joint looks neat and feels solid.
How Should You Test and Inspect Your Copper to PEX Connection for Safety?
Never assume a joint is good. Testing is the final, essential step that prevents costly water damage.
You must pressure test the entire system with air or water, visually inspect for leaks or drips, and check for proper pipe support. Do not cover the joints with insulation or wall material until they have passed a 24-hour pressure test under normal household water pressure.
The Pressure Test: Your Best Safety Net
A visual check is not enough. You need to test the joint under pressure, just like it will experience daily.
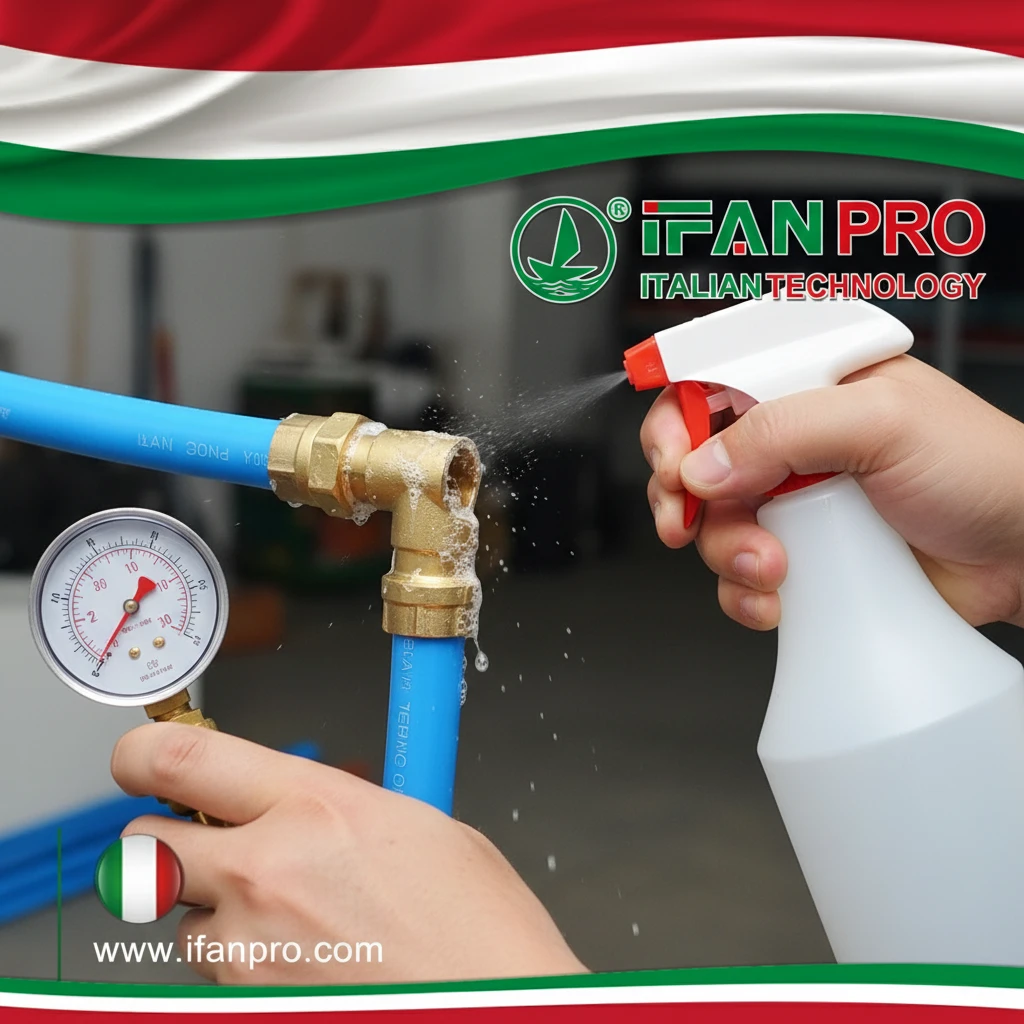
Air Testing (Before Water is Connected):
This is common for new installations. Cap all open ends and attach an air compressor with a pressure gauge. Pump the system to about 60 PSI (check local code). Spray all joints, especially your new transition, with a soapy water solution. Look for bubbles. If you see bubbles forming, you have a leak. Mark it, depressurize the system, and re-make the connection.
Water Testing (Final Check):
Once the system is connected to your water supply, this is the ultimate test. Slowly turn the water main back on. Have someone slowly open a faucet downstream to let air escape. Then, with the system full and pressurized:
- Look: Carefully watch the new connection for any sign of a drip or bead of water. Use a dry paper towel to wipe the joint—a damp spot will appear if there’s a tiny leak.
- Listen: Put your ear close to the joint. A hissing sound indicates a pinhole leak.
- Feel: Run your finger around the joint. It should be completely dry.
Inspection Checklist
Go through this list before closing up walls:
| Inspection Point | What to Look For | Action if Problem Found |
|---|---|---|
| Joint Itself | Any moisture, drips, or corrosion. | Depressurize and re-make the connection. |
| Pipe Alignment | Is the connection straight, or is it bent? | Bent alignment puts stress on the joint. Add a support bracket. |
| Pipe Support | Is the pipe secured within 18 inches of the fitting? | Lack of support causes joint failure over time. Add a pipe hanger or clamp. |
| Solder Joint Appearance | A full, silver ring of solder around the fitting. | If solder is blobbed or only on one side, it’s a weak “cold joint.” Re-solder. |
| Push-Fit Fitting | Is the pipe fully inserted to the depth mark? | If not, depressurize, disconnect, and re-insert fully. |
Let the system sit pressurized for at least several hours, ideally 24, before considering the job complete. Pay special attention after the first few heating and cooling cycles (from using hot water), as pipes expand and contract.
Conclusión
Connecting copper to PEX is straightforward with the right fitting, careful preparation, and proper testing. For reliable transition fittings, PEX tubing, and all necessary tools, trust the quality and expertise of IFAN.


Comentarios recientes