
I recall a service call where a leaky connection caused major water damage. The installer used a standard PEX tool, which taught me that the right tool is a strict requirement for composite pipes, not just a suggestion.
Yes, installing a 121UC-type multi-layer composite valve (commonly used on PEX-AL-PEX pipe) requires a specialized pressing tool. A standard PEX-A expansion tool or a standard PEX-B crimp ring tool is not sufficient and will lead to connection failure. You need a dedicated press tool with specific jaws designed to correctly compress the unique sleeve fitting onto the composite pipe structure.
To ensure a perfect, leak-free seal every time, let’s explore the exact tools and techniques you need.
Is a Standard PEX Crimp or Press Tool Sufficient, or Is a Special Tool Needed?
Using the wrong tool is the fastest way to create a future leak. I have seen the costly results firsthand.
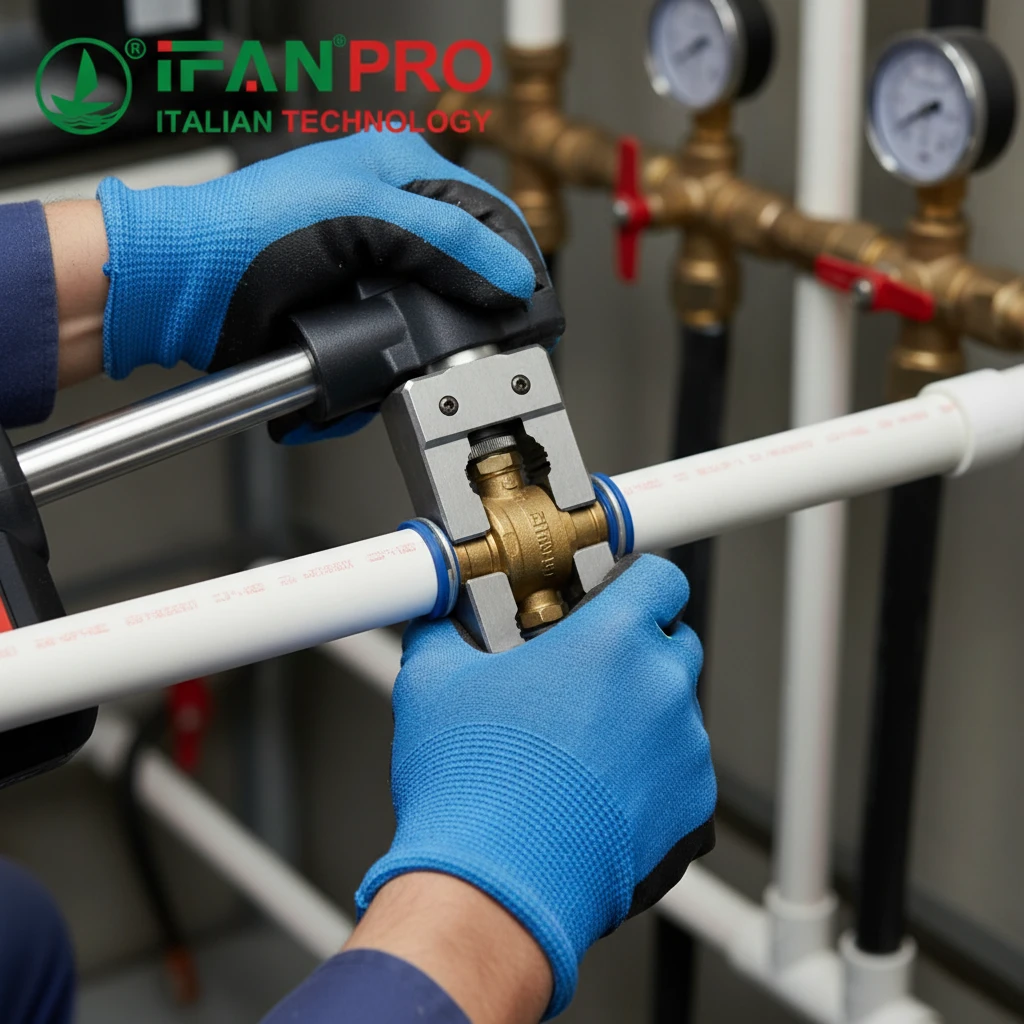
No, a standard PEX crimp or press tool is not sufficient. PEX-AL-PEX (composite) pipe has a rigid aluminum core, which requires a different connection method than pure PEX plastic. You must use a dedicated press tool with specifically shaped jaws that match the manufacturer’s 121UC sleeve fitting. This tool applies uniform radial force without damaging the aluminum layer.
Understanding the Core Difference in Materials
The need for a special tool comes down to basic material science. First, let’s compare the two pipe types:
- Standard PEX Pipe: This is flexible plastic all the way through. Crimp or press connections work by deforming a metal ring around the soft PEX, which creates a seal.
- PEX-AL-PEX Composite Pipe: This pipe has three layers: an inner PEX layer, a middle solid aluminum tube, and an outer PEX layer. The aluminum core gives the pipe strength, but it also makes it rigid.
If you try to use a standard PEX crimp ring on composite pipe, you cannot achieve proper compression. Specifically, the aluminum core resists the deformation. Consequently, you will likely crimp only the outer PEX layer, which results in a weak, incomplete seal that will fail under pressure.
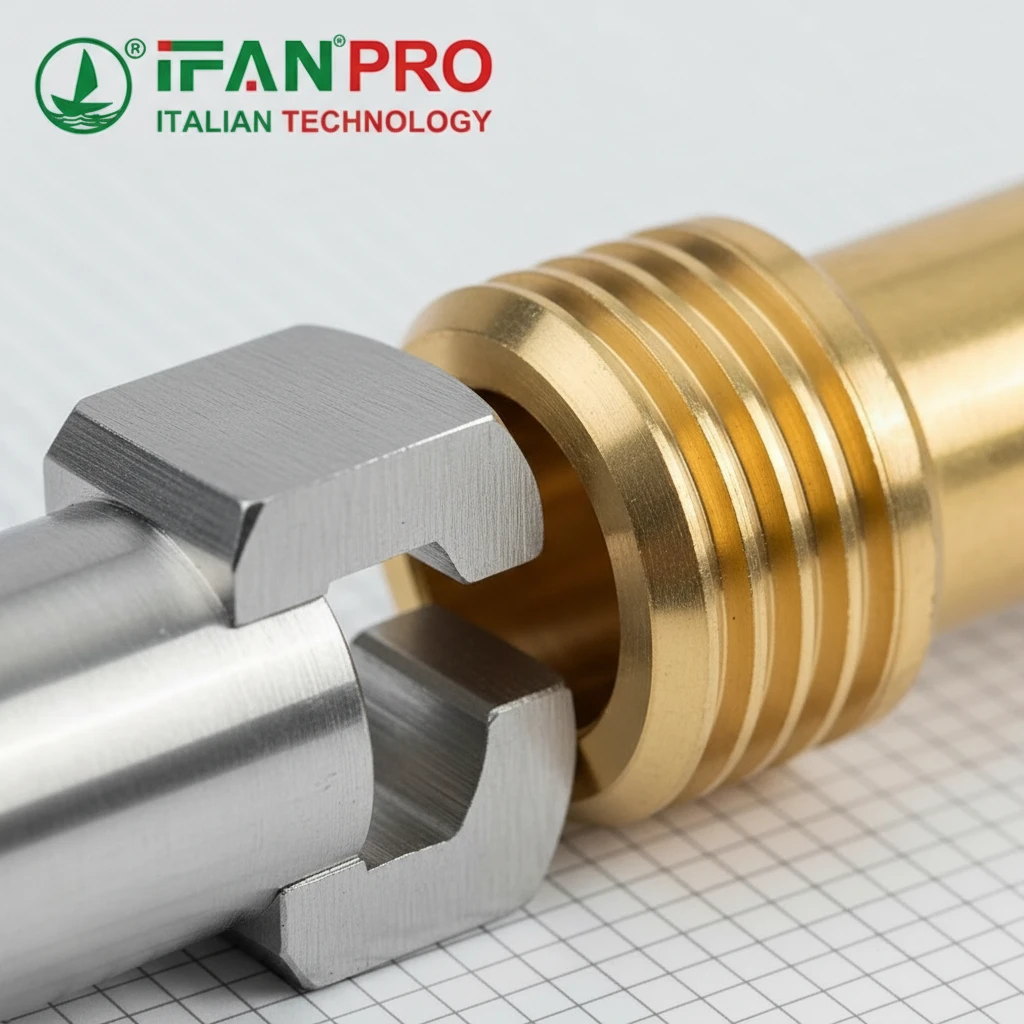
The Role of the 121UC Sleeve Fitting
The connection system for composite pipes like PEX-AL-PEX is completely different. It uses a press sleeve fitting, often called a 121UC fitting. This is a single, thick stainless-steel sleeve with a built-in rubber O-ring.
The special press tool does not crush a ring. Instead, its jaws are precision-engineered to perform three key actions:
- They fit perfectly around the contours of the 121UC sleeve.
- They apply an even, radial force from all sides.
- They compress the sleeve onto the pipe just enough to press the O-ring into a dedicated groove on the pipe insert, which creates the seal.
This process essentially cold-welds the sleeve to the pipe. Therefore, you can only achieve this with the correct tool and fitting combination.
What Tool Features Are Crucial for a Proper Connection on PEX-AL-PEX?
Not all “compatible” press tools are equal. In fact, the wrong jaw profile is a recipe for leaks.
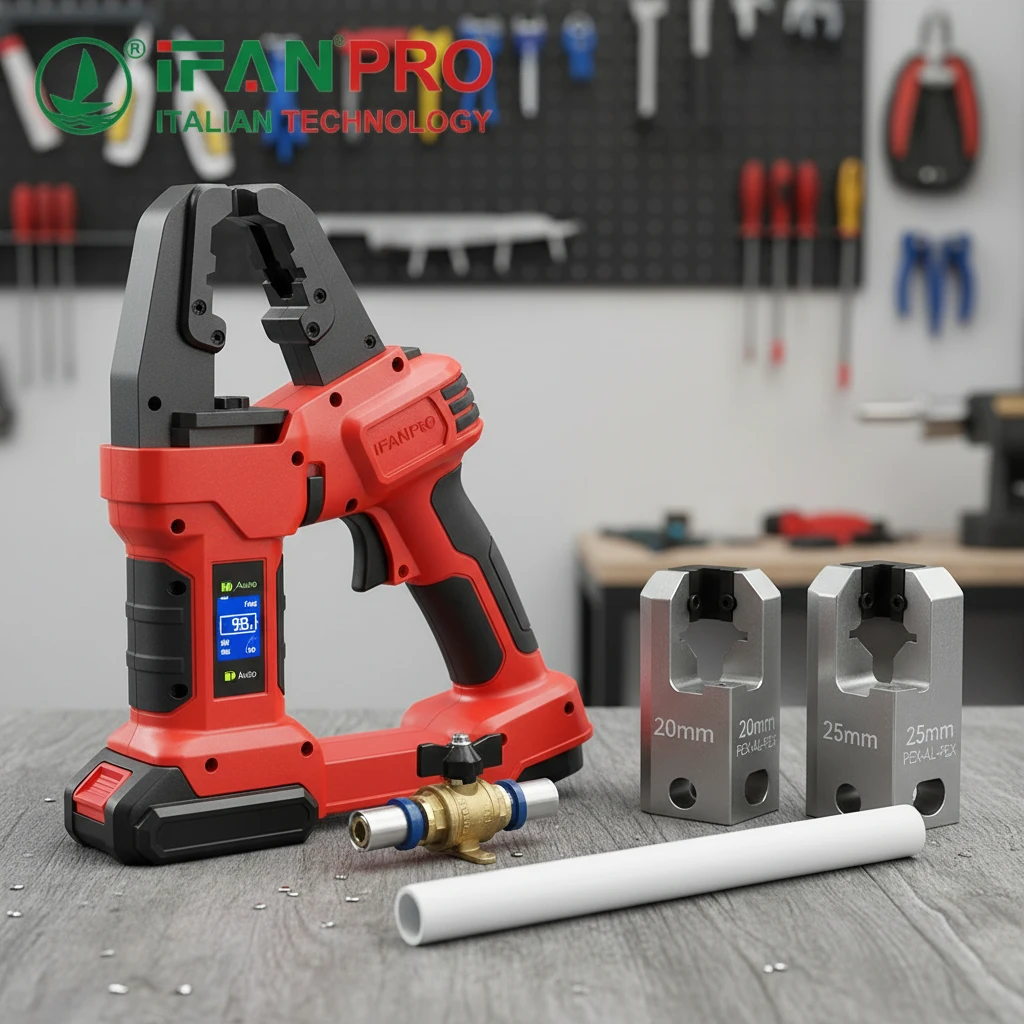
**Three tool features are absolutely crucial: 1) *Jaws that exactly match the 121UC sleeve profile* from your specific manufacturer, 2) Sufficient pressing force (measured in kN or tons) to fully complete the press, and 3) A clear visual or auditory indicator (like a green gauge window or a click) to confirm a complete, correct press cycle.**
Feature 1: The Correct Jaw Profile
This is the most critical feature. The jaws must be shaped to match the exact diameter and profile of the 121UC press sleeve. If you use jaws meant for a different brand, they will apply force in the wrong places.
- Consequence of Wrong Jaws: This mistake can result in an incomplete press that leaks immediately. Alternatively, it can cause over-compression, which can crack the fitting’s plastic internal insert.
Feature 2: Adequate Pressing Force
PEX-AL-PEX connections require significant force. Therefore, manual press tools must have proper leverage, and battery-powered press tools must have enough battery capacity and motor power.
- Common Problem: A weak battery or an undersized manual tool may stall mid-press. This leaves a partially connected fitting that will inevitably fail. So, always ensure your tool is rated for the fitting size you are using.
Feature 3: A Positive Completion Indicator
A proper tool removes guesswork. It must have a built-in mechanism to tell you the press is done correctly.
- Best Practice: Many professional-grade tools have a window that turns green when the correct pressure is reached, or they make an audible click. You should never rely on “feeling” like it’s tight enough.
Essential Tool Checklist
Before starting any job, verify your tool has these features:
| Tool Feature | Why It’s Important | What to Look For |
|---|---|---|
| Correct Jaw Set | Ensures force is applied to the right parts of the fitting for a perfect seal. | Jaws marked with the fitting brand (e.g., IFAN) and size (e.g., “20mm 121UC”). |
| Sufficient Power | Ensures the press cycle completes fully without stalling. | For battery tools, check voltage (18V+ recommended). For manual tools, check leverage. |
| Completion Indicator | Eliminates installer error and confirms a successful press. | A green indicator window or a distinct clicking sound at the end of the press cycle. |
| Ergonomic Design | Reduces installer fatigue and improves safety on large jobs. | Comfortable grips, balanced weight, and a rotating head for tight spaces. |
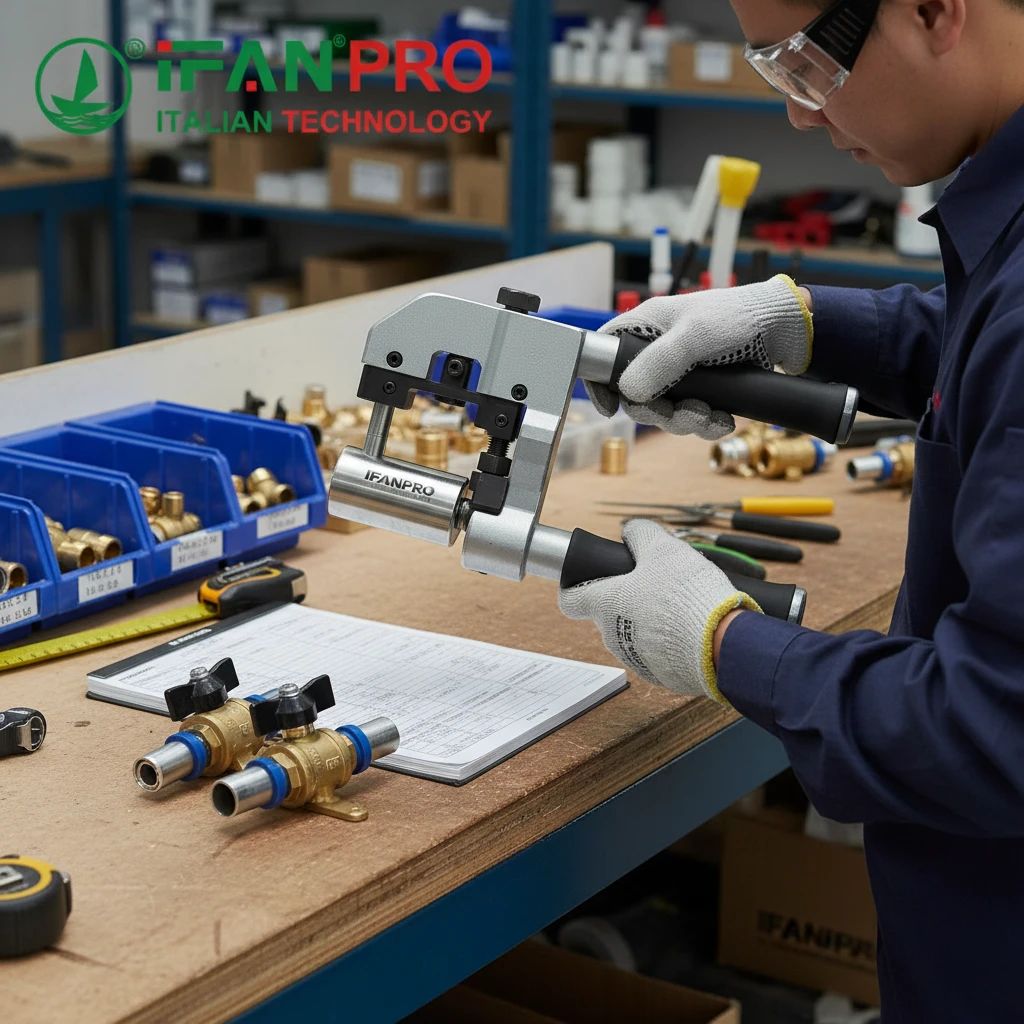
How Do You Calibrate the Tool to Avoid Under or Over-Compression?
Calibration is what separates pros from amateurs. Simply put, an uncalibrated tool is a liability.
You calibrate a professional press tool using a calibration gauge (mandrel) provided by the tool manufacturer. First, you insert the gauge into the tool’s jaws and activate a press cycle. The tool is correctly calibrated only if the completion indicator (green window/click) aligns perfectly at the end of the cycle. You should do this daily or weekly based on usage.
The Step-by-Step Calibration Process
Calibration ensures your tool’s internal mechanism applies the exact, correct amount of force. Here is how to do it:
- Get the Right Gauge: Obtain the brand-specific calibration gauge for your tool model and jaw size.
- Insert the Gauge: Open the tool’s jaws and fully insert the calibration gauge. Ensure it sits perfectly.
- Perform a Test Press: Activate the tool as if you were pressing a real fitting. Apply steady pressure.
- Observe the Result: At the end of the press cycle, check the indicator.
- Correct Calibration: The tool’s indicator (green window) appears exactly as the cycle finishes.
- Under-Calibration (Dangerous): The indicator appears before the cycle finishes. This means the tool will stop pressing too soon on a real fitting, causing under-compression and leaks.
- Over-Calibration (Dangerous): The indicator does not appear even after the jaws are fully closed. This means the tool will over-squeeze a real fitting, potentially cracking it.
Frequency and Log Keeping
Calibration is not a one-time task. Force settings can drift with regular use.
- Daily: Check calibration if you use the tool heavily every day.
- Weekly: This is a minimum for professional installers.
- After any impact: Always recalibrate if the tool is dropped.
- Log it: Keep a simple logbook with calibration dates and results. This practice is a mark of professionalism.
What If You Have a Basic, Non-Calibratable Tool?
Some lower-cost manual tools lack a calibration feature. In this case, you must perform a destructive test on a sample connection before starting your job.
- Make a sample connection with a scrap piece of pipe and a fitting.
- Press it with your tool.
- Cut the connection open lengthwise with a pipe cutter.
- Inspect the cross-section. The sleeve should be evenly compressed, and the O-ring should be fully seated in its groove without being pinched.
This test is the only way to verify your technique and tool setup.
Where Can Installers Obtain the Correct Tools and Training for These Valves?
The right source guarantees quality and support. Ultimately, you should not leave this to chance.
Installers can obtain the correct tools and training from three main sources: 1) The valve and fitting manufacturer (like IFAN) directly, 2) Authorized distributors who carry the manufacturer’s full system, and 3) Reputable plumbing supply houses that provide brand-specific training sessions. You should always avoid unbranded, generic tool kits sold online.

Source 1: The Manufacturer (Most Reliable)
Going directly to the manufacturer or their official sales channels is the best way to ensure 100% compatibility. For example, when you purchase IFAN’s 121UC valves and PEX-AL-PEX system, you can also purchase or rent IFAN-branded press tools and jaws.
- Advantage: This guarantees a perfect match between tool jaws, sleeves, and valves. You also get access to official technical manuals and direct support.
Source 2: Authorized Distributors
These distributors have a partnership with the manufacturer. They stock the complete system and are trained to provide correct advice.
- Advantage: You get local availability, potential for tool rental, and personalized service from knowledgeable reps.
Source 3: Plumbing Supply Houses & Trade Schools
Many large supply houses host regular training seminars for plumbers. Manufacturers often sponsor these to educate the market on proper installation techniques.
- Advantage: This provides hands-on, practical training often for free or low cost. It is a great way to learn before investing in the tool system.
A Vital Warning About Generic Tools
Online marketplaces are full of cheap, unbranded “universal” press tools. These pose a serious risk:
- Jaw Incompatibility: Their jaws are rarely precision-made for a specific 121UC profile.
- No Calibration: They often lack any calibration mechanism.
- No Support or Warranty: If it fails, you have no recourse.
Using such a tool voids any warranty on the valves and fittings and puts the entire installation at risk.
Your Actionable Sourcing Plan
- Identify the System: Choose your composite pipe system brand (e.g., IFAN).
- Contact the Supplier: Reach out to them or their local distributor for a tooling quote and ask about training.
- Invest in the System: Purchase or rent the matched toolset.
- Get Trained: Attend a session or thoroughly review the official installation video guide.
- Practice: Make several test connections on scrap material before your first live job.
Conclusión
Proper installation of 121UC valves requires specialized, calibrated press tools—not standard PEX equipment. For a perfectly matched and reliable system, use IFAN’s 121UC valve series along with their recommended installation tools.


Comentarios recientes