
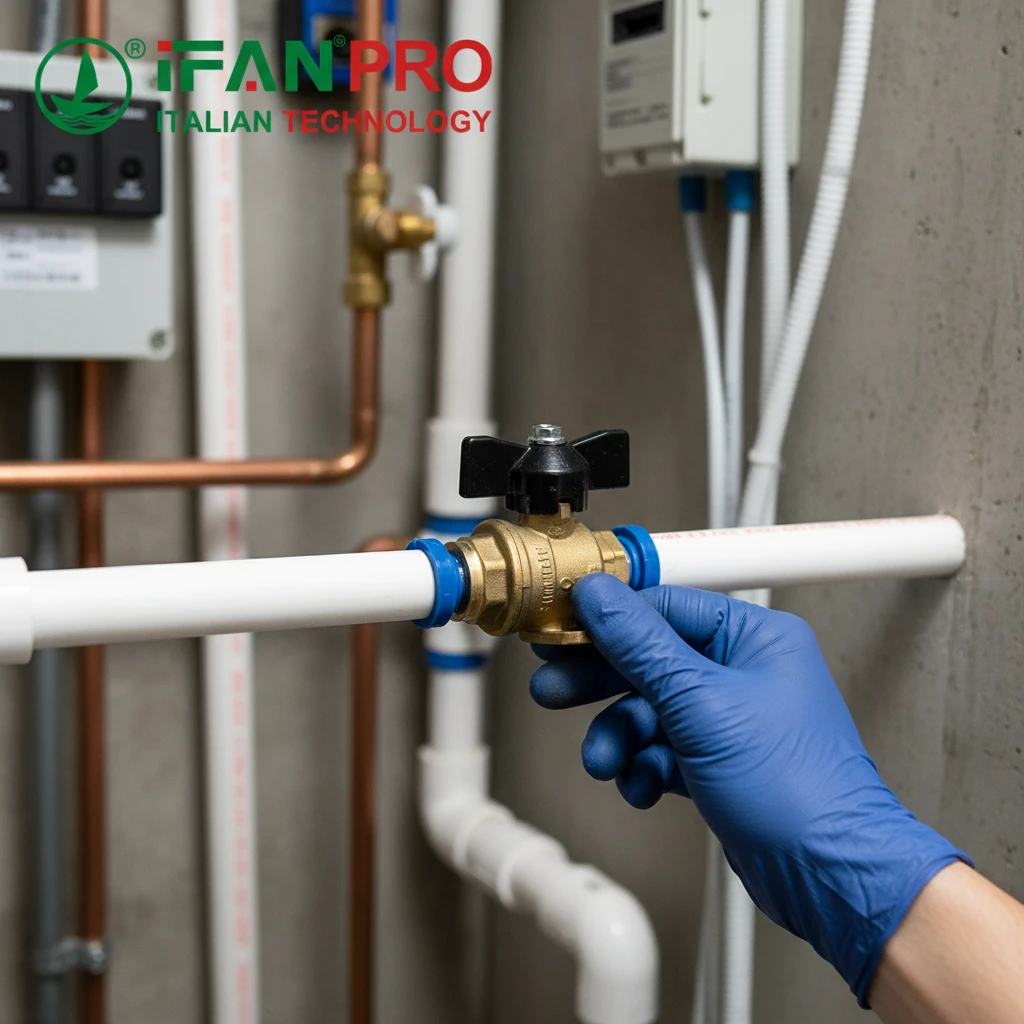
A client once faced a system shutdown because a faulty valve couldn’t be fixed without cutting the entire loop. This experience taught us the precise steps for a successful, minimal-disruption repair.
You can often service a 121UC valve in-place, but replacement typically requires cutting the pipe. The key is to safely isolate and depressurize the loop, then use the correct method to disconnect the press fitting without damaging the expensive PEX-AL-PEX pipe, ensuring the new installation maintains a perfect seal.
Replacing a valve in a press-fit system demands care. Let’s walk through the exact process to do it right the first time.
Can the Valve Be Serviced In-Place, or Must the Pipe Section Be Cut?
Finding out you must cut a pipe when you hoped for a simple repair is frustrating. We always check this first.
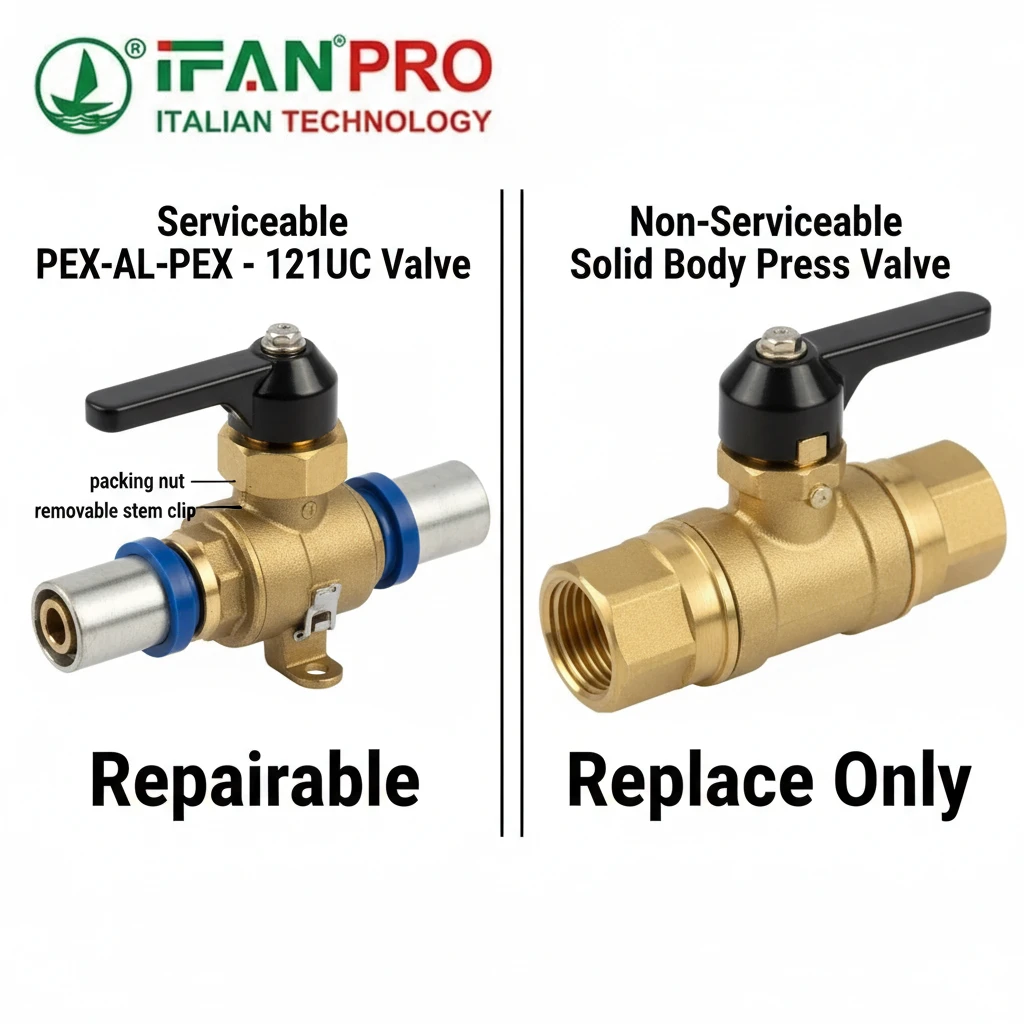
The valve itself is usually not serviceable in-place if it has failed internally. However, you must inspect the valve type. Most 121UC-style valves are single-unit press fittings; if the valve mechanism fails, you must cut out and replace the entire fitting. Only valves with a removable cartridge or bonnet can be serviced without cutting the pipe.
Identifying Valve Serviceability
First, you need to know what kind of valve you have. Look at the valve body. A standard, one-piece brass or stainless steel 121UC ball valve is a sealed unit. You cannot open it to replace internal parts like the ball or seats. If this type of valve is leaking from the stem or not shutting off, you have only one option: replace the whole valve fitting.
On the other hand, some specialized valves have a design that allows for service. Look for a threaded bonnet (a large nut on top) or a visible cartridge assembly held by a clip. If your system uses these, you may only need to turn off the water, remove the internal parts, and install a replacement cartridge. This is a much faster and cheaper repair.
Decision Flowchart: To Cut or Not to Cut?
Follow this simple logic to decide your approach:
- Identify the Problem: Is the leak coming from the valve body connections (where it joins the pipe), or from the valve itself (stem, handle, or body)?
- Check Valve Type: Examine the valve. Does it have visible screws, a removable handle, or a cartridge clip? If yes, it might be serviceable. If it’s a smooth, solid body, it is not.
- Make the Call:
- Leak at Pipe Connections: The press fitting may have failed. You likely need to cut out the valve and a small section of pipe.
- Leak from Valve Stem/Body on a Non-Serviceable Valve: You must cut and replace.
- Fault on a Serviceable Valve: Purchase the exact replacement cartridge or seal kit.
Here is a table to guide your decision:
| Valve Problem | Valve Type | Recommended Action |
|---|---|---|
| Leak at pipe connections (in/out) | Any 121UC Fitting | Cut and Replace. The press connection integrity is lost. |
| Valve won’t turn, leaks from stem | Solid-Body Ball Valve | Cut and Replace. The unit is not repairable. |
| Valve won’t turn, leaks from stem | Serviceable Cartridge Valve | Service In-Place. Replace the cartridge or stem seals. |
| Poor water flow (clog suspected) | Any Type | Try flushing first. If failed, Cut and Replace or Service cartridge. |
So, in most cases involving common press-fit ball valves, you will need to plan for a cut-and-replace operation. The following sections detail how to do that safely.
What is the Procedure for Safely Isolating and Depressurizing the Loop?
Skipping this step is dangerous. A pressurized line can cause injury and flood the area when cut.
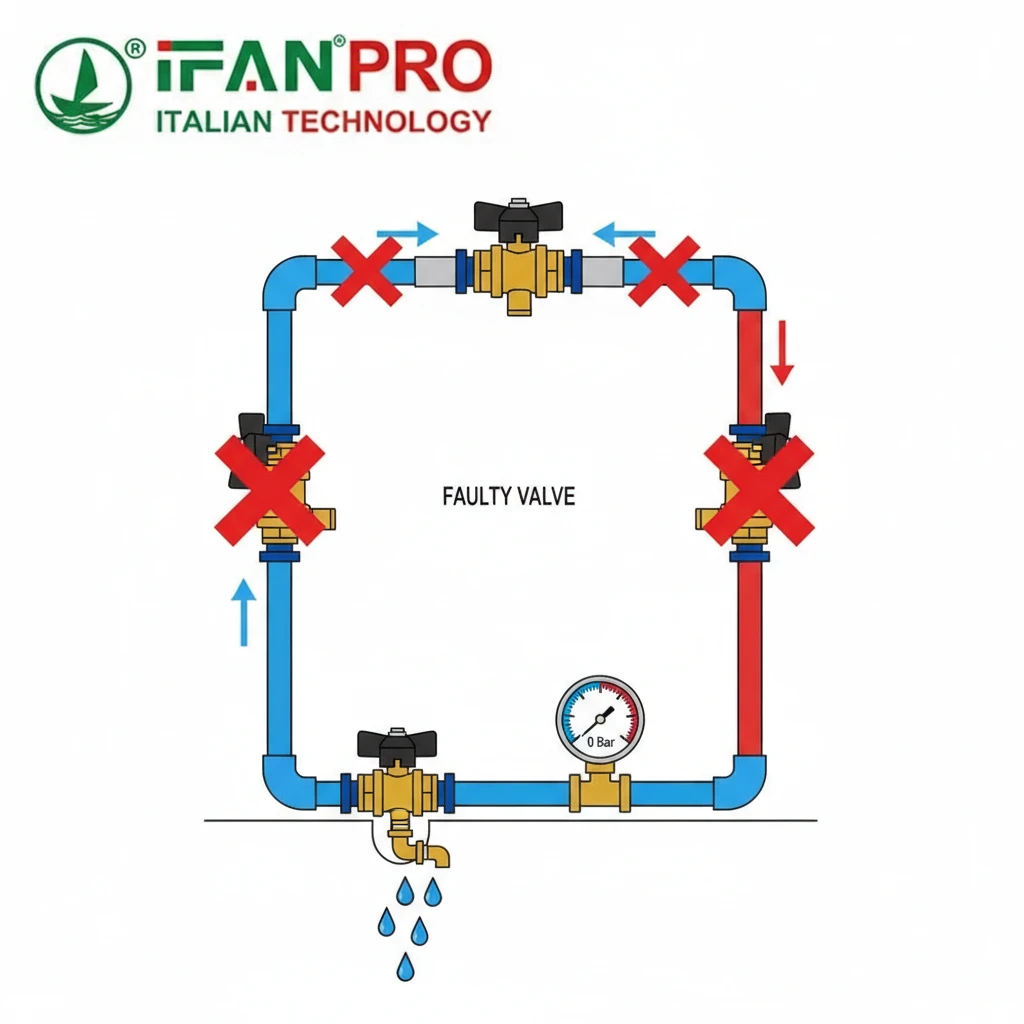
To safely isolate and depressurize the loop, first locate and close the main system shutoff valves upstream and downstream of the faulty valve. Then, open a drain port or faucet at the lowest point in the isolated section to release all water pressure. Finally, verify zero pressure by cautiously opening a relief valve or the drain valve on the faulty valve itself.
Step-by-Step Isolation and Depressurization
Safety is the absolute priority. Never assume the system is off. Follow these steps in order:
1. Locate Control Valves: Find the nearest isolation valves that control flow to the section containing your faulty 121UC valve. There should be one valve on the supply side (upstream) and one on the return side (downstream) of the loop. If these don’t exist, you must shut down the entire system at the main boiler or manifold.
2. Close the Isolation Valves: Turn the handles of these valves to the full closed position. Go slowly and do not force them. If an isolation valve is also faulty, you must address that first or shut down a larger system section.
3. Relieve System Pressure: Now, you need to drain the water from the isolated pipe section. Find a drain valve, a low-point vent, or the lowest faucet in that zone. Open it completely. Also, open a vent or faucet at a high point in the section to allow air in, which helps water drain out.
4. Confirm Zero Pressure: This is the critical verification step. After water stops flowing from the drain, place a bucket under the faulty valve. Use a screwdriver to slowly open the bleed screw on the valve (if it has one) or carefully prepare to open a connection. You should only get a trickle of residual water, not a pressurized stream. If there is still pressure, re-check that your isolation valves are fully closed and the system is properly vented.
Preparation Checklist Before Cutting
Before you pick up a tool, use this checklist:
- [ ] Main system isolation valves are CLOSED.
- [ ] Drain valve/faucet in the section is OPEN and water flow has STOPPED.
- [ ] Pressure is VERIFIED to be zero at the work site.
- [ ] Electricity to any nearby pumps or controls is LOCKED OUT/TAGGED OUT.
- [ ] A large bucket and towels are ready for residual water.
- [ ] The new replacement valve and parts are on-site and correct.
Only when all these boxes are checked should you proceed to disconnect the old valve.
How Do You Disconnect the Press or Crimp Fitting Without Damaging the Pipe?
Forcing a press fitting off can ruin a costly PEX-AL-PEX pipe. We use the right tool for a clean removal.
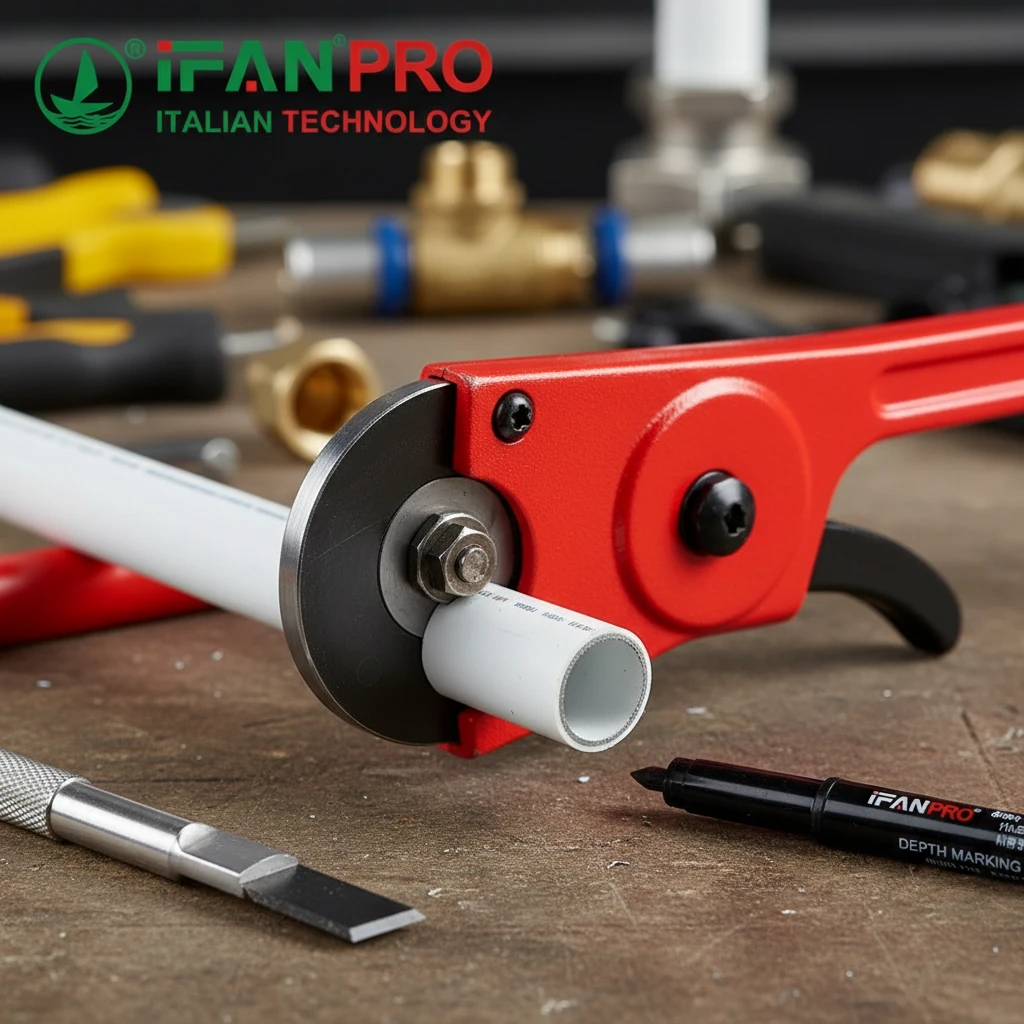
You cannot reuse a pressed 121UC fitting. Therefore, you must cut the pipe. To avoid damaging the pipe end you will reuse, use a pipe cutter (not a saw) to make a clean, square cut very close to the old valve’s shoulder. Then, use a deburring tool to perfectly clean and prepare the pipe end for the new press fitting, removing all remnants of the old sealing ring.
The Cutting Process: Precision is Key
The goal is to remove the old valve while leaving a perfect, undamaged pipe end. A crushed or angled pipe end will not seal with a new press fitting.
1. Choose the Right Cutter: Use a sharp, rotating pipe cutter designed for metal or composite pipe. Do not use a hacksaw or reciprocating saw, as they create uneven, ragged ends and can delaminate the PEX-AL-PEX layers.
2. Plan Your Cuts: You will make two cuts: one on each side of the faulty valve. Cut as close to the valve body as possible without touching it. This maximizes the length of usable pipe left in the system. Leave yourself about 2-3 cm (1 inch) of clean pipe protruding from any other nearby fittings.
3. Execute a Clean Cut: Place the cutter around the pipe and tighten it snugly. Rotate it around the pipe, tightening it slightly after each full rotation until the pipe separates. The cut should be smooth and perfectly perpendicular (90 degrees) to the pipe length.
Post-Cut Preparation: The Secret to a Good Seal
A clean cut is only half the job. The inside and outside of the pipe must be prepared.
1. Deburr the Inside Edge: The cutting process creates a small inward ridge (a burr) on the inside of the pipe. This burr restricts water flow and can damage the O-ring of the new fitting. Use a deburring tool to scrape this ridge away completely. The inner wall should be perfectly smooth.
2. Clean the Pipe Exterior: The outside of the pipe must be clean and free of scratches. Use a clean cloth and isopropyl alcohol to wipe the last few centimeters of the pipe. Remove any dirt, grease, or old adhesive. Important: Check the pipe for any deep scratches or compression marks from the old fitting. If the pipe is visibly damaged, you must cut it back further to a pristine section.
3. Measure and Mark Insertion Depth: Every press fitting has a required insertion depth. Use the manufacturer’s go/no-go gauge or a depth marker to draw a clear line on the pipe. This line shows you how far to push the pipe into the new valve. Pushing it in too far or not far enough will cause a leak when pressed.
What Steps Ensure the New Valve Reinstalls with Full System Integrity?
A rushed reinstallation leads to callbacks and leaks. We follow a strict protocol to guarantee a perfect result.
To ensure full integrity, first verify the new valve and fitting match the old specs. Then, insert the pipe to the correct depth mark, use a calibrated press tool with the correct jaw size to crimp the fitting, and finally, conduct a thorough pressure test of the entire repaired section before reopening the system to service.
The Installation and Pressing Procedure
This is where your preparation pays off. Follow these steps methodically.
1. Component Verification: Before touching the pipe, confirm the new 121UC valve is the correct size (e.g., 20mm, 25mm), material (brass or stainless), and pressure rating for your system. Also, ensure you have the correct stainless steel press sleeve (if not pre-attached) and a compatible O-ring.
2. Fitting Assembly: Slide the press sleeve onto the prepared pipe end first, if it’s separate. Apply a drop of lubricant recommended by the fitting manufacturer (often just clean water) to the pipe end and the fitting’s O-ring. This helps the pipe slide in smoothly without displacing or rolling the O-ring.
3. Insertion and Alignment: Push the pipe firmly into the valve socket until it bottoms out against the internal stop. Your previously marked depth line should now be visible right at the edge of the fitting socket. Visually check that the pipe is straight and not angled in the fitting. Repeat for the other side of the valve.
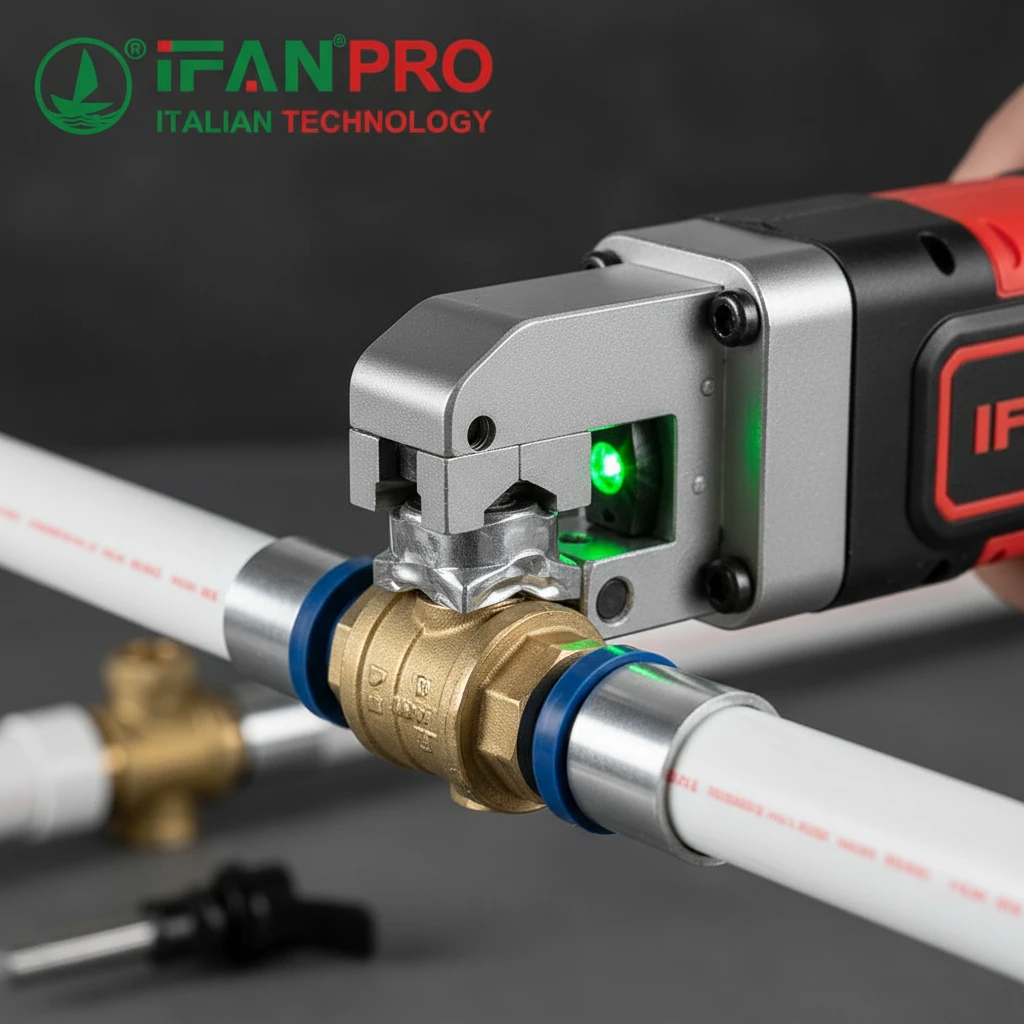
4. The Pressing Operation: This is the most critical step. Use a calibrated, battery-powered press tool.
- Select the correct jaw size for your pipe and fitting diameter (e.g., 20mm jaws for a 20mm fitting).
- Position the jaws squarely over the press indentation on the fitting sleeve. The tool must be perpendicular to the pipe.
- Activate the tool. It will apply uniform, tremendous pressure, crimping the sleeve onto the pipe and creating a permanent, metal-to-metal seal. You will hear a click or see the tool cycle to completion.
- Important: You must press both sides of the new valve before moving anything.
Final Verification: Testing the Repair
Do not skip the test. It is your guarantee of quality.
1. Close the New Valve: Ensure the handle of your new 121UC valve is in the closed position.
2. Re-Pressurize the Isolated Section: Slowly open the main isolation valves you closed earlier. Allow the isolated section to fill with water and come up to system pressure. Watch the new valve and connections closely for any immediate weeping.
3. Perform a Formal Pressure Test: As described in the previous article, the best practice is to isolate the section again and perform a static pressure test at 1.5x normal operating pressure for at least 30 minutes. Monitor the pressure gauge for any drop.
4. Final Inspection and Cleanup: After passing the pressure test, open the new valve to restore flow. Check for leaks one final time. Insulate the pipe if required and secure it with clips.
Tool and Material Checklist for Reinstallation
| Item | Purpose | Critical Note |
|---|---|---|
| Calibrated Press Tool | To crimp the new fitting | Must have correct, undamaged jaws for your pipe size. |
| Deburring Tool | To prepare pipe end after cutting | Ensures a smooth interior for O-ring seal. |
| Pipe Cutter | To remove old valve cleanly | Must be sharp for a square cut. |
| Isopropyl Alcohol & Cloth | To clean pipe exterior | Removes contaminants for better seal. |
| Depth Gauge / Marker | To mark pipe insertion depth | Prevents under- or over-insertion. |
| Pressure Test Gauge & Pump | To verify system integrity | The only way to confirm a leak-free repair. |
Conclusión
Replacing a 121UC valve requires careful isolation, clean cutting, and a precise press connection. For a reliable repair, use certified components like IFAN’s 121UC press valves and professional press tools.


Comentarios recientes