
I once saw a plumbing system fail because a cross fitting was installed in the wrong order. The resulting leak and misalignment caused days of rework. This guide will help you avoid that.
To install a brass cross fitting, first plan your pipe layout and dry-fit all components. Begin by securing the main flow line, then connect the two opposite side ports, and finally attach the last open port. Always use proper thread sealant and tighten connections incrementally in a crisscross pattern to ensure alignment and prevent leaks.
Following the correct procedure is crucial for a leak-free and reliable four-way connection. Let’s break down each critical step.
What is the Proper Sequence for Connecting Pipes to a Brass Cross Fitting?
A random installation sequence is a common mistake. It often leads to misalignment and impossible-to-tighten connections.
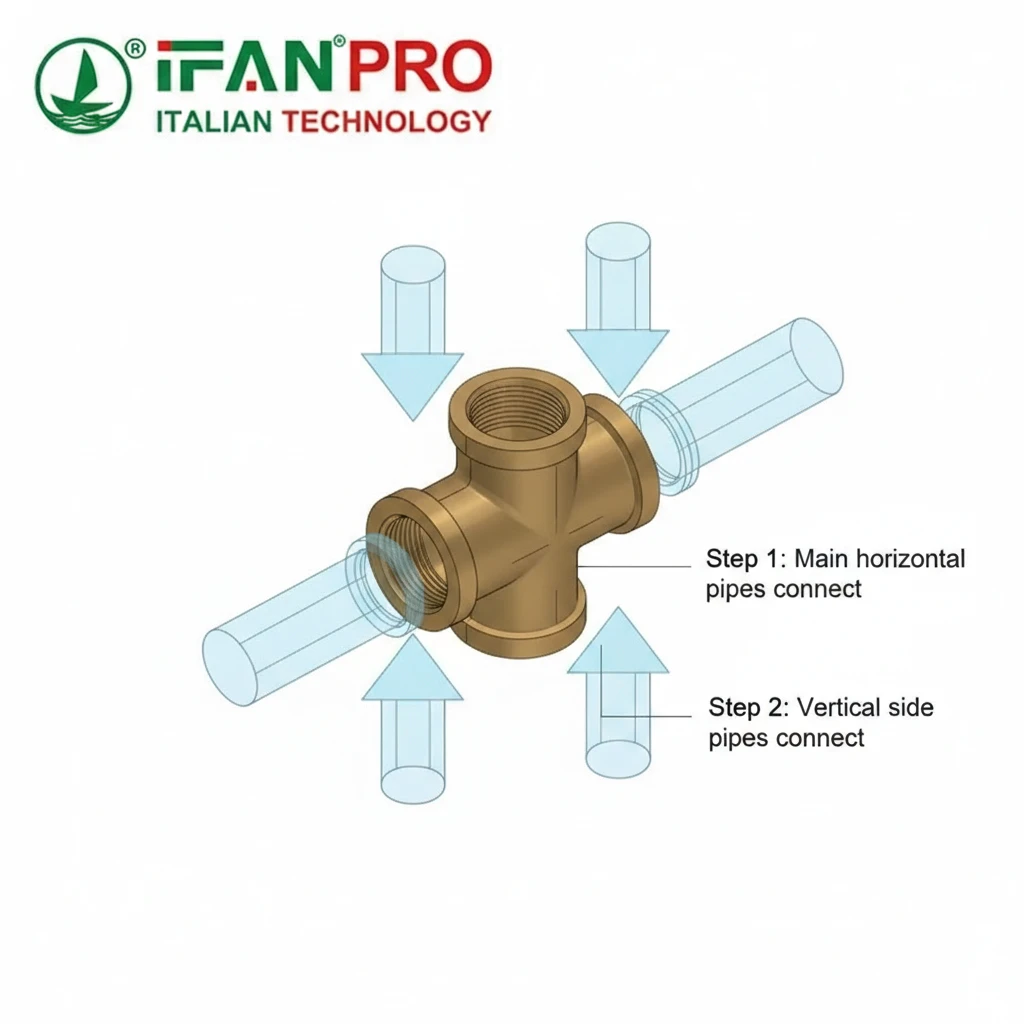
The proper sequence is to first install the fitting onto the two pipes forming the main through line. Next, connect the two opposite side branch pipes. Finally, connect the last remaining pipe to the open port. This method provides stability and allows for precise alignment of all four connections.
Why Sequence Matters
Installing a cross fitting is not like connecting a series of couplings. You are dealing with four connection points that must align in three dimensions. Starting in the wrong place can leave you with a fitting that is twisted or with ports that point in the wrong direction. The pipe ends will not seat properly into the fitting, causing stress and guaranteed leaks.
The recommended sequence works because it builds a stable foundation. Think of the main through line as the backbone of your connection.
Step-by-Step Installation Process
Here is the detailed process based on industry best practices:
- Dry-Fit and Mark: Before applying any sealant, loosely thread all pipes into the cross fitting. Check for alignment. Mark the orientation of the fitting and the depth of thread engagement on each pipe with a marker. This is your blueprint. Then, disassemble everything.
- Secure the Main Line: Identify the two ports that form the primary continuous flow path. Apply your chosen thread sealant (tape or compound) to the male threads of the first pipe. Screw it into the cross fitting by hand until it is finger-tight, aligning it according to your marks.
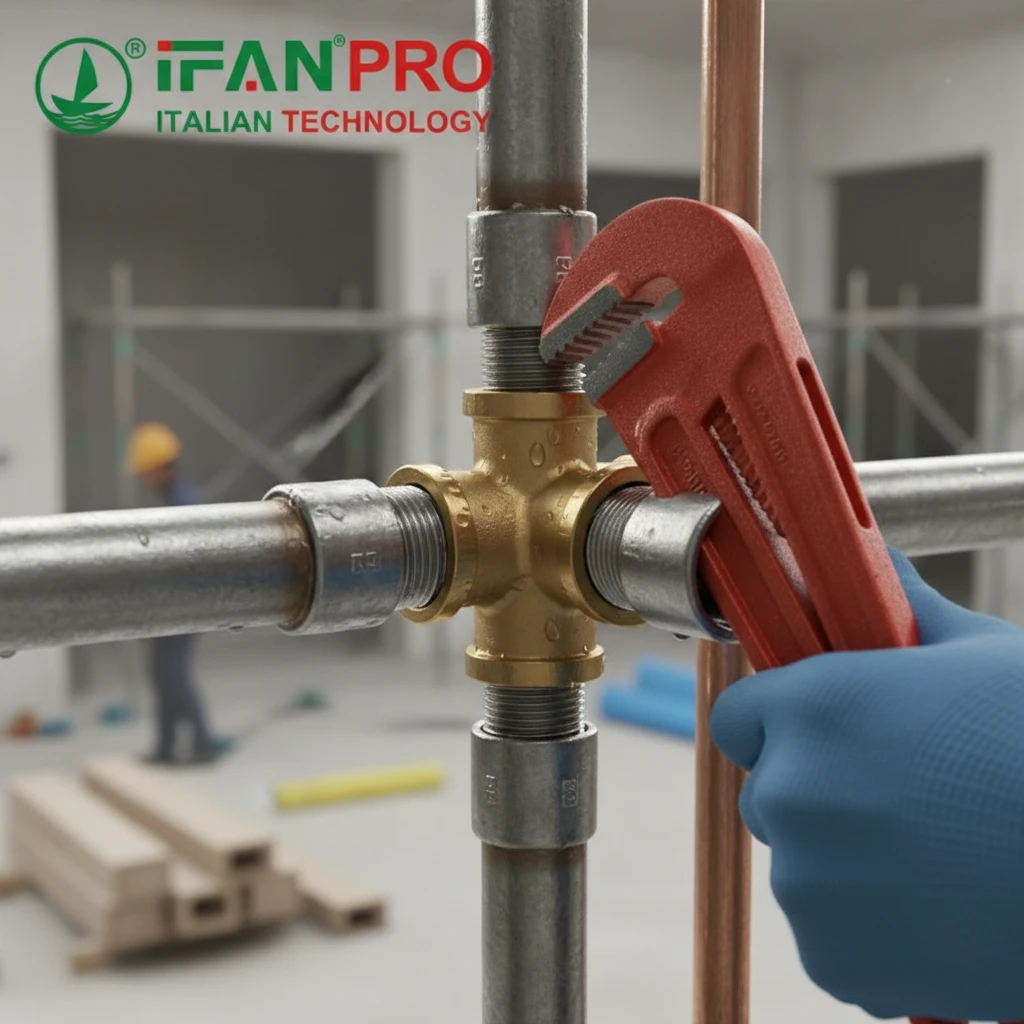
- Anchor the Fitting: Before tightening the first pipe, you must now hold the cross fitting steady. Use a second strap wrench or a suitable tool to grip the body of the cross fitting. This prevents it from spinning when you tighten the pipe connections. Tighten the first pipe to the fitting using pipe wrenches, following the “one wrench holds, one wrench turns” rule.
- Complete the Main Line: Apply sealant to the second pipe of the main line and connect it to the opposite port of the cross. Tighten it securely. You now have a stable “T” shape.
- Connect the Side Branches: Apply sealant to one of the side branch pipes. Connect it to an open port. Tighten it. Then, repeat for the final, opposite side branch pipe. Working on opposite sides helps maintain balance.
Common Pitfalls and the Correct Order
The table below contrasts a wrong approach with the right one.
| Step | Wrong Sequence (Leads to Problems) | Correct Sequence (Ensures Stability) |
|---|---|---|
| 1 | Connect all pipes loosely and try to tighten randomly. | Dry-fit, mark, then disassemble. |
| 2 | Start with a side branch pipe. | First, secure the two main through-line pipes. |
| 3 | Tighten one connection fully before starting others. | Hand-tighten all connections first, then tighten incrementally in a pattern. |
| 4 | Let the fitting spin freely while tightening pipes. | Always use a backup wrench to hold the fitting body. |
Following this logical sequence transforms a tricky 3D puzzle into a straightforward, reliable installation.
How Do You Ensure All Four Ports Align Correctly During Installation?
Misaligned ports force pipes to bend, creating stress. This stress leads to leaks at the threads or even pipe fatigue over time.
You ensure correct alignment by dry-fitting all components first and marking their positions. During final assembly, tighten all connections slowly and evenly using a crisscross pattern, similar to tightening a car tire’s lug nuts. Always use a second wrench to hold the fitting body stationary and prevent it from rotating.
The Critical Role of Dry-Fitting
Never skip the dry-fit. This is your most important step for perfect alignment. Screw all pipes into the cross fitting by hand without sealant. Position the entire assembly exactly as it needs to be in the final system. Once everything is oriented correctly, use a permanent marker to draw alignment lines across each pipe-to-fitting joint. Also, mark how many threads are visible to ensure consistent engagement depth. These marks are your guide during the sealed assembly.
Tightening Technique for Perfect Alignment
Even with marks, poor tightening technique can pull things out of alignment. You must tighten the connections in a way that applies pressure evenly around the fitting.
- Hand-Tighten First: After applying sealant, screw every pipe into the fitting by hand until it reaches your alignment mark. Do this for all four ports before reaching for a wrench.
- Use a Crisscross Pattern: Do not fully tighten one pipe and then move to the next. Instead, use your wrenches to give each connection a quarter- or half-turn in a star pattern. Go to the opposite port next, then to the other pair. This gradually pulls the fitting into position without straining any single connection.
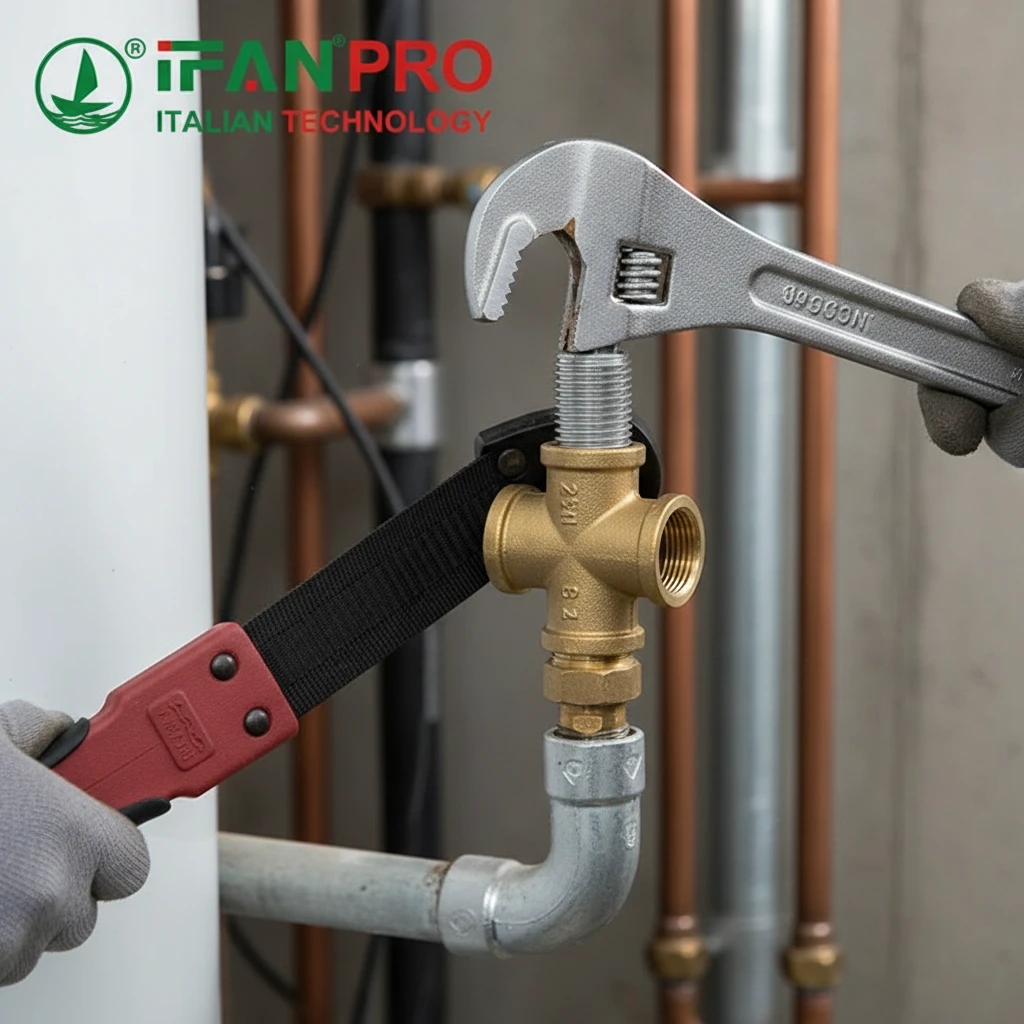
- The Backup Wrench is Essential: A common cause of misalignment is the fitting itself spinning. You must immobilize it. After hand-tightening the first pipe, clamp a strap wrench onto the body of the cross fitting. This backup wrench absorbs the torque as you tighten the pipe connections, keeping the fitting’s orientation locked in place.
Tools and Their Purpose for Alignment
Using the right tools makes alignment achievable.
| Tool | Purpose in Alignment | Consejo |
|---|---|---|
| Permanent Marker | To draw alignment and depth marks during dry-fit. | Make bold, clear lines across the joint. |
| Strap Wrench | To hold the cross fitting body without damaging it. | Use one with a non-slip strap and a sturdy handle. |
| Two Pipe Wrenches | To tighten connections (one to hold, one to turn). | Position them so they pull towards each other for better control. |
| Level / Visual Check | To verify the final assembly is not twisted. | Check that side branches are level with each other. |
By combining careful planning (dry-fitting), precise execution (crisscross tightening), and the right tool use (backup wrench), you guarantee that all four ports will align perfectly, resulting in a professional, stress-free installation.
Which Sealing Methods Are Recommended for Threaded Brass Cross Connections?
Choosing the wrong sealant is a major pain point. I’ve seen both paste and tape fail when used incorrectly for a multi-port fitting.
For threaded brass cross connections, both high-quality PTFE thread seal tape and a non-hardening pipe thread compound (paste) are recommended. For high-vibration or hot water lines, a paste sealant is often more reliable. The key is to apply the chosen sealant correctly, covering all male threads but keeping it away from the first two threads to prevent contamination of the pipe system.
Understanding the Two Main Sealant Types
Threads on pipes and fittings are not perfectly tight. Sealants fill these microscopic gaps to create a watertight and pressure-tight seal. For brass-to-brass connections, you have two excellent choices, each with pros and cons.
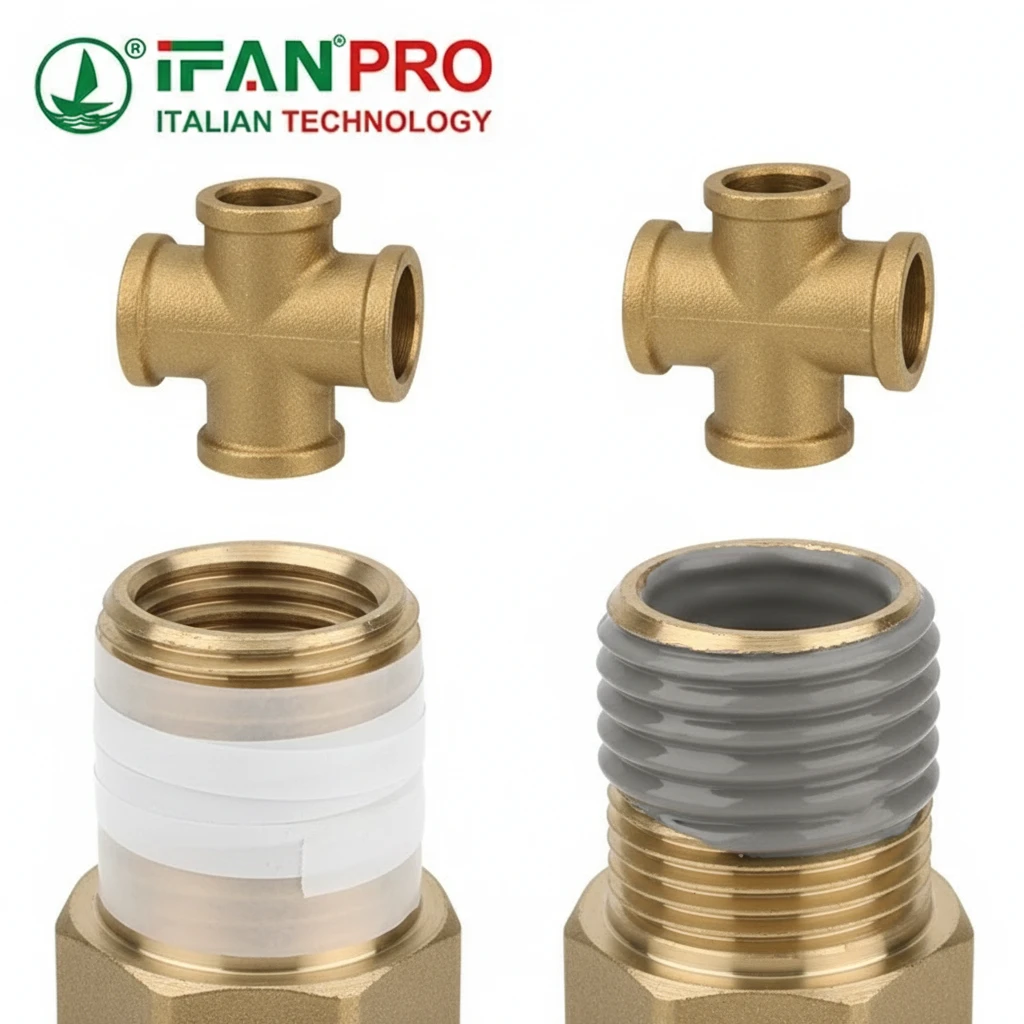
PTFE Thread Seal Tape (Plumber’s Tape):
- What it is: A thin, white tape made of polytetrafluoroethylene.
- Best for: Beginners, low-pressure applications, and situations where you may need to adjust the fitting later. It makes disassembly cleaner.
- How to apply: Wrap the tape clockwise around the male threads (as you look at the end of the pipe). Do 3-4 wraps for standard pipes. Keep the tape tight and smooth. It should not bunch up. Never let tape overhang the first thread, as it can shred and enter your water lines.
Pipe Thread Compound (Paste/Dope):
- What it is: A thick, brush-on or squeeze-tube paste.
- Best for: Professional installations, high-pressure systems, hot water lines, and areas with vibration. It provides a more complete fill of thread imperfections.
- How to apply: Use a brush or your finger (with a glove) to apply a uniform, moderate coat over all the male threads. Again, avoid the first two threads at the pipe end. A common mistake is using too much, which can cause it to squeeze into the pipe.
Direct Comparison and Recommendations
The table below helps you choose the right sealant for your job.
| Feature | PTFE Tape | Thread Compound (Paste) |
|---|---|---|
| Ease of Use | Very easy, clean. | Can be messy; requires a brush or applicator. |
| Adjustability | Good; allows for slight turns after initial tightening. | Poor; paste sets and can make future disassembly harder. |
| Vibration Resistance | Fair. Can loosen over time if not tightly wrapped. | Excellent. Fills gaps completely and stays pliable. |
| Pressure Handling | Good for standard residential pressure. | Best for high-pressure systems. |
| Risk of Pipe Contamination | Low, if applied correctly. | Moderate; must be careful to avoid the first threads. |
Critical Application Rules for Cross Fittings
For a complex fitting like a cross, these rules are non-negotiable:
- Consistency is Key: Use the same sealant type on all four connections of the cross. Do not mix tape on one side and paste on another.
- Avoid First Threads: Whether using tape or paste, never let the sealant cover the first two threads at the very end of the male pipe. This prevents shreds or globs of sealant from breaking off and flowing into your pipes, where they can clog valves or fixtures.
- Apply to Male Threads Only: Always apply the sealant to the external (male) threads of the pipe, not the internal (female) threads of the fitting. This ensures the sealant is pushed into the threads correctly as you tighten.
For the most dependable seal in a critical four-way connection, many professionals, including the IFAN team, prefer a high-quality, non-hardening pipe thread compound. Its ability to fully fill threads and resist vibration makes it ideal for ensuring a lasting seal on all four ports.
How Do You Pressure Test a Newly Installed Four-Way Brass Cross Fitting?
Skipping a pressure test is like driving a new car without checking the brakes. A failure after the walls are closed up is catastrophic and expensive.
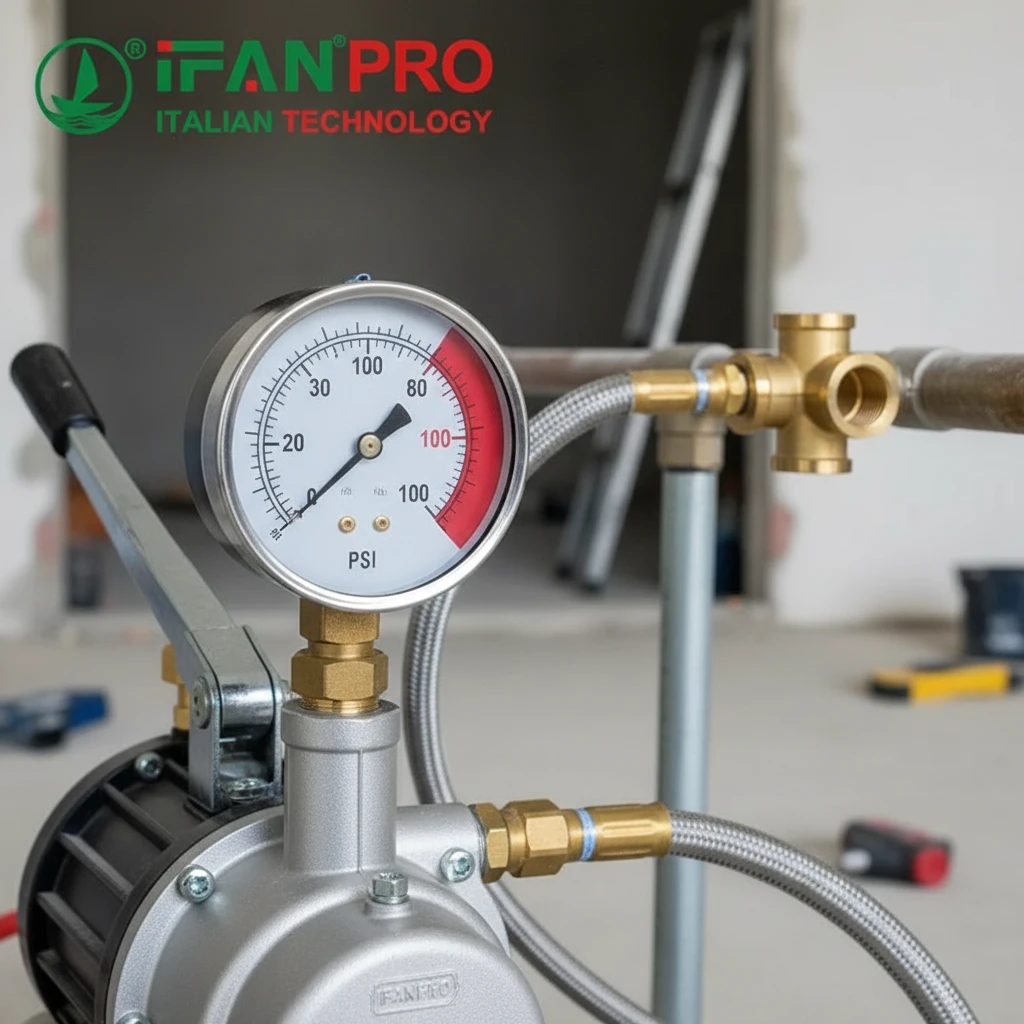
To pressure test the fitting, isolate the section containing the cross, fill it with water, and connect a pressure test pump. Raise the pressure to 1.5 times the system’s normal operating pressure (e.g., 100 PSI for a 65 PSI system) and hold it for a minimum of 15-20 minutes. Inspect all four connections and the fitting body for any drops in pressure or visible weeping.
Why a Pressure Test is Non-Negotiable
A visual check is not enough. Threaded connections can seem tight but have micro-leaks only revealed under sustained pressure. A pressure test simulates the stress of daily operation and thermal cycling (hot water expansion). It is the only way to confirm the integrity of your work before declaring the job complete. For a cross fitting—a central hub with four potential failure points—this test is especially critical.
Step-by-Step Testing Procedure
Follow this methodical approach for a reliable test:
- Isolate the Section: Close any shut-off valves upstream and downstream of your newly installed cross fitting. If valves are not present, you may need to use pipe caps or test plugs to isolate the specific section of pipe containing the cross.
- Install Test Points: At a convenient low point in the isolated section, install a drain valve or a connection for a hose. At a high point, you need a connection for your pressure gauge and pump. Specialized test tees with gauge ports are often used by professionals.
- Fill with Water: Connect a hose to the low point and fill the entire isolated pipe section with water. It is essential to remove all air from the system, as air compresses and will give false pressure readings. Let the water run until it flows steadily from the high-point vent.
- Connect the Pump and Gauge: Attach a hand-operated pressure test pump to the high-point connection. Ensure the pump has an accurate pressure gauge. Close the high-point vent.
- Pressurize the System: Slowly pump to raise the pressure. The standard test pressure is 1.5 times the design working pressure of the system. For a typical home system (operating at 50-80 PSI), testing to 100-120 PSI is common. Check your local codes for exact requirements.
- Hold and Observe: Once the target pressure is reached, stop pumping and close the valve to the pump. Start your timer. You must observe the pressure gauge for a minimum of 15-20 minutes. There should be zero pressure drop. Even a small, steady decline indicates a leak.
- Inspect Visually: While the system is under pressure, carefully inspect every connection on the cross fitting. Look for any tiny beads of water (weeping). Use a dry paper towel to wipe each joint; a damp spot will appear if there’s a slow leak.
Interpreting Test Results and Next Steps
The table below guides you on what the test results mean.
| Observation During Test | What It Likely Means | Required Action |
|---|---|---|
| Pressure holds steady for 20+ minutes. | Success. The installation is sound and leak-free. | Safely depressurize, drain the test water, and put the system into service. |
| Pressure drops slowly but steadily. | A small leak is present at one of the threaded joints or the fitting itself. | Depressurize, dry all connections thoroughly, re-tighten the joints slightly (avoid over-tightening), and repeat the test. |
| Pressure drops rapidly. | A significant leak is present. | Depressurize immediately. Inspect for an obvious burst or open connection. Check that all caps/plugs are secure. Likely, a joint needs to be taken apart, re-sealed, and re-tightened. |
Always depressurize the system completely before attempting to tighten or repair any connection. A proper pressure test gives you absolute confidence that your brass cross fitting installation is secure and ready for decades of reliable service.
Conclusión
Installing a brass cross fitting correctly requires careful sequencing, precise alignment, proper sealing, and a final pressure test. For consistently high-quality brass fittings that make professional installation easier, source your components from IFAN.


Comentarios recientes