
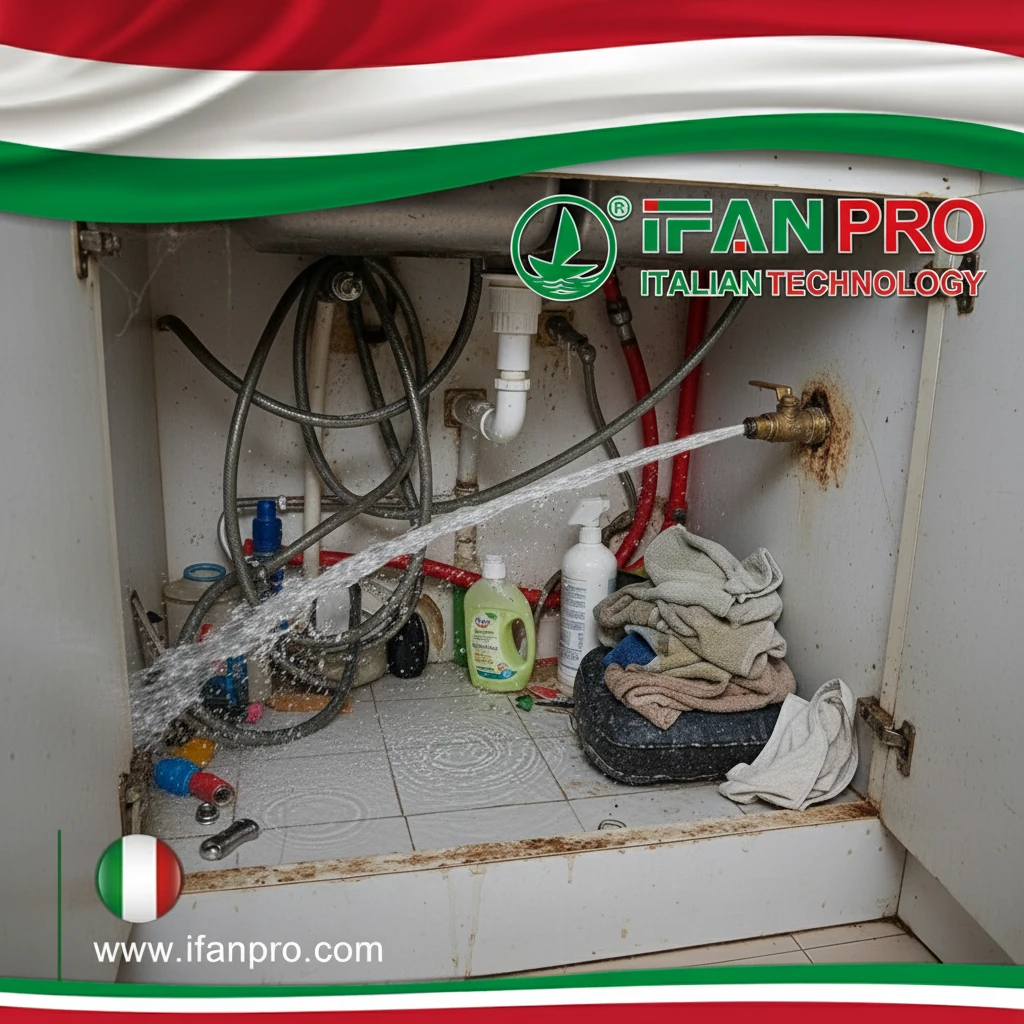
I once got a panicked call from a homeowner with water spraying from a pipe joint. The so-called “glued” PEX connection had failed completely, flooding a utility closet.
To handle a PEX pipe glue break, you must immediately stop the water flow, identify the exact leak point, and replace the faulty section using proper PEX crimp or clamp rings—not glue. True PEX systems are designed for mechanical connections, and “glue breaks” usually mean an incorrect fitting or installation method was used.
This guide will walk you through the exact steps, from crisis control to a lasting repair, and show you how to prevent it from happening again.
How Do You Identify the Exact Location of a PEX Pipe Glue Break?
A small drip can cause major damage. Pinpointing the exact source is your first and most critical job.
You identify a PEX glue break by first looking for visible water spray, drips, or pooling, then thoroughly drying and feeling along the pipe and fitting for moisture. Listen for a faint hissing sound. The leak is almost always at the connection point (the fitting), not along the pipe wall itself.
Start with a Visual and Physical Inspection
A leak might seem obvious, but water can travel along the pipe before dripping, fooling you about its true origin. First, turn off any water source to the area if you can. Then, grab a towel and dry the entire pipe run and all the fittings near the wet area.
Once dry, turn the water back on for a moment. Watch closely. Look for a fine spray or a steady drip. Run your fingers along the pipe and around the collar of every fitting. You are feeling for the coolness of seeping water. The exact spot will feel damp. Remember, PEX pipe itself rarely fails; the problem is almost always where it connects to a fitting.
Advanced Methods for Tricky Leaks
Sometimes, a leak is inside a wall or is very small. For these cases, you need a more careful approach.
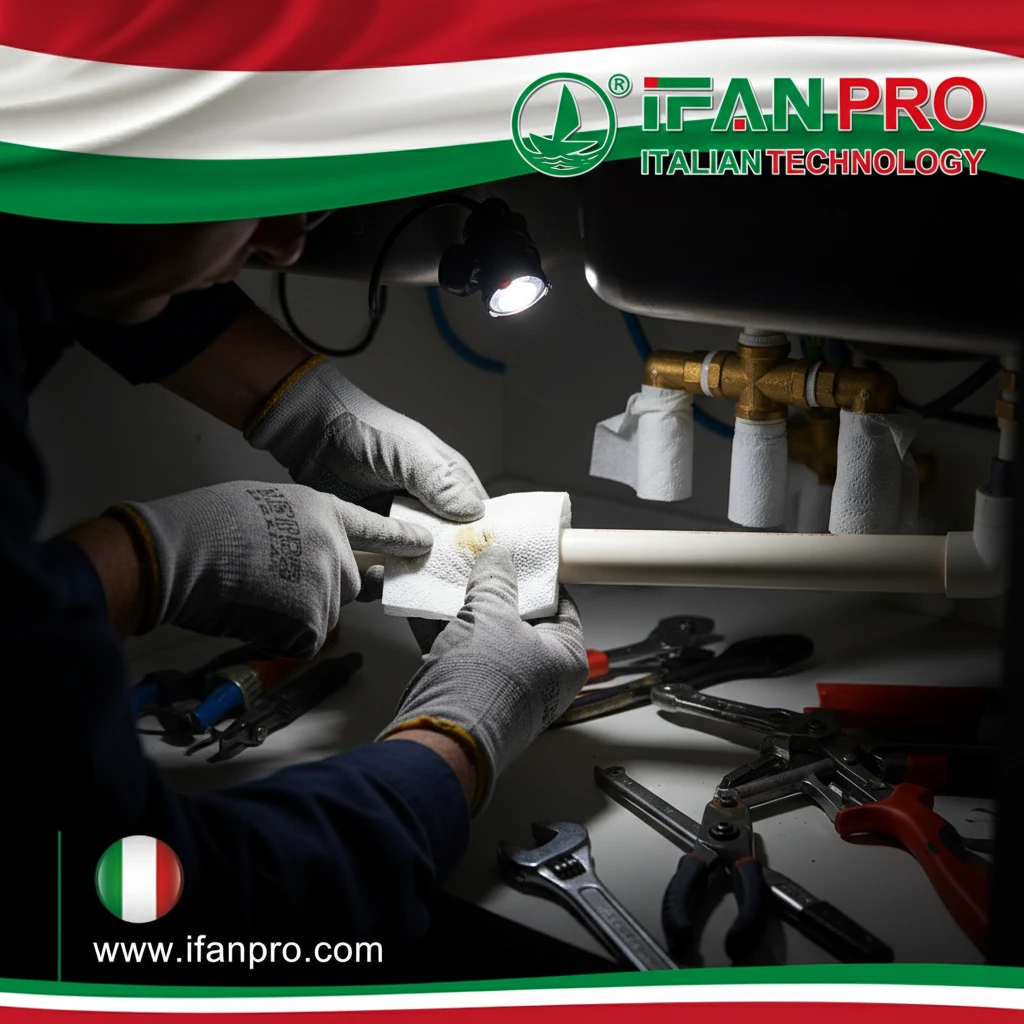
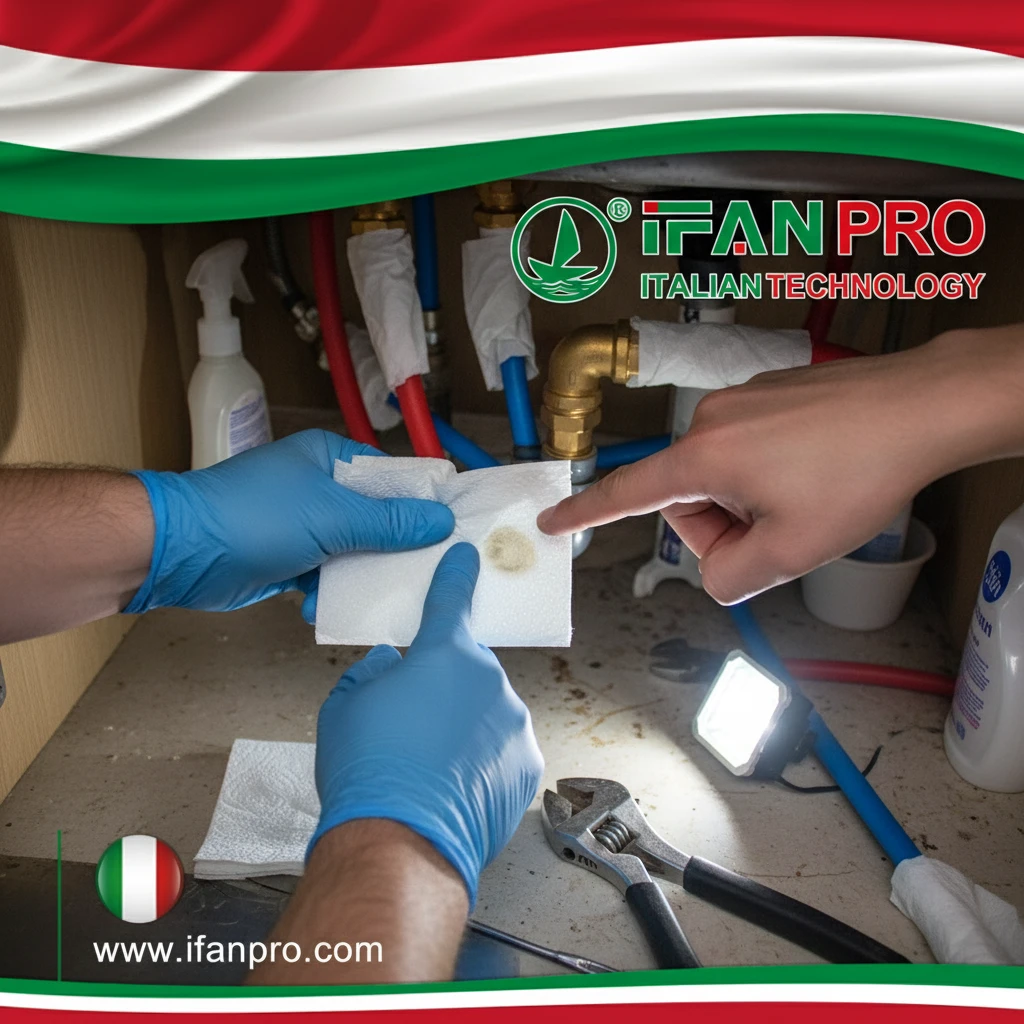
1. The Paper Towel Test: This is a simple and effective trick. After drying the pipes, wrap each fitting separately with a piece of plain, dry paper towel. Turn the water on briefly. Check which paper towel gets wet first. The towel will pinpoint the exact leaking fitting.
2. Listening Carefully: In a quiet room, listen near the suspected fittings. A small leak often makes a faint hissing or spraying sound. This can guide your eyes to the right spot.
3. Checking the Fitting Type: This is a key diagnostic step. Look at the fitting that is leaking.
- Is it a plastic fitting that looks like it was glued? This is the problem. PEX should not be glued. These glued joints are unreliable and will fail.
- Is it a metal (brass) or plastic fitting with a metal ring clamped around the pipe? This is a correct PEX connection. If it’s leaking, the ring may not have been installed properly (too loose, crooked, or over-crimped).
Common Leak Locations Table
Use this table to guide your search.
| Likely Leak Location | What to Look For | Probable Cause |
|---|---|---|
| End of a plastic fitting | Water seeping from where the pipe enters the fitting. | An incorrect glued joint or a missing/loose clamp ring. |
| Under a crimp/clamp ring | Water dripping from under the metal ring. | A poorly installed ring (wrong tool, not tight enough). |
| Side of a fitting | A crack or split in a plastic fitting body. | Use of a non-PEX fitting (like PVC) or a defective part. |
| Along the PEX pipe | A pinhole spray or split in the pipe itself. | Very rare. Could be from physical damage (nail, rodent) or extreme UV exposure. |
Once you find the exact source, you know what you need to fix. Do not try to patch or re-glue it. The only real fix is a complete replacement of the faulty connection.
What Are the Immediate Steps to Take When a PEX Pipe Connection Leaks?
Speed and calm action prevent a small leak from becoming a disaster. Here’s your emergency plan.
When a PEX connection leaks, immediately shut off the main water supply to your house to stop the flow. Then, open a faucet at a lower level to drain pressure from the system. This gives you a dry, safe workspace to assess the damage and plan the repair.
Step-by-Step Emergency Response
Your first goal is to stop the water. Do not waste time looking for tools. Follow these steps in order:
1. Find and Turn Off the Main Water Valve. Every homeowner should know where this is. It is usually where the main water line enters your house, often in the basement, garage, or near your water heater. Turn the valve clockwise until it stops. This cuts off all water to your home.
2. Drain the Pressure. Now, go to the lowest faucet in your house (like a basement sink or an outside hose bib). Open the cold water tap. This lets the remaining water in the pipes drain out, which relieves pressure. This step is important because it stops any lingering drips and makes the pipe safe to work on.
3. Contain the Water. Place buckets under the leak and use old towels or a wet/dry vacuum to clean up standing water. Water damages floors, walls, and ceilings quickly, so soak up as much as you can.
4. Call for Help if Needed. If the leak is large, has caused electrical hazards, or is inside a complex wall, call a professional plumber immediately. Tell them you have shut off the main water. This information helps them prepare.
What NOT to Do
In a panic, people make mistakes. Avoid these common errors:
- Do Not try to tighten a crimp ring with pliers. You will likely damage it more.
- Do Not wrap the leak with duct tape or use a “pipe repair clamp” meant for metal pipes. These are temporary fixes at best and will fail under pressure.
- Do Not ignore the leak and just place a bucket. The constant moisture can lead to mold and structural damage.
- Do Not attempt to solder or glue the PEX joint. It will not work and is dangerous.
By acting quickly and correctly, you control the situation. Once the water is off and the area is dry, you can move on to the permanent repair without rushing.
What Is the Correct Method to Repair a Broken PEX Pipe Glue Joint?
A glued joint is a faulty joint. The correct repair means removing it and doing it the right way with a mechanical connection.
The correct repair method is to cut out the section of pipe with the glued fitting. Then, install a new, proper PEX fitting (brass or poly-alloy) using a mechanical connection like a copper crimp ring, stainless steel clamp, or push-to-connect fitting, secured with the correct tool for that method.
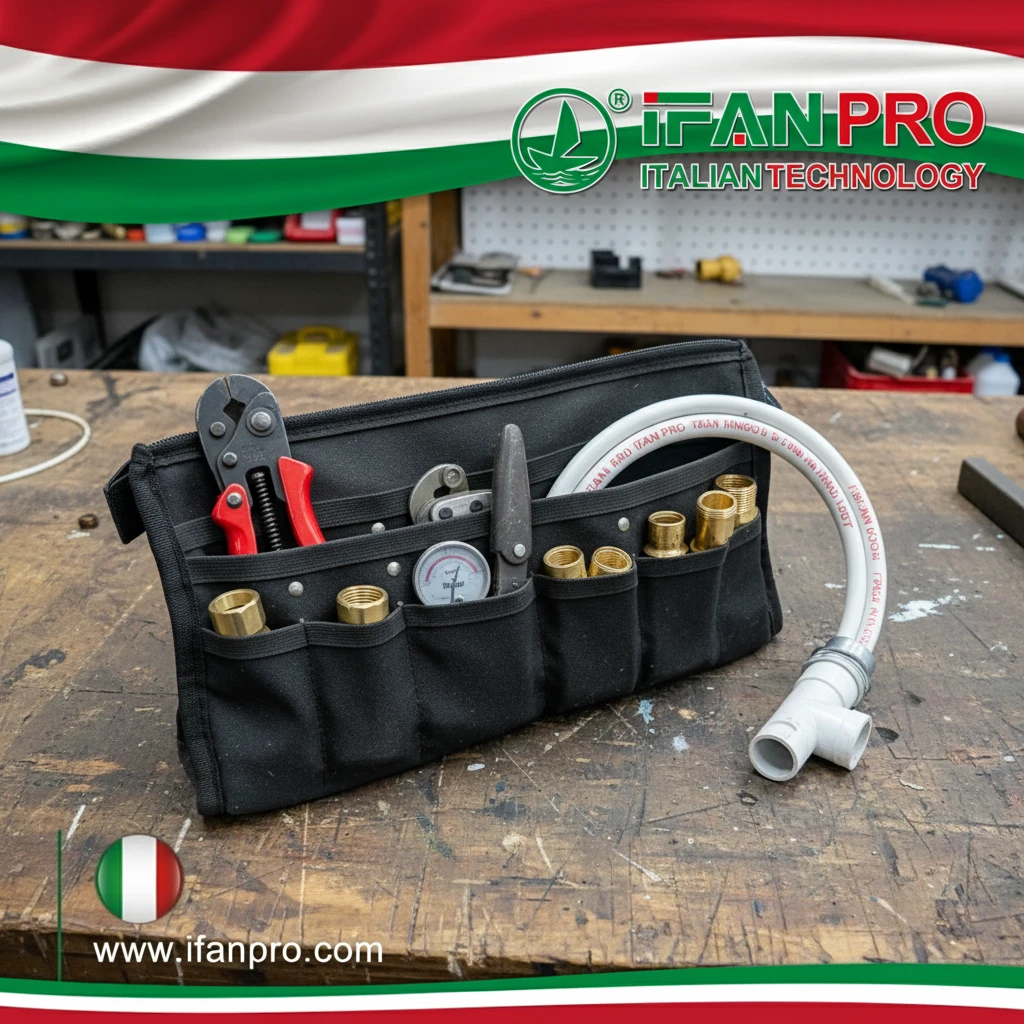
Gather the Right Tools and Parts
First, you need the correct supplies. Using the wrong parts is what caused the problem in the first place.
- PEX Pipe Cutter: This gives a clean, square cut. Do not use a regular saw.
- New PEX Fitting: Use a brass or certified plastic PEX fitting. Do not use a PVC fitting meant for glue.
- New Connection Rings: You need either copper crimp rings or stainless steel cinch clamps. Choose one type.
- The Proper Tool: For copper rings, you need a PEX crimp tool. For stainless clamps, you need a PEX cinch tool. They are not the same.
- Two Slip Couplings: You will need these to reconnect the new section.
The Repair Process in Detail
Follow these steps carefully for a leak-proof, permanent repair.
1. Cut Out the Bad Section. Use your PEX cutter. Cut the pipe on both sides of the failed glued fitting. Remove that whole piece. Make sure your new cuts are straight and clean.
2. Prepare the New Pipe Section. Measure the gap. Cut a new piece of PEX pipe to fit. It should be long enough to reach the existing pipes with a little room to work.
3. Install the New Fitting.
- Slide a copper crimp ring onto each end of the existing pipes.
- Push the new fitting into one end of the existing pipe as far as it will go.
- Slide the crimp ring back so it is about 1/8 inch from the end of the pipe, centered over the fitting.
- Use your PEX crimp tool. Place the jaws over the ring and squeeze the tool handles firmly until they close completely. You will hear a click or feel a solid stop. This creates a perfect, uniform crimp.
- Repeat the process on the other side with the new piece of pipe.
4. Check Your Work. A proper crimp will be even and circular. Use a go/no-go gauge (a small, cheap tool) to check the crimp ring. If the gauge fits, the crimp is correct. This is a crucial quality control step.
Comparison of PEX Connection Methods
Here are the two main correct ways to connect PEX.
| Method | Tool Needed | How it Works | Best For |
|---|---|---|---|
| Copper Crimp Ring | PEX Crimp Tool | A copper ring is compressed around the pipe and fitting. | Most common DIY and pro method. Very reliable. |
| Stainless Steel Clamp | PEX Cinch Tool (or special pliers) | A stainless steel band is tightened with a special tool. | Often considered slightly easier for beginners to verify. |
Once the new connections are made and checked, you can turn the water back on slowly. Check the repair for leaks. If you used the right parts and tools correctly, it will be dry and secure for decades.
How Can You Prevent Future Glue Breaks in Your PEX Plumbing System?
Prevention is always better than repair. A reliable PEX system depends on using the right materials and methods from the start.
You can prevent future glue breaks by never using glue on PEX pipes. Only use fittings and connection systems designed specifically for PEX. Ensure installations are done with the proper tool for the ring type (crimp or clamp), and always support pipes properly to avoid stress on the joints.

Use the Correct Materials
This is the most important rule. PEX pipes and fittings are designed for a mechanical connection, not a chemical (glue) bond. The glue cannot properly adhere to the PEX material, leading to a weak joint that will fail under pressure.
- Buy from Reputable Brands: Use PEX pipes, fittings, and rings from known, certified manufacturers like IFAN. Their products are tested to meet high standards for pressure and durability.
- Match the System: Stick to one type of connection system. If you start with copper crimp rings, use copper crimp rings and the correct crimp tool for all connections. Do not mix parts from different systems.
Ensure Proper Installation Technique
Even with the right parts, poor installation causes failures.
1. Use the Designated Tool. Do not try to crimp a ring with regular pliers or a clamp with a screwdriver. You will not get even pressure, which leads to leaks. Invest in the correct, calibrated tool for your chosen method.
2. Support the Pipes. PEX pipe should be secured with pipe hangers or straps every 32 inches on horizontal runs. If the pipe sags or moves, it puts bending stress on the fittings, which can slowly pull them loose over time.
3. Avoid Kinks and Sharp Bends. When bending PEX, do it gently. Use a bend support or a 90-degree elbow fitting for tight turns. A sharp kink weakens the pipe and affects water flow.
Maintenance and Environmental Checks
Sometimes, external factors cause issues.
- Protect from UV Light: PEX pipe should not be exposed to direct sunlight for long periods. UV rays make the plastic brittle. If pipes are in a sunny area, paint them or cover them with a protective sleeve.
- Avoid Extreme Heat: Keep PEX away from exhaust vents, furnaces, or water heater flues. High, direct heat can damage the pipe.
- Address Water Hammer: If you hear loud banging when you turn off water quickly (water hammer), install water hammer arrestors. This shockwave can stress fittings over many years.
Preventive Checklist Table
Follow this simple checklist for a trouble-free system.
| Task | Why It Helps | How Often |
|---|---|---|
| Visual inspection of exposed pipes | Catch a small drip or mineral buildup early. | Once a year. |
| Check pipe hangers and supports | Prevents sagging and stress on joints. | Every few years. |
| Listen for water hammer noise | Identifies need for arrestors to protect fittings. | When installing new appliances. |
| Use only PEX-specific fittings | Ensures a compatible, reliable mechanical seal. | Every repair or addition. |
By following these guidelines, you build a PEX plumbing system that is trustworthy and long-lasting. The goal is to never face an unexpected “glue break” leak again.
Conclusión
Handle PEX breaks by stopping the water, cutting out the faulty glued joint, and replacing it with a proper mechanical connection. For guaranteed reliable PEX pipes, fittings, and tool kits that make correct installation easy, choose IFAN‘s PEX plumbing solutions.


Comentarios recientes