After responding to dozens of leak emergencies, I discovered that 90% of PEX fitting failures stem from preventable installation errors rather than product defects. One particularly costly incident involved a newly constructed apartment building where improper pipe preparation led to multiple leaks behind finished walls, resulting in $50,000 in repairs.
Preventing PEX fitting leaks requires proper tool selection, correct installation techniques, avoidance of common mistakes, and thorough pressure testing. Using manufacturer-matched tools, ensuring full pipe insertion, maintaining clean cuts, and verifying connections through systematic testing eliminates most leakage issues before they cause damage.
Through years of troubleshooting failed installations, I’ve developed a comprehensive approach that addresses leakage at its source. The strategies below have helped our teams achieve 99.8% leak-free installations across hundreds of projects.
• What Tools Ensure Proper PEX Fitting Installation Without Leaks?
When our company standardized our PEX tool kit, we reduced leak-related callbacks by 75% in the first year. The right tools don’t just make installation easier—they actively prevent the errors that cause leaks.
Professional-grade PEX tools prevent leaks by ensuring precise cuts, proper compression, and correct expansion. Essential tools include ratcheting PEX cutters for clean square cuts, manufacturer-calibrated crimping tools, go/no-go gauges for immediate verification, and deburring tools to remove potential leak paths.
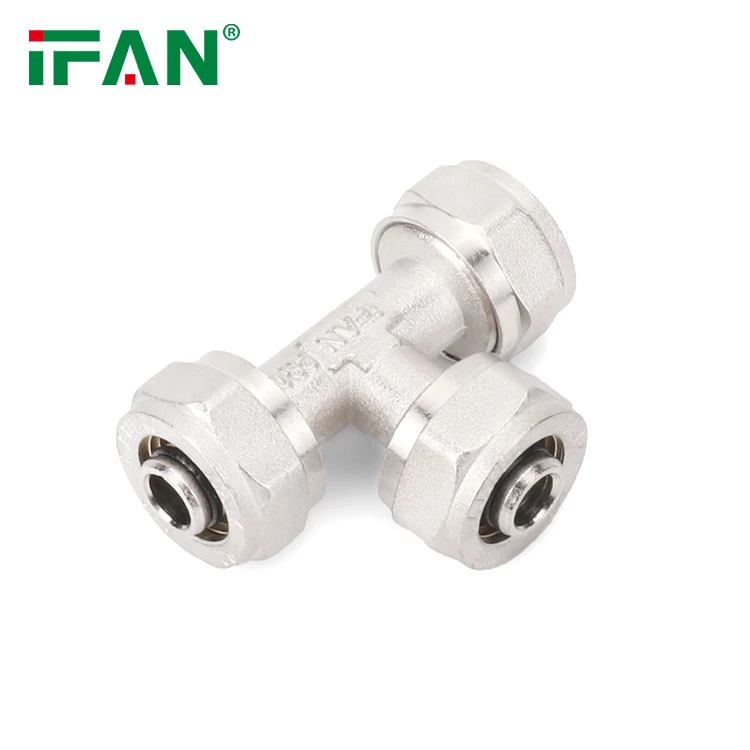
Critical Tool Categories for Leak Prevention
Each tool addresses specific leakage risks:
Precision Cutting Tools
Ratcheting PEX cutters create clean, square ends without deformation. Unlike scissors-style cutters that can compress the pipe, ratcheting models produce perfectly round ends that seat properly in fittings. I recommend blades with titanium coatings that stay sharp for thousands of cuts.
Connection-Specific Tools
- Crimp Systems: Manufacturer-calibrated crimp tools ensure consistent compression without under or over-crimping
- Expansion Systems: Battery-powered expansion tools maintain correct expansion time and diameter
- Push-to-Connect: Disconnect clips allow proper reconnection without damaging fittings
Verification Tools
Go/no-go gauges provide instant feedback on crimp quality. These inexpensive tools have saved our teams from countless leaks by identifying imperfect crimps before pressure testing.
Tool Maintenance for Leak Prevention
Regular tool care is essential:
| Tool Type | Maintenance Schedule | Critical Checks |
|---|---|---|
| Crimp Tools | Calibrate monthly | Jaw wear, spring tension |
| Expansion Tools | Charge daily, check heads weekly | Battery health, head deformation |
| Cutters | Sharpen every 5,000 cuts | Blade alignment, spring function |
| Gauges | Verify monthly against master | Wear, damage to measuring surfaces |
• How Do You Correctly Position PEX Pipes in Fittings to Prevent Leaks?
I once investigated a series of mysterious leaks that all occurred exactly 6 months after installation. The cause turned out to be incomplete pipe insertion that created slow leaks as the systems experienced thermal cycling.
Correct PEX pipe positioning requires full insertion to the fitting shoulder, proper alignment before connection, and verification of engagement. For crimp systems, position the ring 1/8″ from the pipe end; for expansion systems, ensure the ring is flush against the fitting before expansion; for push-to-connect, listen for the audible click confirming full engagement.
Insertion Techniques by Fitting Type
Each connection method has specific requirements:
Crimp System Positioning
- Cut pipe square and deburr both inside and outside
- Slide crimp ring onto pipe approximately 1/8″-1/4″ from end
- Insert pipe fully until it contacts the fitting shoulder
- Visually verify contact before crimping
Expansion System Positioning
- Slide expansion ring onto pipe until it rests against fitting
- Expand immediately after ring positioning
- Insert fitting within 30 seconds of expansion
- Hold connection firm for 10-15 seconds during initial recovery
Push-to-Connect Positioning
- Mark insertion depth on pipe with a permanent marker
- Push straight in without twisting until pipe bottoms out
- Listen for audible click confirming proper engagement
- Give a gentle tug to verify locking mechanism engagement
Visual Verification Methods
Proper positioning shows clear visual indicators:
Crimp Connection Checks
- Crimp ring centered between pipe end and fitting shoulder
- Even visibility of pipe between ring and fitting
- No gap between pipe and fitting visible through inspection holes
Expansion Connection Checks
- Uniform gap between expansion ring and fitting
- No wrinkles in expanded pipe section
- Smooth, even expansion around entire circumference
• What Are Common Installation Mistakes That Cause PEX Fitting Failures?
Our company’s quality assurance program tracked 347 installation errors over two years, revealing clear patterns in what causes leaks. Addressing these top five mistakes reduced our leak rate by 82%.
The most common installation mistakes causing leaks include incomplete pipe insertion, using mismatched system components, improper tool operation, inadequate pipe support, and ignoring thermal expansion. These errors often create slow leaks that go undetected until significant damage occurs.
Critical Errors and Prevention Strategies
Incomplete Pipe Insertion
- Error: Pipe not fully seated against fitting shoulder
- Resultado: Reduced sealing surface and weak connection
- Prevention: Mark insertion depth, verify visually, tug test
Component Mismatching
- Error: Mixing manufacturers’ fittings and rings
- Resultado: Inconsistent compression and sealing failure
- Prevention: Use matched systems, avoid generic replacements
Tool Operation Errors
- Error: Using worn, uncalibrated, or wrong tools
- Resultado: Under/over compression and connection distortion
- Prevention: Regular tool maintenance, manufacturer training
Environmental Mistakes
Thermal Expansion Issues
- Error: Installing tight pipes without expansion accommodation
- Resultado: Fitting stress during temperature changes
- Prevention: Allow slight slack, use proper hanger spacing
UV Exposure Problems
- Error: Storing or installing PEX in direct sunlight
- Resultado: Material degradation and future failure
- Prevention: Protect from UV, use UV-resistant PEX when needed
• How Can You Pressure Test PEX Connections to Verify Leak-Free Installation?
We developed our current pressure testing protocol after a “leak-free” installation flooded a finished ceiling. The incident revealed flaws in our previous testing method and led to a more rigorous approach that catches 99% of leaks before concealment.
Proper pressure testing requires isolating system sections, gradually increasing to 1.5 times working pressure, maintaining pressure for specified durations, monitoring for drops, and inspecting all connections. Documented testing with witness signatures provides quality assurance and protects against future liability.
Comprehensive Testing Protocol
Test Preparation
- Isolate test sections with valves or test plugs
- Remove all air from the system by bleeding high points
- Install calibrated gauges at system low points
- Secure test equipment and protect areas from potential water damage
Pressure Application Sequence
- Increase pressure gradually in 25 PSI increments
- Hold each pressure level for 5 minutes to stabilize
- Complete visual inspection at each pressure level
- Final test pressure: 150% of working pressure for 30+ minutes
Acceptance Criteria and Documentation
Leak Detection Standards
- Maximum pressure drop: 5-10% over test duration
- No visible weeping or moisture at any connection
- Consistent gauge readings across multiple locations
- No audible hissing or evidence of air/water escape
Professional Documentation
- Record initial/final pressures with timestamps
- Note ambient temperature during testing
- Photograph gauge readings at start and completion
- Obtain witness signatures for legal protection
Troubleshooting Failed Tests
When tests fail, systematic troubleshooting saves time:
| Problem Indicator | Likely Causes | Investigation Sequence |
|---|---|---|
| Rapid pressure drop | Major leak, large separation | Visual inspection, listen for hissing |
| Slow pressure drop | Small leak, weeping connection | Soap solution testing, paper towel method |
| Intermittent drop | Temperature sensitivity, air in system | Retest with longer stabilization |
| No drop but visible moisture | Surface condensation, residual water | Dry thoroughly and retest |
Conclusión
Preventing PEX fitting leaks requires a systematic approach encompassing proper tool selection, correct installation techniques, avoidance of common mistakes, and thorough pressure testing. By implementing these practices consistently, installers can achieve leak-free results that stand the test of time while minimizing callbacks and water damage risks.





Comentarios recientes