
I once saw a control panel fail because of a bad wire connection. That single, poorly made crimp caused hours of downtime and expensive troubleshooting. It taught me that the right tool and technique are not optional—they are essential.
An electrical crimping tool is used to create permanent, secure connections between wires and terminals by deforming a metal connector (the crimp) around the wire. To use it correctly, you must choose the right tool for the connector type, prepare the wire properly, position it in the correct die, and apply firm, complete pressure to form a solid, gas-tight bond.
A perfect crimp is reliable, safe, and efficient. A bad one is a hidden problem waiting to happen. Let’s walk through the process to ensure every connection you make is perfect.
How Do You Choose the Right Crimping Tool for Your Electrical Project?
Using the wrong crimp tool is like using a hammer on a screw. I’ve received samples where the connector was crushed, not crimped, simply because of a mismatched tool.
You choose the right crimping tool by matching it precisely to the type and size of the terminal connectors you are using. The tool must be rated for the wire gauge (AWG) and the connector family (e.g., insulated, non-insulated, coaxial, RJ45). Using a manufacturer-specific tool for their brand of connectors is the most reliable way to guarantee a perfect crimp every time.
Start with the Connector
The tool does not work alone. It works as a system with the connector. So, your first step is always to look at the connectors you need to install. Are they insulated nylon spade terminals? Non-insulated ring tongues? Coaxial F-connectors for cable TV? RJ45 heads for network cables? Each type has a unique shape and requires a specific die in the crimping tool to deform the metal correctly without damaging the plastic insulation.
The connector package will always list the wire size it is designed for, such as “22-16 AWG” or “10-12 AWG.” This is your most important number. Your crimping tool must be capable of crimping that specific size range. A tool that is too large will not compress the connector enough, leaving a loose connection. A tool that is too small may not close fully or could damage the tool itself.
Types of Crimping Tools
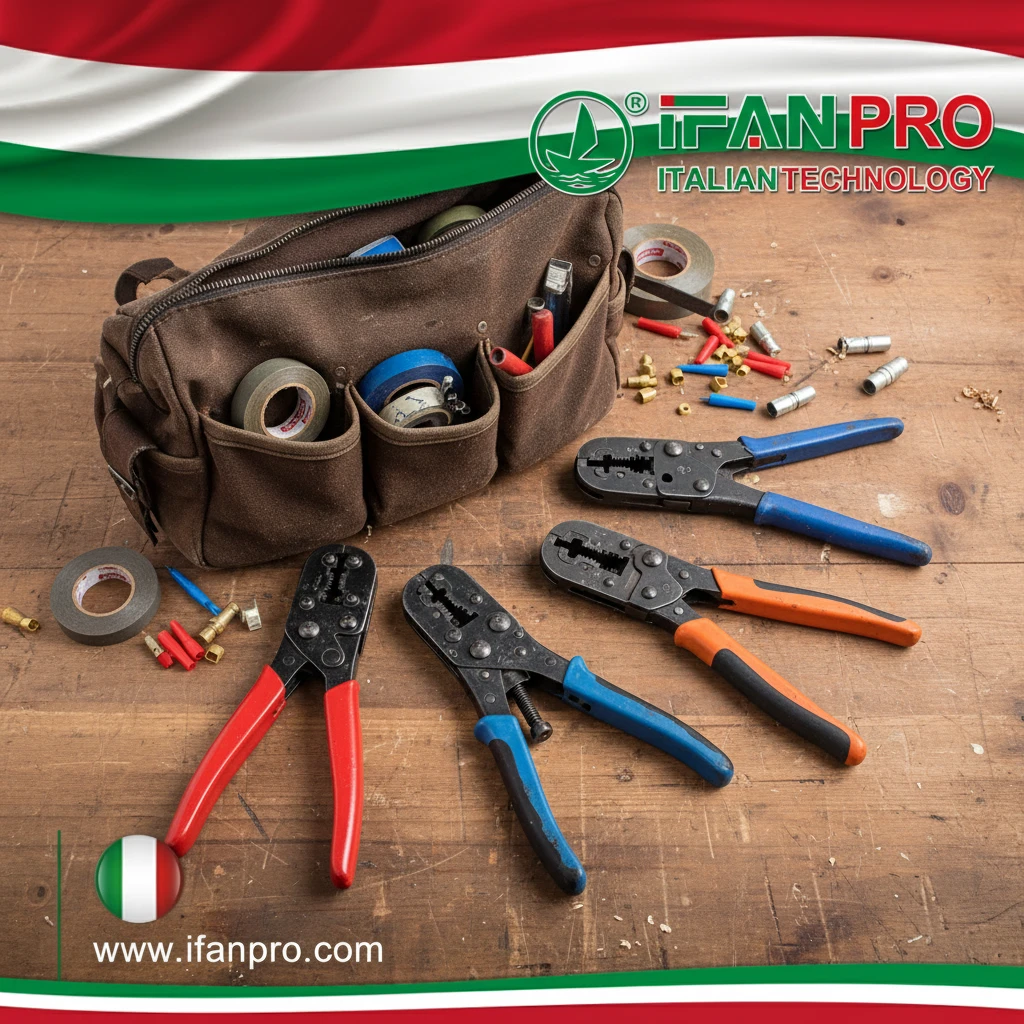
There are three main types of tools you will encounter:
- Generic/Adjustable Jaw Crimpers: These have a series of notches for different wire sizes. They are inexpensive and versatile but are often the source of poor-quality crimps. The dies are not precision-matched to a specific connector shape, which can lead to under-crimping or over-crimping. We only recommend these for very occasional, non-critical work.
- Precision Die Crimpers: These are the professional’s choice. The tool has a fixed, engineered die set that matches one specific family of connectors (e.g., all insulated terminals). You rotate the tool or the die to select the exact size (e.g., the red die for 22-16 AWG, the blue die for 16-14 AWG). This ensures the correct amount of force and deformation for a perfect crimp. This is what most electricians use daily.
- Ratchet Crimpers: These are a subset of precision die crimpers with a critical safety feature: a ratchet mechanism. The tool will not release until it has applied a complete, full cycle of pressure. This prevents the user from making a partial, weak crimp. It is the best choice for consistency and reliability, especially in production environments or for critical connections.
Tool Selection Guide Table
| Project Type | Connector Example | Recommended Tool Type | Key Reason |
|---|---|---|---|
| Home DIY / Occasional Repair | Insulated Spade Terminals | Precision Die Crimper | Affordable yet provides a reliable, consistent crimp for common connectors. |
| Professional Electrical Work | Ring Terminals, Butt Splices | Ratchet Crimper | Ensures every crimp is complete and meets industry standards; prevents callbacks. |
| Data & Telecommunications | RJ45, RJ11, Coaxial | Specialized Crimper | Dies are shaped exactly for the data connector, preventing pin damage. |
| Automotive & Marine | Heat-Shrink Sealed Terminals | Ratchet Crimper with Hex Die | The ratchet ensures a water-tight seal, and the hex crimp is stronger than a standard indentation. |
Finally, consider comfort and build quality. A good tool has comfortable grips and is made of hardened steel. It should feel solid in your hand. For a brand that understands the importance of the right tool, IFAN offers a range of precision-engineered ratchet crimpers designed for durability and perfect crimps every time, matching the high quality of our electrical connectors.
What Are the Essential Steps for Safe Electrical Crimping Tool Operation?
Safety starts before you squeeze the handle. I’ve seen sparks fly from a wire that wasn’t properly isolated, a simple mistake with scary consequences.
The essential steps for safe operation are: 1) Verify the circuit is de-energized and locked out with a multimeter. 2) Wear safety glasses to protect your eyes from flying wire strands or metal bits. 3) Use the tool only on the connectors it is designed for, and 4) Never point the tool toward yourself or others during operation.

Step 1: Energy Isolation is Non-Negotiable
This is the most critical rule. Always assume a wire is live until you prove it is not. Before you strip or crimp any wire, you must use a properly functioning voltage tester or multimeter to confirm there is zero electrical energy in the circuit. If you are working on a panel or machine, follow lock-out/tag-out (LOTO) procedures. This means physically disconnecting the power source and placing a lock and tag on the disconnect so no one can accidentally re-energize it while you are working. This step alone prevents severe electrical shock.
Step 2: Personal Protective Equipment (PPE)
Your eyes are vulnerable. When you cut a wire or crimp a terminal, tiny metal strands or pieces of insulation can shoot out. Always wear clear safety glasses. For heavier work, like cutting large cables, gloves can protect your hands from sharp wire ends and the pressure of the tool handles.
Step 3: Tool and Workspace Inspection
Before you start, take a quick look at your tool. Are the jaws clean and undamaged? Is the mechanism moving smoothly? A damaged or dirty die can create a bad crimp. Make sure your workspace is clean, dry, and well-lit. Good lighting helps you see the wire placement clearly.
Step 4: The Safe Crimping Sequence
Follow this order for each connection:
- Strip: Use a wire stripper to remove just enough insulation. The goal is to expose enough bare wire so that it sits fully inside the terminal barrel, but no bare wire is visible after crimping. Usually, about 1/8 to 1/4 inch (3-6mm) is perfect. Cutting strands by stripping too much or nicking the conductor by stripping too little both weaken the connection.
- Insert: Place the correctly sized terminal onto the bare wire. Push it on until the insulation touches the base of the terminal barrel. For insulated terminals, the wire insulation should be inside the insulated sleeve.
- Position in Tool: Place the terminal into the correct size die on your crimping tool. Make sure it sits square and fully seated.
- Crimp: Apply smooth, firm pressure on the tool handles. If you are using a ratchet tool, squeeze until the ratchet releases automatically. Do not stop halfway.
- Tug Test: After crimping, give the wire a firm pull to ensure it is mechanically secure. A proper crimp will hold strongly. If the wire pulls out, the crimp is bad and must be cut off and re-done.
Safety Checklist Table
| Task | Safe Practice | Risk if Ignored |
|---|---|---|
| Verifying Power is Off | Use a multimeter on known live circuit first to test the meter, then test your work wires. | Severe electrical shock or electrocution. |
| Stripping Wire | Use the correct hole on a stripper; do not use side cutters which can nick strands. | Nicks reduce wire strength, leading to a hot spot and potential failure under load. |
| Using the Crimper | Keep fingers away from the jaw area. Hold the tool perpendicular to the wire. | Pinched fingers or an angled, poor-quality crimp. |
| Post-Crimp Inspection | Visually check for cracks in the terminal and perform a firm tug test. | A loose connection that will overheat, potentially causing a fire. |
Remember, a safe process leads to a safe product. Rushing or skipping steps is how accidents and failures happen.
How Can You Create a Perfect and Secure Crimp with Your Crimping Tool?
A perfect crimp looks clean and feels solid. It’s the difference between a connection that lasts for decades and one that fails in a year.
You create a perfect and secure crimp by combining exact wire preparation, precise terminal placement in the correct die, and applying full, complete compression. The finished crimp should be visually symmetrical, the wire should not pull out under strong force, and for insulated terminals, the insulation grip should be properly compressed without cutting into the wire.

The Anatomy of a Perfect Crimp
A high-quality crimp performs two main functions:
- Electrical Connection: The metal barrel of the terminal is compressed tightly around the bare wire strands. This creates a large surface area of metal-to-metal contact with very low electrical resistance.
- Mechanical Connection: The crimp holds the wire so tightly that it can withstand vibration and pulling forces. On insulated terminals, a second set of indentations (the insulation crimp) grips the wire’s plastic jacket to relieve strain on the metal connection.
Step-by-Step to Perfection
Let’s break down the ideal process:
1. Strip with Precision:
The length of stripped wire is critical. If it’s too short, not all strands will be inside the crimp barrel, reducing conductivity. If it’s too long, bare wire will be exposed, which is a shock and short-circuit hazard. A good rule is that after crimping, you should see a tiny bit of insulation at the very mouth of the terminal barrel.
2. Choose the Correct Die:
Refer to the chart on your crimping tool. For a red insulated terminal, you must use the die marked for red (typically 22-16 AWG). Using the blue (16-14 AWG) die will not apply enough pressure, resulting in a loose connection. The die is engineered to fold and compress the metal in a specific, optimal way.
3. Insert and Align:
Place the terminal into the die so it sits flush. Insert the stripped wire into the terminal barrel until it hits the stop. For a ring terminal, make sure the “ring” part is facing the correct direction before you crimp! Look at the tool from the side to ensure everything is straight.
4. Apply Full Force:
Squeeze the handles firmly and evenly. With a ratchet tool, you will hear a click when the crimp is complete. Do not “rock” the tool or crimp twice. One complete, centered crimp is what you want.
How to Inspect Your Crimp
After you make the crimp, inspect it before using it.
- Visual Check: The indentations should be centered on the terminal barrel. The metal should be folded neatly, not cracked or split. For insulated terminals, the insulation crimp wings should be folded over, gripping the wire’s jacket.
- Tactile Check: The crimp should feel like one solid piece of metal. Try to twist the terminal on the wire—it should not move.
- The Tug Test: This is the ultimate test. Hold the terminal in one hand and the wire in the other. Give it a strong, steady pull. You should not be able to pull the wire out. If you can, the crimp is no good. Cut it off and start again.
Crimp Quality Inspection Table
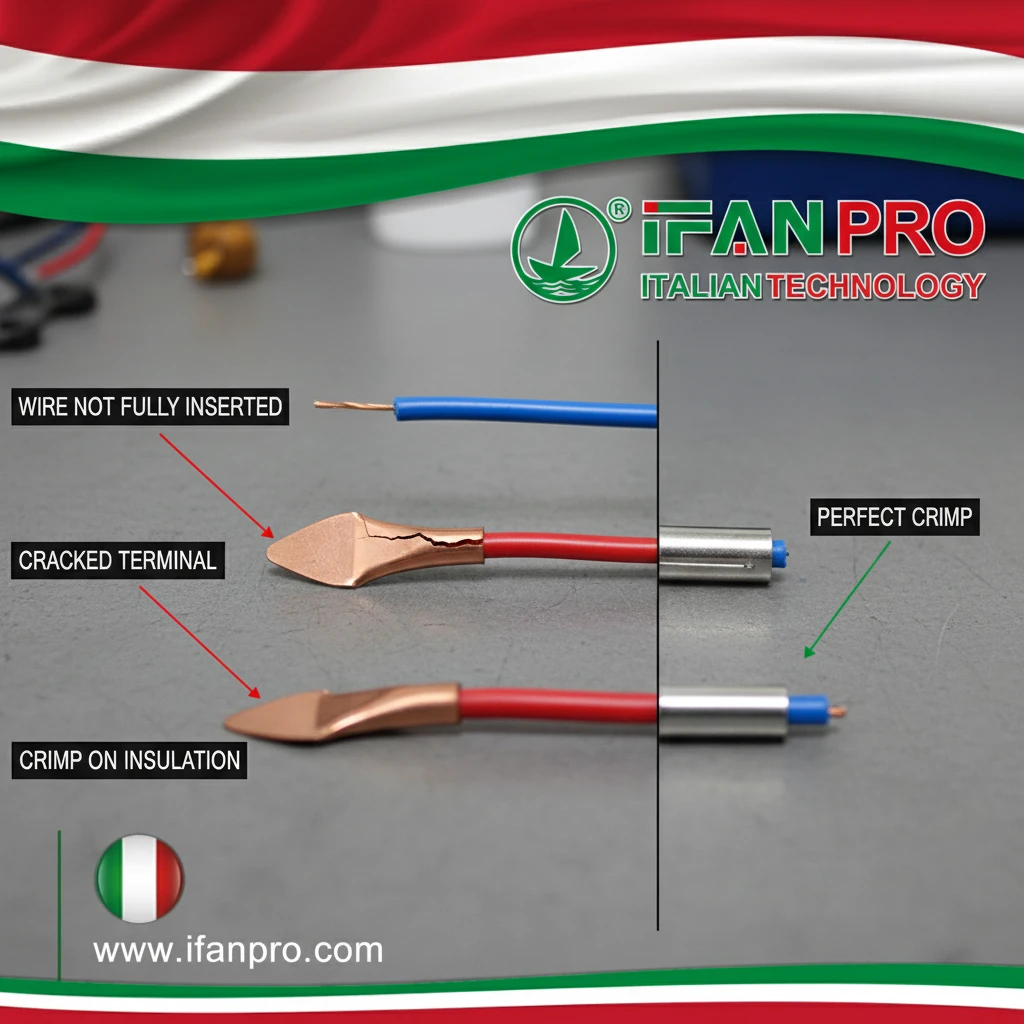
| Feature | Perfect Crimp | Bad Crimp (Problem) |
|---|---|---|
| Wire Position | Bare wire fully inside barrel; insulation at the barrel mouth. | Bare wire exposed (too long) or strands missing from barrel (too short). |
| Indentation | Centered, symmetrical, metal smoothly compressed. | Off-center, asymmetrical, or metal is cracked/split. |
| Insulation Grip | Wings are folded over, contacting the insulation without piercing it. | Wings are not touching insulation, or they cut into the copper strands. |
| Pull Test | Wire does not pull out or twist under strong force. | Wire moves or pulls out easily. |
Using high-quality terminals is just as important as the tool. Inferior terminals use thin, brittle metals that crack during crimping. IFAN’s terminals are made from premium copper with thick, consistent plating (tin or nickel) to ensure low resistance and prevent corrosion, forming a perfect union with your crimp.
What Are Common Electrical Crimping Tool Mistakes and How to Avoid Them?
Mistakes are easy to make but costly to fix. Most failures I see come from repeating the same few avoidable errors.
The most common mistakes are: 1) Using the wrong size or type of tool for the connector. 2) Under-crimping or over-crimping by not completing the tool cycle. 3) Placing the wire in the terminal incorrectly. 4) Using the wrong terminal material for the environment (e.g., plain copper in a damp location).
Mistake 1: Tool-Connector Mismatch
This is the number one error. Using a generic tool on a precision connector, or using a die that is one size off, seems to work in the moment but creates a weak point. The connection may pass a simple tug test initially but will fail under vibration or thermal cycling.
How to Avoid: Invest in a good quality ratchet crimper with marked dies. Match the color/size of the terminal to the die marking every single time. Do not force a terminal into a die that is clearly too small.
Mistake 2: Incomplete Crimp (Under-Crimping)
This happens when the tool jaws do not close fully. With a non-ratchet tool, it’s easy to stop squeezing when it gets hard, leaving a weak crimp. The wire will have high resistance at the connection, causing it to heat up.
How to Avoid: Use a ratchet crimper. It forces you to complete the full crimp cycle. If you must use a non-ratchet tool, squeeze until the jaws are fully closed and the handles are parallel.
Mistake 3: Over-Crimping
Less common but equally bad, this is when too much force is applied, often by using too small a die or double-crimping. This cracks or severs the metal barrel, severely weakening the connection and increasing resistance.
How to Avoid: Use the correct die size. Crimp only once. If you suspect a bad crimp, cut it off and use a new terminal—do not try to re-crimp the old one.
Mistake 4: Incorrect Wire Placement
Putting the wire into the wrong part of the terminal is a simple error with big consequences. The most frequent version is crimping the insulation grip part onto the bare wire, or the metal crimp part onto the insulation. Both ruin the connection.
How to Avoid: Slow down and look. For a standard insulated terminal, the bare wire goes into the metal barrel at the back. The plastic insulation should sit under the front, winged insulation grip section. Always do a visual check before squeezing.
Mistake 5: Ignoring the Application Environment
Using standard tin-plated terminals in a humid, salty, or chemically aggressive environment (like outdoors or in a factory) will lead to rapid corrosion. The connection will turn green, resistance will skyrocket, and it will fail.
How to Avoid: Match the terminal material to the environment. Use nickel-plated or stainless steel terminals for harsh conditions. For damp or outdoor use, always choose heat-shrink sealed connectors that provide a watertight seal after crimping.
Common Mistakes and Solutions Table
| Mistake | What Happens | How to Avoid It |
|---|---|---|
| Wrong Tool/Die | Loose or misshapen crimp; high resistance and heat. | Label your tools. Keep connectors organized by size/type with their dedicated tool. |
| Incomplete Crimp | Wire pulls out easily; connection heats up under load. | Use a ratchet crimper. It physically prevents this mistake. |
| Stripping Too Much/Little | Exposed copper (shock risk) or not all strands in crimp (weak). | Use a stripper with labeled gauge holes. Practice on scrap wire first. |
| Wrong Terminal Material | Corrosion, green residue, intermittent failure. | Assess the environment. For challenging settings, use IFAN’s nickel-plated or marine-grade heat-shrink terminals. |
By being aware of these common pitfalls, you can actively prevent them. The goal is to build muscle memory for the right technique. Always inspect your first crimp of the day and your crimps on important connections. Quality is a habit.
Заключение
Mastering your crimping tool ensures safe, reliable, and long-lasting electrical connections. For crimps you can trust every time, use high-quality IFAN crimping tools and terminals designed to work perfectly together.


Последние комментарии