
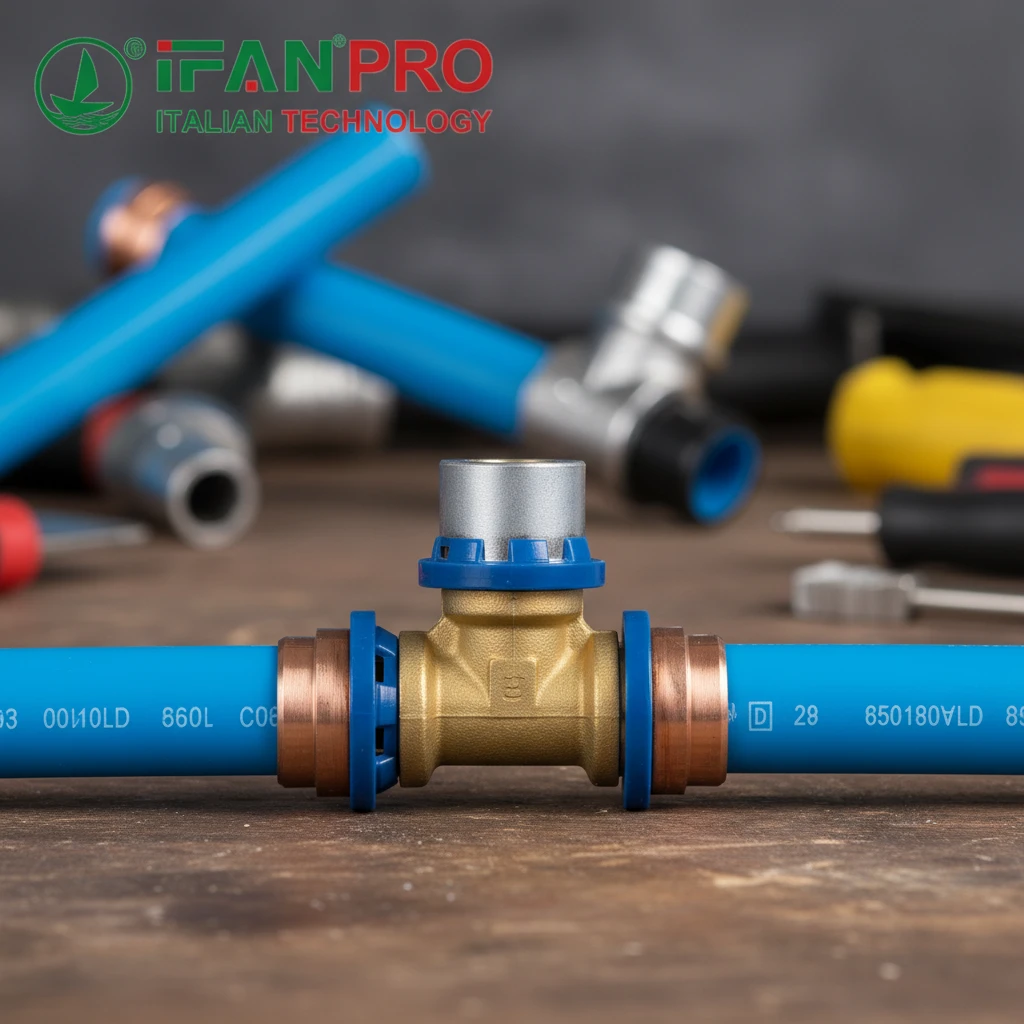
I recently helped a contractor who was stuck because his pipes didn’t align. A simple swivel union solved his problem, but only because he used the right connection method from the start.
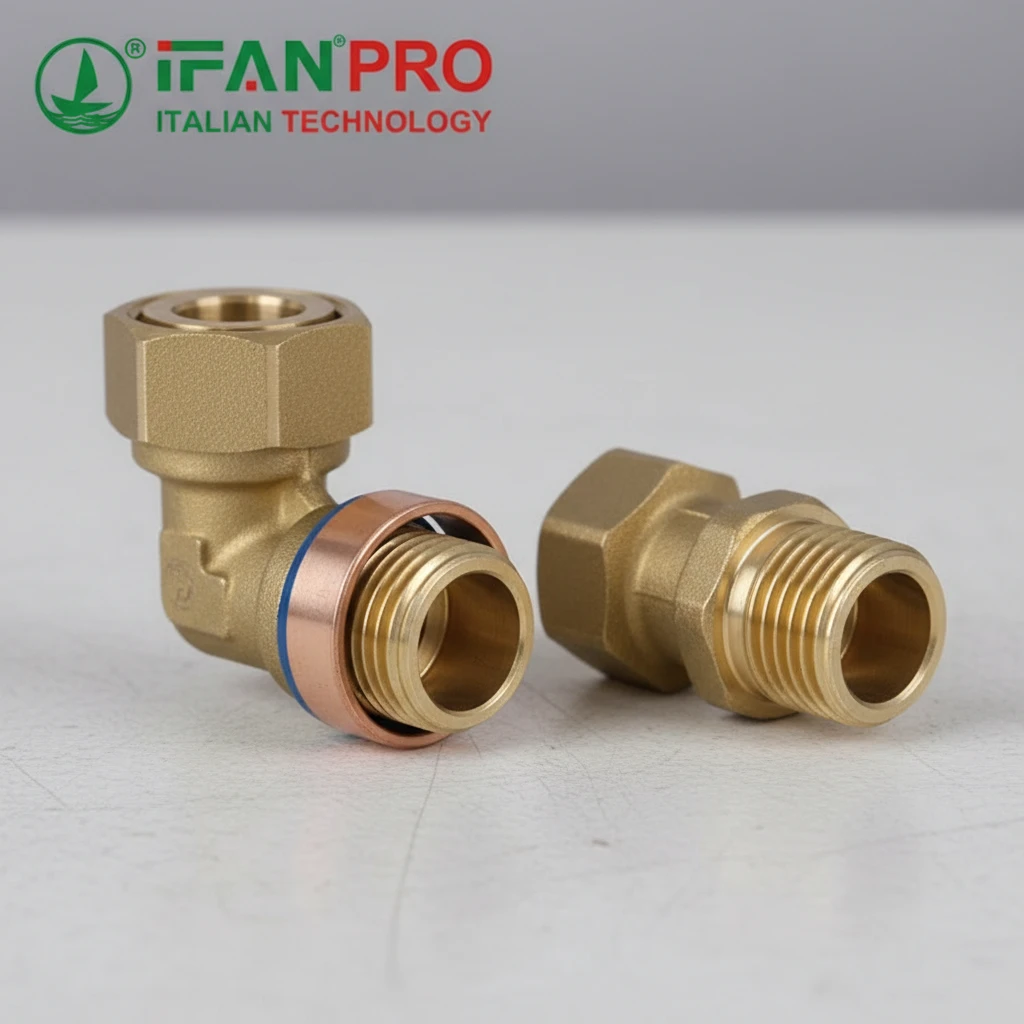
A union elbow for PEX systems features a fixed end with standard PEX barbs. You secure the PEX pipe to this end using a standard crimp or clamp ring, creating a permanent, leak-proof connection. The swivel union mechanism operates completely independently from this PEX joint, allowing for angular adjustment without affecting the security of the ring connection.
This design combines a permanent connection on one side with full adjustability on the other. Let’s examine exactly how this works and how to avoid common installation errors.
Is the Union End Designed for Standard PEX Crimp or Clamp Connections?
Clients often worry about needing special tools. I always confirm that compatibility with standard tools is a key design goal for a useful union fitting.
Yes, the fixed end of a quality PEX union elbow is designed specifically for standard crimp or clamp connections. It features the same sized barbed insert and support sleeve as a regular PEX fitting, ensuring you can use your existing PEX crimping tools or clamp pliers without any modification or special adapters.
Universal Design for Common Tools
Manufacturers design these fittings for easy adoption. The end that connects to the PEX pipe is not a special part. It is identical to the connection end on any standard PEX elbow or coupling. This means:
- The barbed insert has the same outside diameter.
- The tube support sleeve (the area where the ring sits) has the same length and thickness.
- The required insertion depth mark is in the same place.
This standardization is crucial. It means a plumber on site does not need to check if a special ring or tool is required. They can use the same copper crimp rings, stainless steel clamps, or expansion PEX rings they use for the rest of the job.
Verification is Key
However, you should always perform a quick visual and physical check. First, ensure the fitting is clearly marked for PEX-A (expansion) or PEX-B (crimp/clamp). Most unions are for PEX-B, but you must confirm. Second, do a dry fit. Slide a PEX ring onto the pipe, insert the pipe onto the union’s barb until it hits the stop, and ensure the ring sits in the correct position over the tube support. If it fits like any other fitting, it’s compatible.
Table: Tool Compatibility Check
| Your PEX System Type | Required Ring Type | Will it Work on a Standard Union Barb? |
|---|---|---|
| PEX-B (Crimp) | Copper Crimp Ring | Yes, with standard crimp tool. |
| PEX-B (Clamp) | Stainless Steel Clamp | Yes, with clamp cinching tool. |
| PEX-A (Expansion) | Expansion PEX Ring | Only if the union is specifically marked “For PEX-A”. |
The main point is this: The adjustability is in the middle of the fitting, not at the connection points. The connection points remain standard and reliable.
How Do You Secure the PEX Pipe to the Fixed End of the Union Elbow?
A secure connection is everything. I’ve seen leaks happen when installers rush this step, treating the union end differently than a standard fitting.
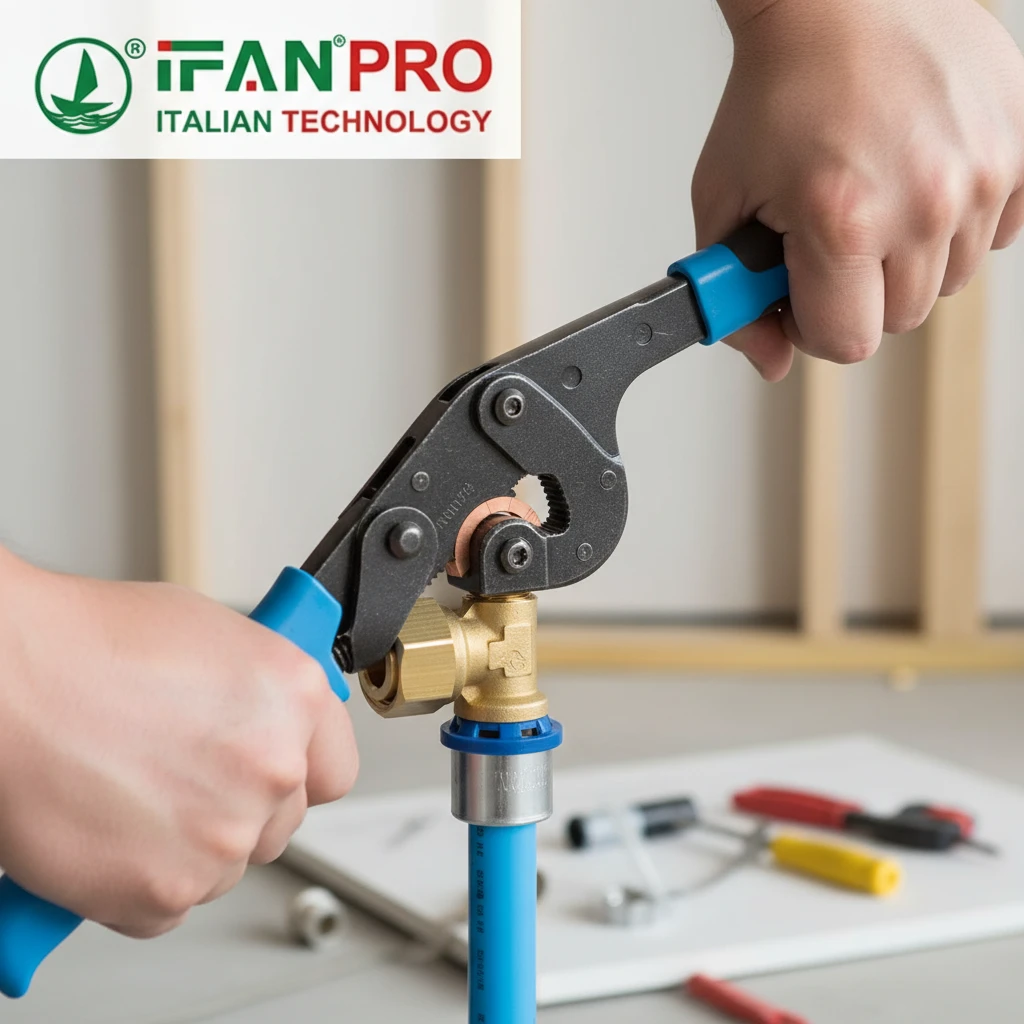
You secure the PEX pipe to the fixed end using the exact same procedure as with any standard PEX fitting. Slide the correct ring onto the pipe, insert the pipe fully onto the barb until it bottoms out, and then crimp or clamp the ring in place using the proper tool. The union’s swivel mechanism is located elsewhere and does not change this fundamental process.
Step-by-Step Connection Process
The process is straightforward because it is familiar. Here is the correct sequence:
- Cut and Prepare: Cut the PEX pipe square using a sharp cutter. Deburr the edge if needed.
- Slide on the Ring: Slide a crimp ring or clamp onto the pipe first.
- Insert Fully: Push the pipe firmly onto the barbed end of the union elbow. You must push until the pipe hits the internal stop. Visually confirm that no pipe is visible between the ring and the fitting’s shoulder.
- Position the Ring: Slide the ring so it is positioned evenly, about 1/8 inch from the end of the pipe, centered over the barbed area.
- Make the Connection: Place the crimping tool’s jaws or clamp tool over the ring and actuate it. Ensure the tool closes completely to form a uniform, circular connection.
- Verify: Use a go/no-go gauge to check the crimp ring’s diameter. For a clamp, ensure the buckle is fully closed and secure.
Common Mistake and How to Avoid It
The most common mistake is not inserting the pipe all the way. Because the union fitting can move, an installer might hold it at an awkward angle and fail to push the pipe on completely. A partial insertion will cause a guaranteed leak.
Solution: Before making the ring connection, hold the union fitting by its fixed end (the barbed side) to keep it steady. Push the pipe on with firm, straight pressure. Once the pipe is fully seated, you can then let go and adjust the angle of the union for the next step. The key is to separate the two actions: first, make a solid mechanical connection; second, adjust the angle.
Table: Troubleshooting the PEX-to-Union Connection
| Problem | Likely Cause | How to Fix |
|---|---|---|
| Leak at the barb | Pipe not fully inserted onto the barb. | Cut out the connection, use a new ring, and re-make it with full insertion. |
| Leak at the barb | Under-crimped or misaligned ring. | Use a go/no-go gauge to check. Replace the ring and re-crimp. |
| Union feels loose | The nut on the swivel side is not tightened. | This is unrelated to the PEX connection. Tighten the swivel nut after final angle adjustment. |
| Cannot adjust angle | The PEX connection was made while the union was at a strained angle. | Loosen the swivel nut, adjust to the desired angle, then re-tighten. |
Remember, the connection to the barb is a one-time, permanent joint. Take the time to do it right the first time.
Does the Union Mechanism Function Independently of the PEX Connection Type?
This is a critical design question. The answer provides the main value of the product.
Yes, the union swivel mechanism functions completely independently of the type of PEX connection (crimp or clamp). The mechanism is a self-contained assembly sealed with an O-ring or gasket, housed between the fixed barbed end and the other threaded end of the fitting. The PEX ring only secures the pipe to the barb; it plays no role in sealing the adjustable joint itself.
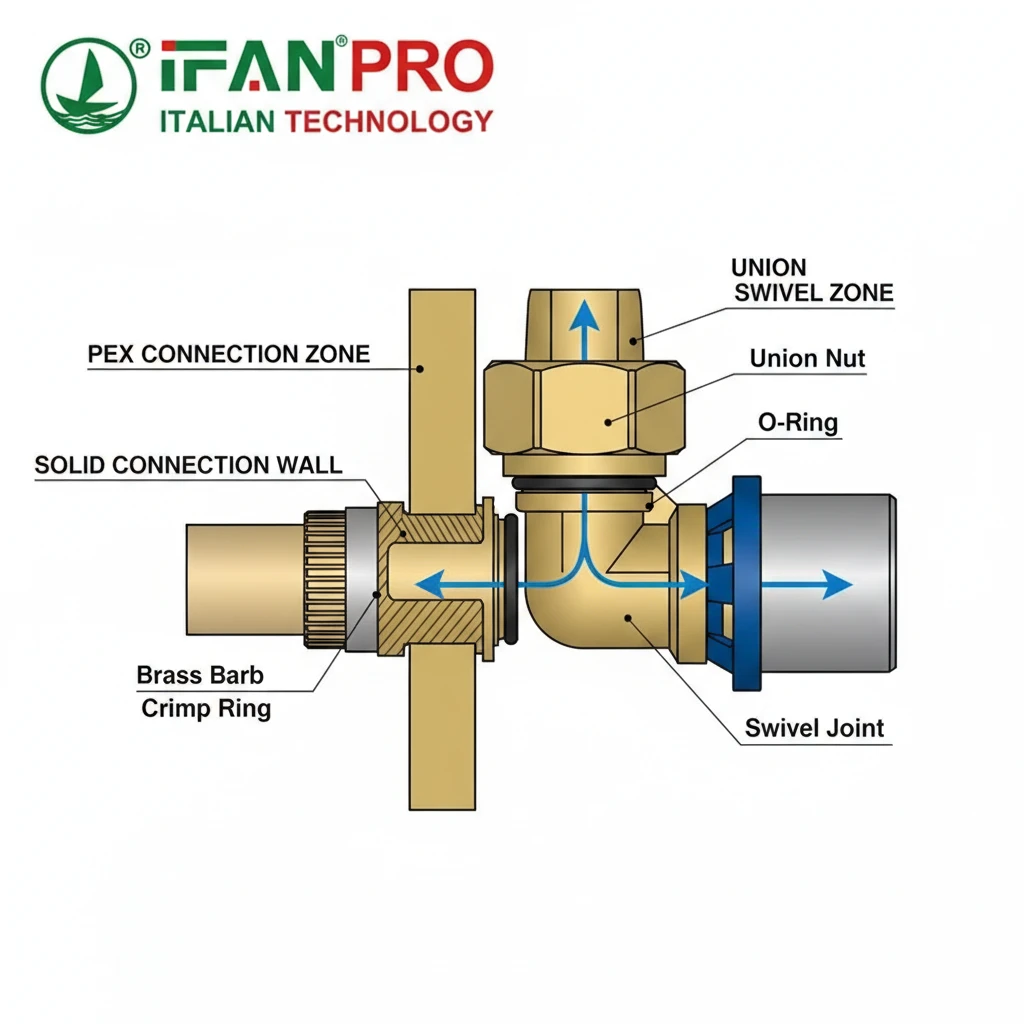
Two Separate Sealing Zones
Understanding this independence is key to trusting the fitting. Imagine the union elbow as two distinct parts fused together:
- Zone A: The PEX Connection. This is at the barbed end. Its seal is created by the PEX ring squeezing the pipe onto the barb. This seal is fixed and permanent.
- Zone B: The Union Swivel. This is in the middle of the fitting. Its seal is created by an internal O-ring or gasket that is compressed when you tighten the external nut. This seal is adjustable and reusable.
These two zones are separated by a solid wall of plastic within the fitting. Water must travel through the fitting, passing from the PEX pipe, through the secured barb, into the central chamber of the union, and out the other side. The integrity of the journey relies on two different seals that do not interfere with each other.
Why This Independence Matters
This design solves major pain points:
- No Stress on the PEX Ring: When you swivel the fitting, all the movement and torque is absorbed by the internal O-ring in Zone B. The hard PEX ring in Zone A remains static and unstressed. This prevents the PEX connection from loosening over time due to adjustment.
- Consistent Performance: Whether you use a copper crimp ring or a stainless clamp, the swivel feels the same and seals the same. The tool choice does not affect the union’s adjustability or leak resistance.
- Reliable Field Adjustments: Because the systems are separate, you can confidently adjust the angle on site—even after the PEX is permanently attached—knowing you are only affecting the designated swivel seal.
In short, the PEX connection handles holding the pipe. The union mechanism handles the angle. One does not job the other’s job.
Can the Union Be Disassembled Without Disturbing the PEX Ring Connection?
Serviceability is a major concern. The ideal fitting allows for adjustment or repair without destroying other parts.
Yes, the union can be fully disassembled without disturbing the secured PEX ring connection. By loosening and removing the swivel nut, the two main body sections of the fitting can be separated. The barbed end with the PEX pipe attached remains intact as one piece, while the other end separates for replacement or cleaning.

The Disassembly Process
This feature is what makes a union different from a glued or welded joint. Here’s how it works:
- Locate the Union Nut: Identify the large hexagonal nut in the center of the fitting that connects the two body pieces.
- Loosen and Remove: Use a wrench to loosen and completely unscrew this nut. It will thread off one of the body sections.
- Separate the Bodies: Once the nut is removed, you can pull the two main body sections apart. One section will have the fixed barb with the PEX pipe still attached. The other section will be free.
- Access Internal Seal: Upon separation, you will see the internal O-ring or gasket. You can now inspect, clean, or replace this seal if necessary.
Throughout this entire process, the PEX pipe remains securely crimped or clamped to its barb. That connection is never touched, stressed, or required to be cut.
Practical Applications for Disassembly
This capability is useful in several real-world scenarios:
- Replacing the O-ring: If the swivel joint begins to leak after many years, you don’t need to cut out the piping. Simply disassemble the union and replace the old O-ring.
- Changing Direction: If a remodel requires a different angle, you can loosen the nut, adjust, and re-tighten. For a major change, you can even replace just the swiveling half of the fitting with a different angle type (e.g., 45° instead of 90°) while keeping the original PEX connection.
- System Repair: If the fitting itself gets damaged, you can disconnect it at the union point without affecting the pipes connected to it.
Table: Union Serviceability vs. Fixed Fittings
| Action | Standard Fixed Elbow | Adjustable Union Elbow |
|---|---|---|
| Change flow angle | Impossible. Must cut out and replace. | Simple. Loosen, adjust, re-tighten. |
| Fix a leak at the joint | Impossible. Must cut out and replace. | Possible. Disassemble and replace O-ring. |
| Replace the fitting | Must cut pipe on both sides. | Disassemble at union; pipe connections remain. |
| Inspect the sealing surface | Not possible without destruction. | Possible via disassembly. |
This disassembly feature future-proofs the installation, providing flexibility that fixed fittings simply cannot match.
Заключение
A PEX union elbow combines a permanent, tool-standard connection with a separable, adjustable joint. For reliable and serviceable installations, choose IFAN’s adjustable PEX union fittings.


Последние комментарии