

I once saw a perfectly good plumbing system fail because the pipes weren’t supported properly. Sagging pipes put stress on joints and can lead to leaks. Therefore, getting the clips right is just as important as the pipes themselves.
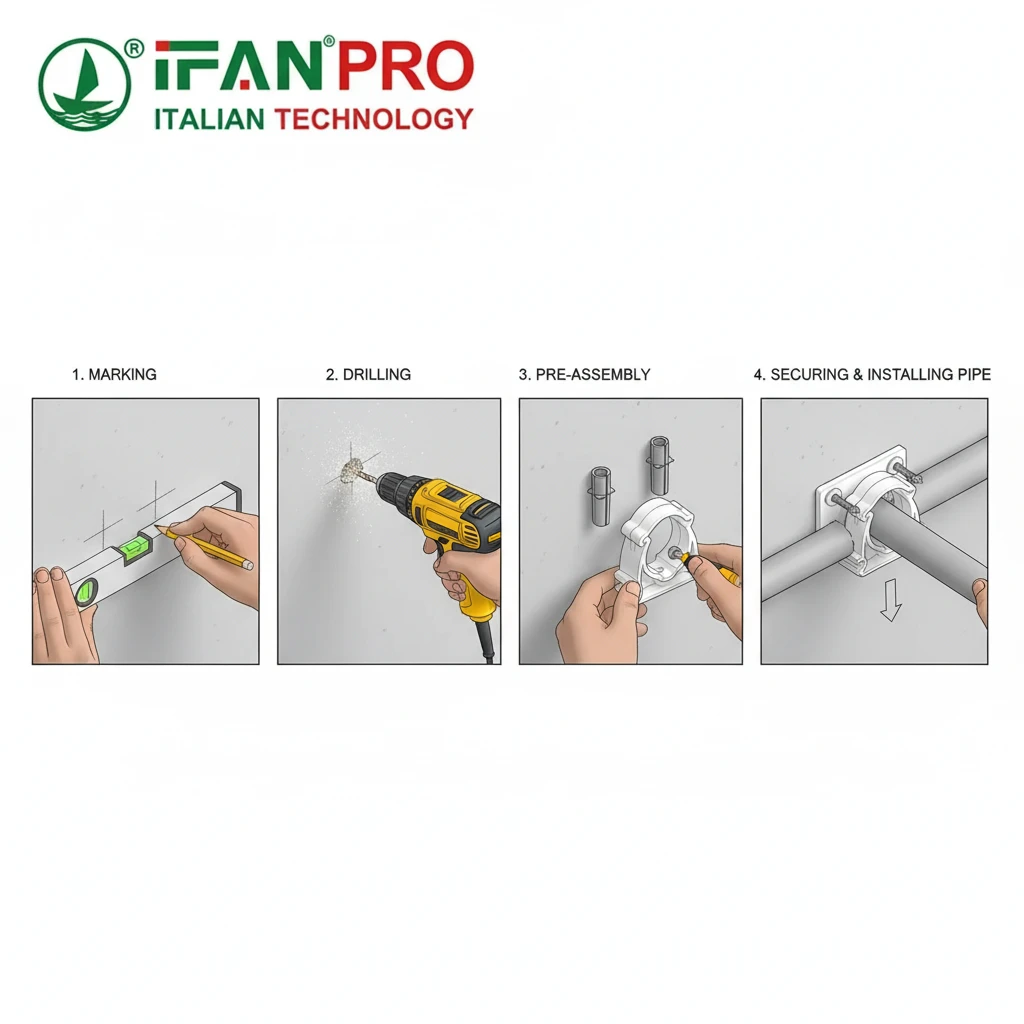
To install PVC pipe clips securely, you need the right tools, follow correct spacing rules, and use a precise fixing method. The key steps are: marking the line, drilling accurate holes, using the correct wall plugs and screws, and snapping the pipe firmly into the clip. Finally, you must check that the pipe cannot move or sag.
Now, let’s break down this process into simple, actionable steps. This way, you can ensure your pipework stays supported safely for years to come.
What are the Essential Tools Needed for Installing PVC Pipe Clips?
Trying to install clips with the wrong tools is frustrating and leads to poor results. I’ve compiled a basic toolkit that makes the job smooth.
The essential tools for installing PVC pipe clips are: a tape measure and pencil for marking, a spirit level to ensure a straight run, a power drill with the correct drill bit for your wall type, a hammer, the correct wall anchors (plugs), suitable screws, and the PVC pipe clips themselves. So, having these tools ready before you start is crucial for a professional finish.

Core Tool Functions
First, using the right tool for each task is not just about ease; it’s about creating a safe and lasting installation. Here is a deeper look at why each tool is necessary and how to use it correctly.
You start with planning and marking tools. A tape measure and pencil let you plan the entire pipe run before you drill a single hole. This planning helps you avoid obstacles like electrical wires or studs. Next, a spirit level is non-negotiable. Pipes should run straight, either perfectly horizontal or vertical. A crooked pipe line looks unprofessional and can cause drainage or pressure issues. Therefore, you use the level to draw a straight guideline for all your clips.
Drilling and Fixing Tools
Then, you need the power drill. This is your most important tool. You must select the correct drill bit. Specifically, the bit size must match the wall plug you are using. For example, if you use a 6mm wall plug, you need a 6mm masonry drill bit for brick or concrete. For wooden studs, use a standard wood drill bit slightly smaller than the screw’s core diameter. If you use the wrong size bit, you will get a loose fit or a plug that won’t go in.
Also, you need a hammer. You use it for gently tapping the plastic wall plug into the drilled hole. Remember, never force a screw directly into a hole without a plug in soft materials; it will not hold.
Choosing the Right Components
Next, consider the wall plugs and screws. These components are what truly secure the clip to the wall. The plug must suit your wall material. For instance, a general-purpose plastic plug works for solid brick, concrete, or block. However, for hollow walls like drywall, you need a specialized toggle bolt or cavity anchor that spreads out behind the wall. Also, the screw length must be enough to go through the clip, fully into the wall plug, and have a good grip. Typically, a screw 50mm to 60mm long is standard.
Finally, you have the PVC pipe clips. Ensure they are the correct size for the outside diameter of your pipe. A clip that is too big won’t hold the pipe snugly, and a clip that is too small won’t fit at all. For this reason, using high-quality clips, like those from IFAN, is wise. They make clips from durable, UV-stabilized material that won’t become brittle over time.
Recommended Tool Kit Table
| Tool | Purpose | Key Tip |
|---|---|---|
| Tape Measure & Pencil | Marking clip positions. | Measure twice, drill once. |
| Spirit Level | Ensuring straight pipe runs. | Check level frequently. |
| Power Drill & Correct Bits | Creating holes for wall plugs. | Match bit size to plug size. |
| Hammer | Inserting wall plugs. | Tap gently to avoid splitting. |
| Wall Plugs & Screws | Securing clip to structure. | Choose based on wall material. |
| PVC Pipe Clips | Holding the pipe securely. | Match clip size to pipe OD. |
How Do You Determine the Correct Spacing for PVC Pipe Clip Installation?
Spacing clips too far apart is a common mistake that causes pipes to sag over time. However, following simple rules prevents this.
The correct spacing for PVC pipe clips depends on the pipe’s diameter and whether it carries hot or cold water. A general rule is to support horizontal pipes every 0.8 to 1.2 meters for standard 20-40mm pipes. Always place a clip within 150mm of any joint, valve, or change of direction. Moreover, for vertical pipes, space clips every 1.5 to 2 meters.

The Purpose of Correct Spacing
First, proper clip spacing prevents three main problems: sagging, vibration, and stress on joints. When a pipe sags, it can trap water or air, leading to noise and reduced flow. Additionally, over a long distance, the weight of the water and pipe itself can strain the middle sections. Vibration from water flow can also shake a poorly supported pipe, leading to noise and wear. Therefore, good spacing supports the pipe evenly along its entire length.
Spacing Based on Pipe Size
Specifically, the larger and heavier the pipe, the more support it needs. Consequently, spacing rules change with diameter. For example, for small cold water pipes (like 20mm), you might space clips up to 1.2 meters apart. Conversely, for larger pipes (50mm and above), you should reduce the spacing to 0.8 meters or even less. Also, hot water pipes expand and contract when heated. So, they need slightly more support than cold water pipes of the same size to control this movement. As a result, a good practice is to reduce the standard spacing by 10-20% for hot water lines.
Critical Support Points
Furthermore, some positions on a pipe run are more critical than others. You must install a clip close to any point where stress is concentrated. These critical points include:
- Joints and Fittings: Place a clip within 150mm on each side of a coupling, elbow, or tee. This prevents the joint from bearing the weight of the pipe.
- Valves: Valves are heavy. Therefore, always support them directly with a clip on either side.
- Changes of Direction: An elbow creates a natural stress point. So, support it on both sides.
- Pipe Ends: Always support the end of a pipe run, such as at a tap connection.
Recommended Spacing Guidelines
This table provides a safe and practical guide for common residential pipe sizes.
| Pipe Diameter (mm) | Max. Spacing for Horizontal Runs (Cold Water) | Max. Spacing for Horizontal Runs (Hot Water) | Max. Spacing for Vertical Runs |
|---|---|---|---|
| 20 | 1.2 m | 1.0 m | 2.0 m |
| 25 | 1.1 m | 0.9 m | 1.8 m |
| 32 | 1.0 m | 0.8 m | 1.6 m |
| 40 | 0.9 m | 0.7 m | 1.5 m |
| 50 | 0.8 m | 0.6 m | 1.5 m |
Note: Always follow local building codes, as they may have specific requirements. When in doubt, add more clips. After all, extra support is cheap insurance against future problems.
What Steps Ensure PVC Pipe Clips are Properly Secured to Walls or Structures?
A clip is only as strong as its attachment to the wall. Unfortunately, rushing this step is the main cause of support failure.
To ensure PVC pipe clips are properly secured, follow these steps: 1) Mark positions accurately using a level. 2) Drill a clean, perpendicular hole to the correct depth. 3) Insert the correct wall plug fully. 4) Drive the screw through the clip base and into the plug until tight, but do not over-tighten and crack the clip. 5) Finally, snap the pipe into the clip firmly.
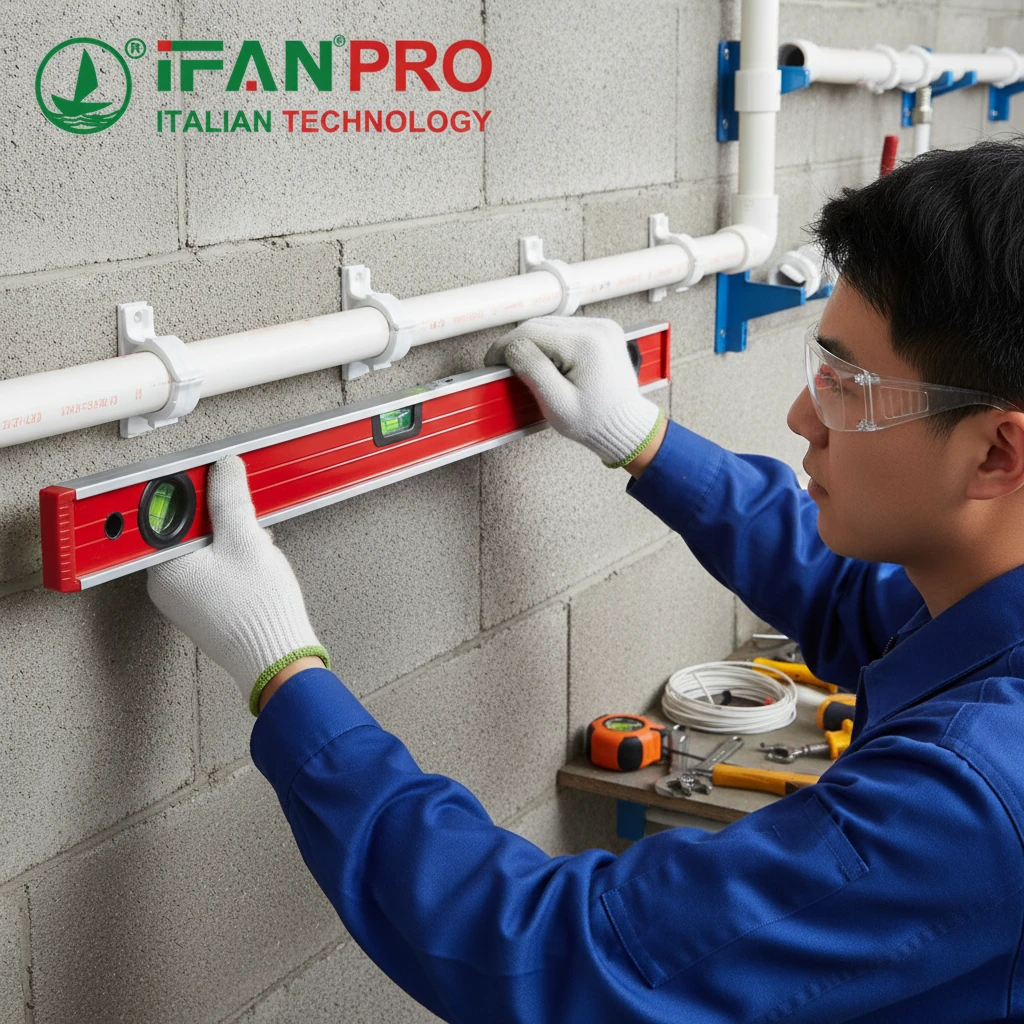
Step 1: Precise Marking and Planning
First, lay your pipe along the planned route temporarily. Then, hold a clip against the wall where you want it, ensuring it aligns with the pipe’s center. Use your pencil to mark the screw hole positions through the clip’s mounting holes. For a series of clips, use your tape measure and spirit level to draw a straight line. Next, mark all the clip positions along this line at your calculated spacing. This method is faster and more accurate than marking each clip individually. Also, double-check for obstructions like wires or pipes behind the wall.
Step 2: Drilling the Perfect Hole
Next, select the correct drill bit for your wall plug and wall material. Attach it to your power drill. Then, hold the drill straight (perpendicular) to the wall. If you drill at an angle, the clip will sit crooked and not hold the pipe properly. Drill to a depth slightly deeper than the length of your wall plug. This ensures the plug can be fully inserted and allows for a bit of dust at the bottom. Finally, blow or brush out the dust from the hole so the plug can seat properly.
Step 3: Inserting the Wall Plug
Now, take the correct plastic wall plug and tap it gently into the drilled hole with your hammer. The plug should be flush with or slightly below the wall surface. It should not be protruding, as this will prevent the clip from sitting flat against the wall. Importantly, do not force it; if it doesn’t go in, the hole might be too small.
Step 4: Attaching the Clip with the Screw
Then, place the PVC pipe clip over the hole, aligning the mounting hole with the inserted wall plug. Insert the screw through the clip and start turning it into the wall plug by hand or with the drill on a low torque setting. Tighten the screw until the clip base is firmly pressed against the wall. Crucially, stop tightening when you feel firm resistance. Otherwise, over-tightening can strip the wall plug, crack the clip, or distort the clip’s shape so it no longer holds the pipe correctly.
Step 5: Installing the Pipe
Once all clips for a section are securely mounted, you can install the pipe. For shorter lengths, you can lay the pipe into the open tops of the clips. However, for longer runs or tight spaces, you may need to use “snap-on” style clips where the top part snaps closed over the pipe. Press or snap the pipe firmly into each clip. You should hear a distinct click with snap-clips. Ultimately, the pipe should fit snugly without being forced.
Common Mistakes to Avoid
- Using wrong plugs or screws for the wall.
- Drilling holes too shallow or at an angle.
- Not aligning clips in a straight line.
- Over-tightening screws.
- Installing the pipe before you fix all clips, which makes alignment hard.
How Can You Verify PVC Pipe Clip Installation Provides Adequate Support?
The job isn’t done until you’ve tested your work. In fact, a simple verification check can prevent callbacks and failures.
You verify the installation by conducting a physical check: ensure the pipe cannot be rotated or lifted out of the clips, confirm there is no sagging between supports using a straight edge, check that clips are not cracked or deformed, and test the system under full water pressure to listen for vibration or movement noises. Ultimately, a properly supported pipe will be immobile and silent.
The Visual and Physical Inspection
First, once the pipe is snapped into all clips, begin with a thorough visual inspection. Look down the length of the pipe. Does it appear perfectly straight? Next, perform a hands-on check. Try to rotate the pipe within the clip. A properly sized clip will grip the pipe firmly, allowing no rotation. Then, try to lift the pipe upwards out of the clip. It should not come out easily; snap-clips should lock it in place. This test ensures the clip is the right size and is properly engaged.
Checking for Sag and Alignment
Then, use a long spirit level or a tight string line as a straight edge. Hold it underneath the pipe, parallel to the run. Look for any gaps between the pipe and the straight edge. Any visible gap indicates sagging. Typically, the most common place for sag is in the middle of the longest span between clips. If you find sag, you need to install an additional clip at that point. Also, check that all clips are aligned correctly and that the pipe is not putting sideways pressure on any clip, which could pop it open over time.
Inspecting the Fixings and Structure
After that, examine the clips themselves. Are they cracked, especially near the screw hole from over-tightening? Are they sitting flat against the wall, or are they tilted? Then, gently try to wiggle a clip. It should feel completely solid with no movement. If a clip moves, the fixing has failed—likely due to a bad wall plug, a wrong screw, or a poor drilling job. Consequently, that clip must be removed and re-fixed in a new location nearby.
Final System Performance Test
Finally, the most telling test is to run the system. Turn on the water supply and pressurize the pipes. Then, open and close valves quickly to create a pressure surge (water hammer). Listen carefully. Do you hear any banging, rattling, or vibrating sounds? These noises often mean a pipe section is moving or vibrating because it’s not held tightly enough. Also, look at the pipes and clips while the water is flowing. You should see no movement whatsoever. Finally, flush toilets and run multiple taps to simulate normal use and observe.
Verification Checklist Table
| Check | Method | Pass Condition |
|---|---|---|
| Clip Grip | Try to rotate or lift the pipe. | Pipe does not move or lift out. |
| Straightness | Use a level or string line under pipe. | No gap between pipe and straight edge. |
| Clip Integrity | Visually inspect each clip. | No cracks, sits flat on wall. |
| Fixing Security | Try to wiggle the clip base. | No movement; feels solid. |
| System Test | Run water, create pressure changes. | No banging, rattling, or visible movement. |
If your installation passes all these checks, you can be confident that your PVC pipe clips are providing secure, long-lasting support.
Conclusion
Proper PVC pipe clip installation ensures a safe, quiet, and durable plumbing system. For reliable performance, use high-quality clips like the IFAN PVC Pipe Support and Clip series, designed for strength and easy installation.


Recent Comments