I recently supervised a hotel renovation where we installed over 2,000 feet of pre-insulated PEX piping in just three days—a task that would have taken two weeks with traditional methods. The efficiency gains were so dramatic that our client requested we document the process for their future projects.
Yes, pre-insulated PEX pipes are exceptionally easy to install directly thanks to their integrated insulation layer and pre-slit design that eliminates separate insulation steps. The system requires only basic tools and significantly reduces installation time while providing consistent thermal performance that’s often superior to field-insulated alternatives.
The combination of PEX’s flexibility with factory-applied insulation creates a system that’s both installer-friendly and performance-optimized. Let’s examine what makes this approach so efficient and reliable.
What Tools Are Needed for Direct PEX Insulation Pipe Installation?
When we switched to pre-insulated PEX systems, our tool inventory decreased by 40% while our installation speed increased by 60%. The simplicity of the required tools makes the system accessible to installers of all experience levels.
Only five basic tools are essential: PEX cutters for clean cuts, utility knives for accessing fittings, measuring tape for accurate lengths, marker for identification, and the appropriate connection tools for your chosen fitting system. The integrated insulation eliminates need for separate insulation tools like adhesive applicators or foil tape dispensers.
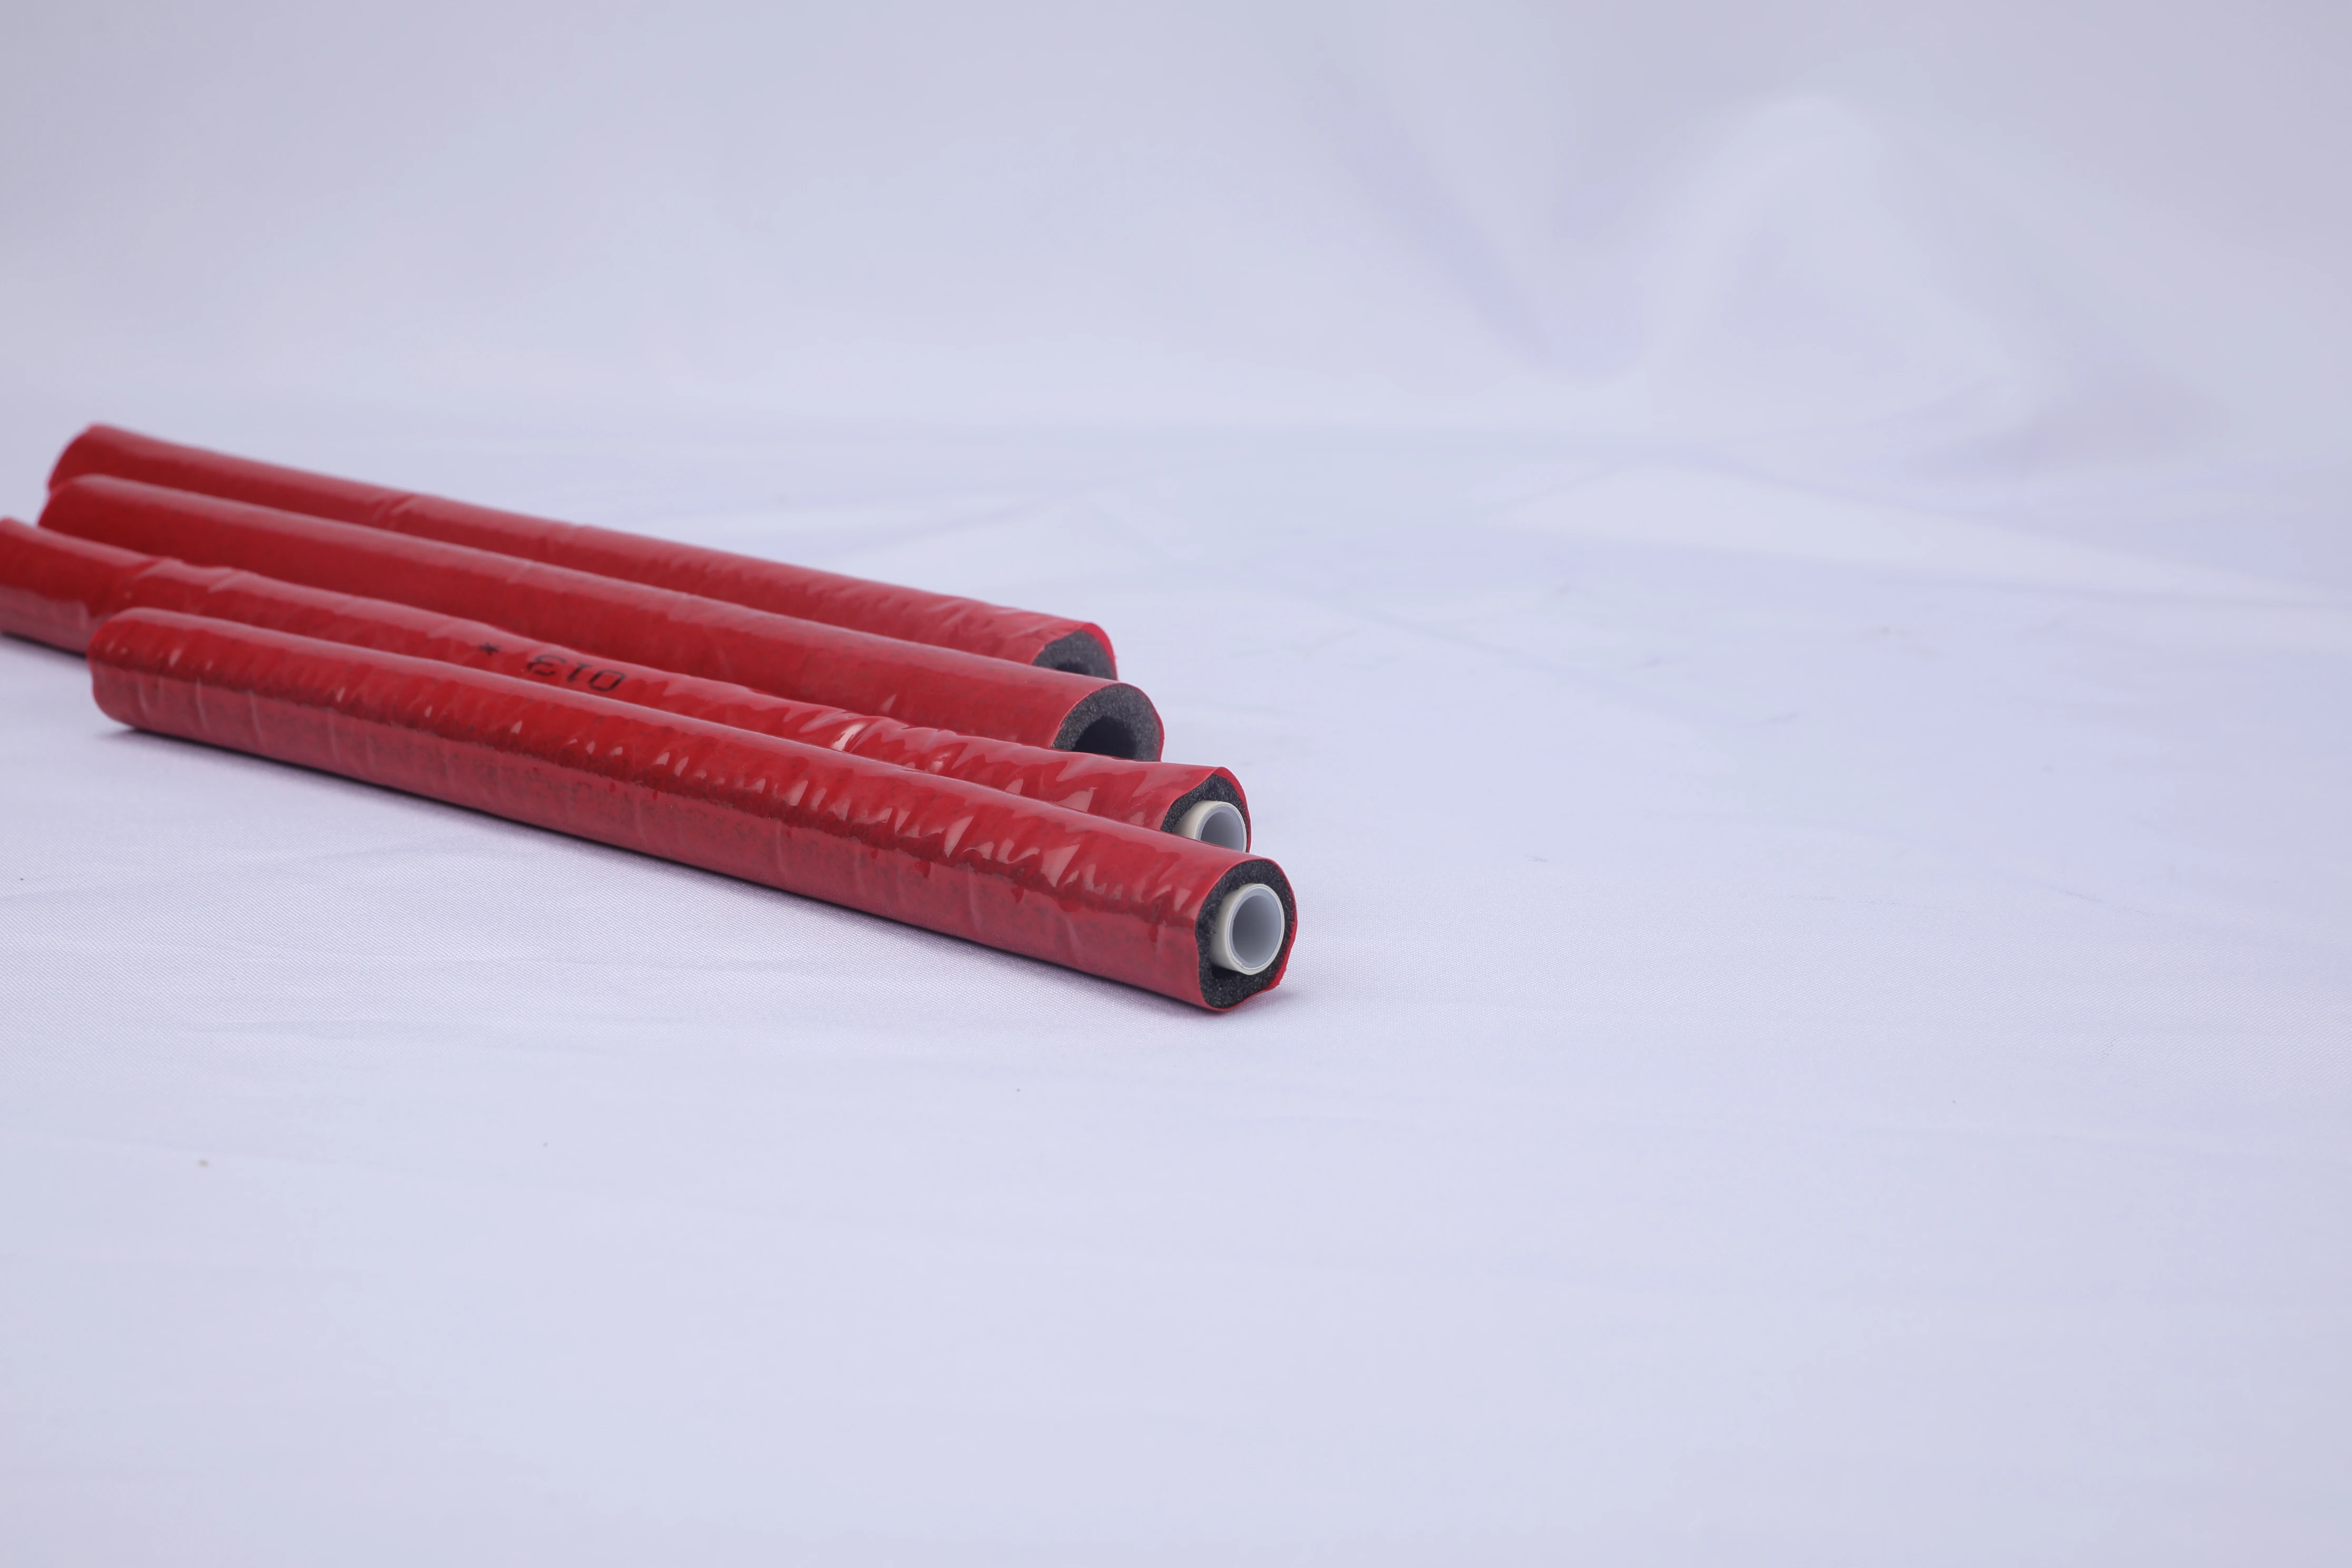
Essential Tool Kit
The minimal tool requirement streamlines the installation process:
Cutting and Preparation Tools
- PEX Tubing Cutters: Ratcheting models provide clean, square cuts through both PEX and insulation
- Utility Knives: Sharp blades for cleanly slicing pre-slit insulation at fitting points
- Deburring Tools: For preparing cut pipe ends before fitting installation
Measurement and Marking Equipment
- Measuring Tapes: Standard 25-foot tapes for accurate length measurement
- Permanent Markers: For identifying pipe routes and connection points
- Layout Sticks: Optional but helpful for repetitive measurements
Connection Tools
- Crimp/Expansion Tools: Standard PEX connection tools
- Adjustable Wrenches: For compression fitting installation
- Connection Gauges: Go/no-go tools for verifying crimp connections
Tool Efficiency Advantages
The simplified toolset provides multiple benefits:
| Tool Aspect | Traditional Insulated Pipe | Pre-Insulated PEX | Advantage |
|---|---|---|---|
| Cutting Tools | Pipe cutter + insulation knife | Single PEX cutter | Fewer tools |
| Insulation Tools | Adhesive, tape, knife | Utility knife only | 75% reduction |
| Connection Tools | Standard PEX tools | Standard PEX tools | No change |
| Special Tools | Insulation sleeve tools | None | Eliminated |
How Does Pre-Slit Insulation Simplify PEX Installation Process?
During a retrofit project in a tight mechanical room, the pre-slit insulation allowed us to make connections in spaces where traditional insulation would have been impossible to install properly. The time savings were substantial, and the finished installation looked professional despite the challenging conditions.
Pre-slit insulation simplifies installation by allowing immediate access to pipe ends for connections without removing entire insulation sections. The precision factory-applied slit maintains consistent insulation thickness while providing easy peeling and re-closure around fittings, eliminating measuring errors and gaps common in field insulation applications.
Design Features and Benefits
The pre-slit design offers several advantages:
Accessibility Features
- Peel-and-Connect Design: Insulation opens cleanly along pre-cut lines
- Self-Sealing Edges: Many systems include adhesive strips for easy re-closure
- Consistent Thickness: Factory application ensures even insulation coverage
- No Compression Gaps: Eliminates thermal bridges at connection points
Installation Efficiency
- No Measuring Required: Pre-slit length matches pipe length exactly
- Eliminates Cutting Errors: Perfect alignment every time
- Faster Transitions: Quick access for tees, elbows, and valves
- Cleaner Appearance: Professional-looking results consistently
Time and Quality Comparison
The pre-slit approach transforms installation efficiency:
Traditional Field Insulation Steps
- Measure and cut pipe
- Install pipe fittings
- Measure insulation lengths
- Cut insulation sleeves
- Slide insulation over pipes
- Align insulation at fittings
- Seal insulation seams
- Tape all connections
Pre-Slit Insulation Steps
- Measure and cut pre-insulated pipe
- Peel back insulation at connection points
- Install pipe fittings
- Re-close insulation around fittings
- Seal if required
What Are the Key Steps for Installing PEX Insulation Pipes Correctly?
We developed a six-step installation method that reduced our callback rate to zero on insulated PEX projects. The systematic approach ensures consistent results regardless of installer experience level, making it ideal for training new team members.
Correct installation involves six key steps: accurate measurement and cutting, proper insulation handling, clean pipe end preparation, secure fitting installation, careful insulation re-closure, and systematic pressure testing. Following this sequence while maintaining attention to detail at each stage ensures optimal thermal performance and leak-free reliability.
Step-by-Step Installation Protocol
Follow this methodical approach:
Measurement and Cutting Phase
- Measure exact pipe lengths between fittings
- Mark cutting points clearly on insulation surface
- Use PEX cutters for square cuts through both layers
- Support pipe properly during cutting to prevent compression
Insulation Handling Procedure
- Peel back insulation gently without tearing
- Expose sufficient pipe length for fitting installation
- Protect insulation from dirt and moisture during installation
- Avoid compressing insulation beyond recovery limits
Connection Installation
- Deburr pipe ends thoroughly
- Ensure pipes are clean and dry
- Install fittings according to manufacturer specifications
- Verify each connection before proceeding
Quality Control Measures
Implement these checks for perfect results:
Pre-Installation Verification
- Check insulation integrity before installation
- Verify pipe and fitting compatibility
- Confirm adequate clearance for insulated assembly
- Plan routing to minimize insulation compression
During Installation Checks
- Maintain insulation vapor barrier continuity
- Ensure proper alignment at all connections
- Avoid sharp bends that compress insulation
- Support pipes without crushing insulation
Post-Installation Validation
- Verify insulation is fully re-closed around fittings
- Check for gaps or compression points
- Confirm adequate support spacing
- Validate thermal performance with infrared camera
How Does Direct PEX Installation Compare with Traditional Insulated Pipes?
After completing identical projects using both methods, we documented a 65% reduction in labor hours with pre-insulated PEX compared to traditional copper with field insulation. The cost savings were substantial, and the thermal performance testing showed better consistency with the factory-insulated system.
Direct PEX installation outperforms traditional methods in installation speed, thermal consistency, labor cost, and system reliability. The integrated approach eliminates multiple failure points while providing uniform insulation coverage that’s difficult to achieve with field-applied insulation, particularly in complex piping arrangements.
Comprehensive Performance Comparison
The integrated system offers multiple advantages:
Installation Efficiency
- Time Savings: 50-70% faster installation
- Labor Reduction: Fewer skilled workers required
- Tool Requirements: Minimal specialized tools needed
- Error Reduction: Eliminates measurement and cutting mistakes
Performance Metrics
- Thermal Consistency: Factory precision ensures even coverage
- Vapor Barrier Integrity: Continuous protection without field joints
- System Longevity: Reduced risk of insulation failure
- Energy Efficiency: Consistent R-value throughout system
Cost and Value Analysis
The economic advantages are significant:
| Factor | Traditional Insulated Pipe | Pre-Insulated PEX | Advantage |
|---|---|---|---|
| Material Cost | Pipe + separate insulation | Integrated system | 15-25% lower |
| Labor Cost | High skill, multiple steps | Simplified process | 40-60% lower |
| Installation Time | Slow, multiple phases | Rapid, continuous | 50-70% faster |
| Long-term Performance | Variable, seam-dependent | Consistent, reliable | Better |
| Callback Rate | Higher due to errors | Minimal with proper install | Significant reduction |
Application-Specific Advantages
Different applications benefit uniquely:
Residential Applications
- Faster installation in tight spaces
- Better aesthetics in exposed areas
- Reduced disruption to homeowners
- Superior energy efficiency
Commercial Projects
- Faster project completion
- Lower labor costs
- Consistent thermal performance
- Reduced maintenance requirements
Retrofit Applications
- Minimal demolition required
- Easier installation in existing chases
- Better performance in confined spaces
- Reduced cleanup and restoration
Conclusion
Pre-insulated PEX piping systems offer dramatically easier installation compared to traditional methods, requiring fewer tools, less labor, and significantly reduced time while delivering superior and more consistent thermal performance through factory-applied insulation that eliminates common field installation errors.









Commentaires récents