
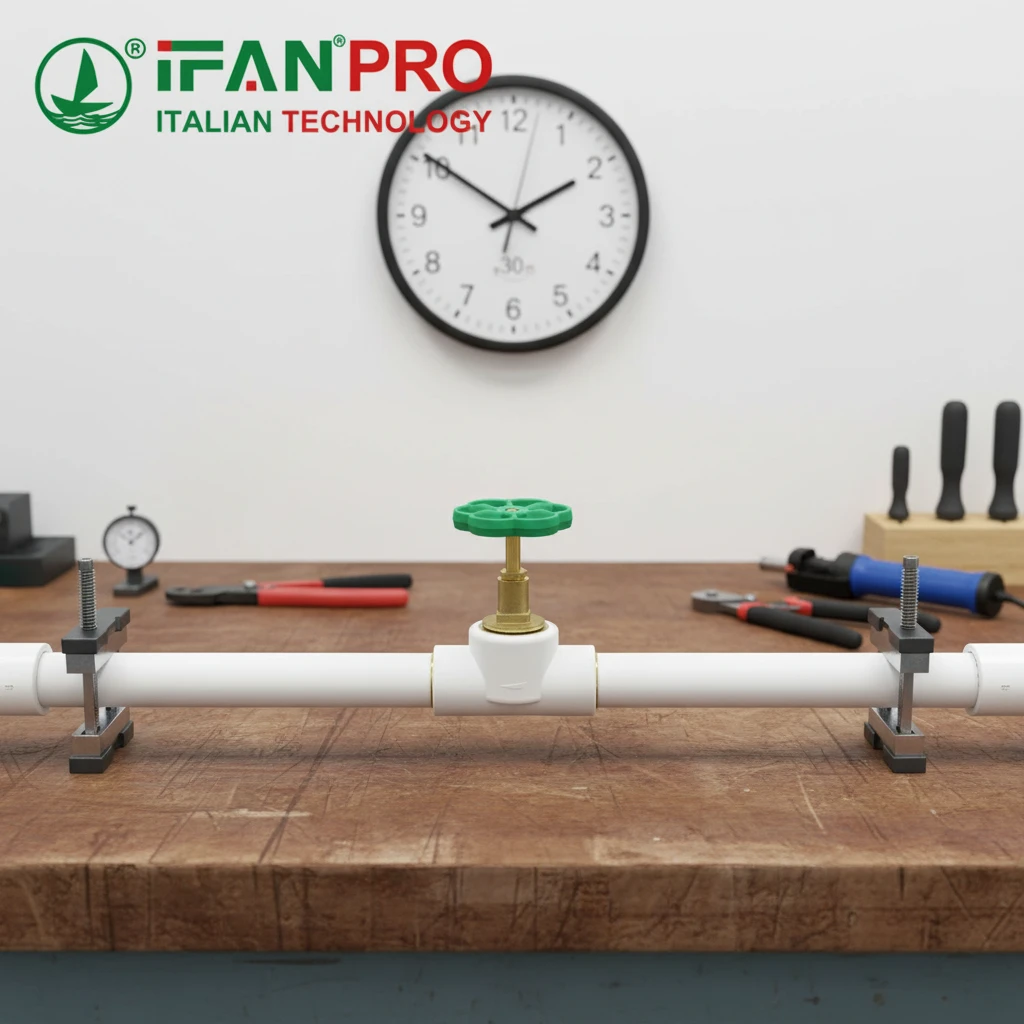
I once watched an entire building’s plumbing system fail because one gate valve joint leaked. That costly mistake taught me that proper fusion technique isn’t optional—it’s essential.
To ensure 100% zero leakage with PPR gate valve fusion, you must master three critical factors: precise heating time and temperature based on valve size, correct insertion depth with clean surfaces, and adequate cooling time before pressure testing. These three elements work together to create a permanent, monolithic joint that will never leak.
Let’s dive into each of these make-or-break factors in detail.
What is the Correct Heating Time and Temperature for Different Valve Sizes?
Nothing ruins a joint faster than wrong temperatures. I’ve seen installers guess the timing and pay for it later.
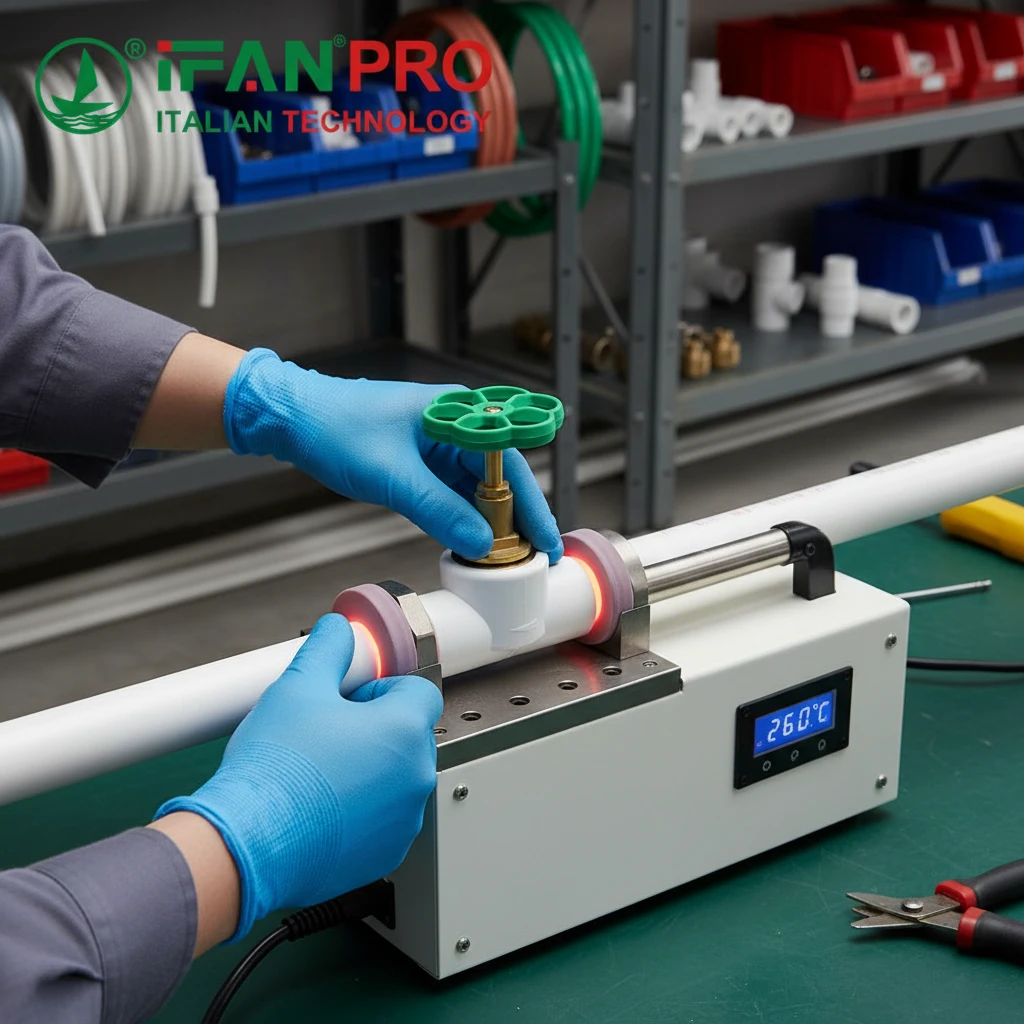
The correct heating time for PPR gate valves depends on the valve’s socket diameter. For a standard 20mm valve, heat for 5 seconds; for 25mm, heat for 7 seconds; for 32mm, heat for 8 seconds; for 40mm, heat for 12 seconds; for 50mm, heat for 18 seconds. The heating tool temperature must remain stable at 260°C (500°F) for all sizes.
Why Temperature Stability Matters More Than You Think
The 260°C mark is not random. PPR material reaches its ideal melting point at this temperature. If the tool runs too cold, the pipe and fitting won’t fuse properly. The joint will look connected but will separate under pressure. If the tool runs too hot, the material degrades. Burnt PPR becomes brittle and weak. It will crack over time.
Many cheap fusion tools have poor temperature control. They heat up but fluctuate widely. A quality welding machine maintains a steady 260°C throughout the entire process. This consistency is critical for reliable joints.
The Timing Formula: Diameter Dictates Duration
Heating time follows a simple rule: bigger pipes need more heat. The heat must penetrate through the entire wall thickness. If you under-heat a 50mm valve, only the surface melts. The inner layers stay solid, so fusion fails. If you over-heat a 20mm valve, the thin wall melts completely and deforms.
The table below shows standard heating times based on international installation standards:
| Valve/Pipe Diameter | Heating Time (Seconds) | Tool Temperature |
|---|---|---|
| 20mm (1/2 inch) | 5 seconds | 260°C |
| 25mm (3/4 inch) | 7 seconds | 260°C |
| 32mm (1 inch) | 8 seconds | 260°C |
| 40mm (1 1/4 inch) | 12 seconds | 260°C |
| 50mm (1 1/2 inch) | 18 seconds | 260°C |
| 63mm (2 inch) | 24 seconds | 260°C |
Common Timing Mistakes to Avoid
The biggest mistake installers make is counting seconds in their head without a timer. Human counting is inaccurate. A few extra seconds can overheat the material. A few seconds less can leave it under-melted. Always use a timer.
Another mistake is starting the count too early. The clock starts when you fully insert the pipe and fitting onto the heating tool, not when you first touch them. The insertion must be quick and firm, then you begin counting.
Also, remember that room temperature affects heating. In cold environments, some installers add one second to compensate. In very hot conditions, they might subtract one second. This adjustment requires experience, but the standard times work well in normal conditions.
How Do You Ensure Proper Insertion Depth Without Contaminating the Fusion Surface?
Depth mistakes are invisible but deadly. A joint that looks fine can fail months later if insertion was wrong.
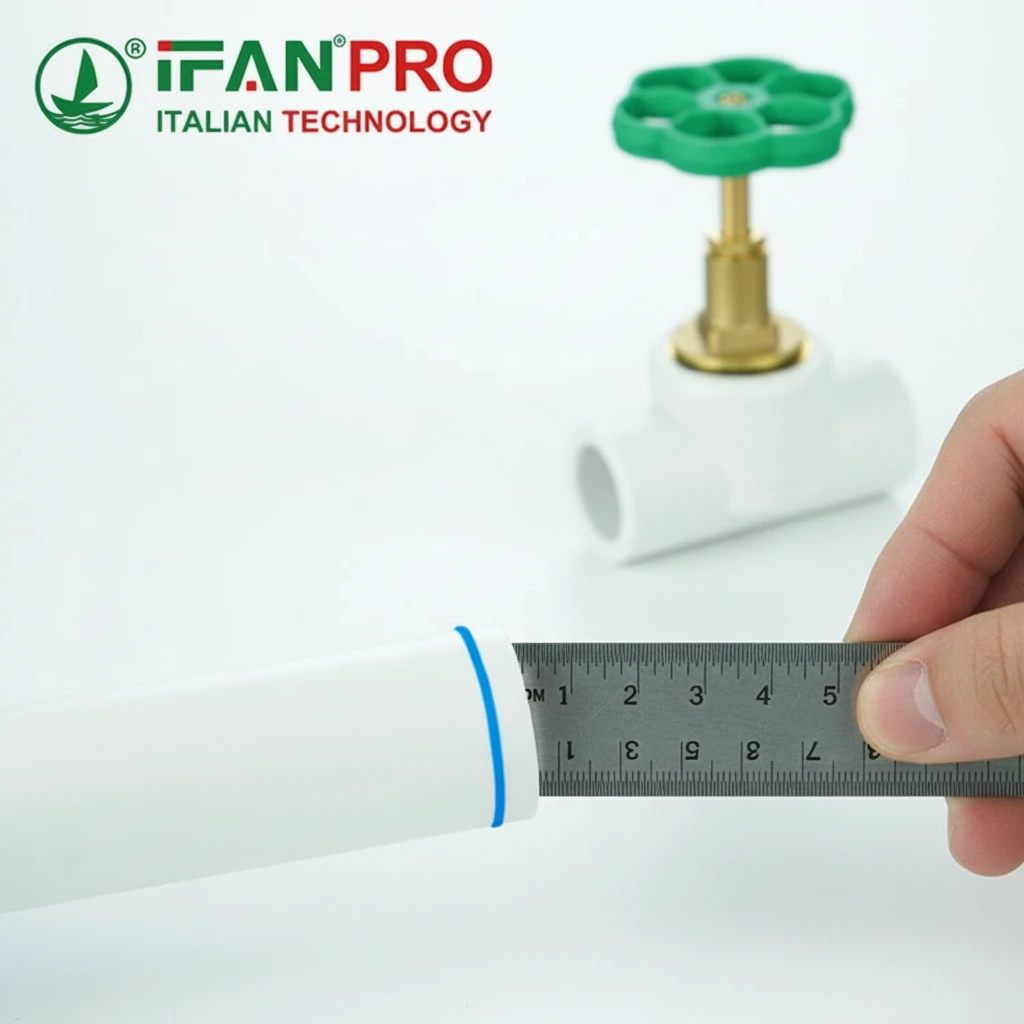
To ensure proper insertion depth, mark the exact insertion depth on the pipe before heating using a marker or tape. This mark shows you exactly how far to push the pipe into the valve socket during fusion. To avoid contamination, handle pipes with clean gloves, never touch the fusion surfaces with bare hands, and clean all surfaces with isopropyl alcohol before heating.
The Marking Method: Simple But Critical
Every PPR valve socket has a specific depth. You cannot guess this depth. The correct measurement is usually printed in the manufacturer’s installation manual. For IFAN valves, this information comes with every product.
Take a measuring tool and find this exact depth on your pipe. Then, draw a clear line around the pipe circumference at that point. Use a permanent marker or a piece of tape. This line becomes your visual guide during insertion. When you push the heated pipe into the valve, stop exactly when the line meets the valve edge.
Without this mark, you might insert too little, creating a shallow joint that pulls apart under pressure. Or you might insert too deep, blocking the valve mechanism or creating internal ridges that restrict flow.
The Cleanliness Rule: Oil and Dirt Are Enemies
Human skin produces natural oils. These oils transfer to everything we touch. If you touch the pipe end or the valve socket interior, you leave oil behind. During heating, this oil burns and creates a contamination layer between the melting surfaces. The joint will look fused but actually has a weak spot where the oil residue sits.
Always wear clean cotton gloves when handling pipes and fittings before fusion. If you accidentally touch a fusion surface, clean it properly. Use isopropyl alcohol and a lint-free cloth. Wipe thoroughly and let it dry completely before heating.
Dust and debris are equally dangerous. A tiny piece of dirt on the heating tool can embed into the melting plastic. This creates a void in the joint. Check your heating tool tips regularly. Keep them clean with a dry cloth or wood scraper. Never use metal tools to clean the non-stick coating.
The Insertion Motion: Quick and Straight
When the heating time finishes, you have a small window to join the parts. Remove the pipe and valve from the tool simultaneously. Immediately push them together with steady, firm pressure. Do not twist. Twisting can tear the melted surface and create weak points.
Push straight in until your mark aligns with the valve edge. Hold this position firmly. Do not let the joint move during the first few seconds of cooling. Any movement now will misalign the molecular bond.
The table below summarizes common contamination sources and solutions:
| Contamination Source | Why It’s Dangerous | Prevention Method |
|---|---|---|
| Bare hand contact | Skin oils burn during fusion, creating weak layers | Wear clean cotton gloves |
| Dirty storage | Dust settles on fusion surfaces | Store pipes in clean bags; wipe before use |
| Greasy tools | Residue transfers to melting plastic | Clean heating tool tips regularly |
| Wet surfaces | Steam creates voids in the joint | Ensure all surfaces are completely dry |
| Cutting debris | Plastic shavings stick to heated areas | Deburr pipes thoroughly after cutting |
What Visual Signs Confirm a Perfect Fusion Joint Has Been Achieved?
You don’t need X-ray vision to spot a good joint. The evidence appears right before your eyes.
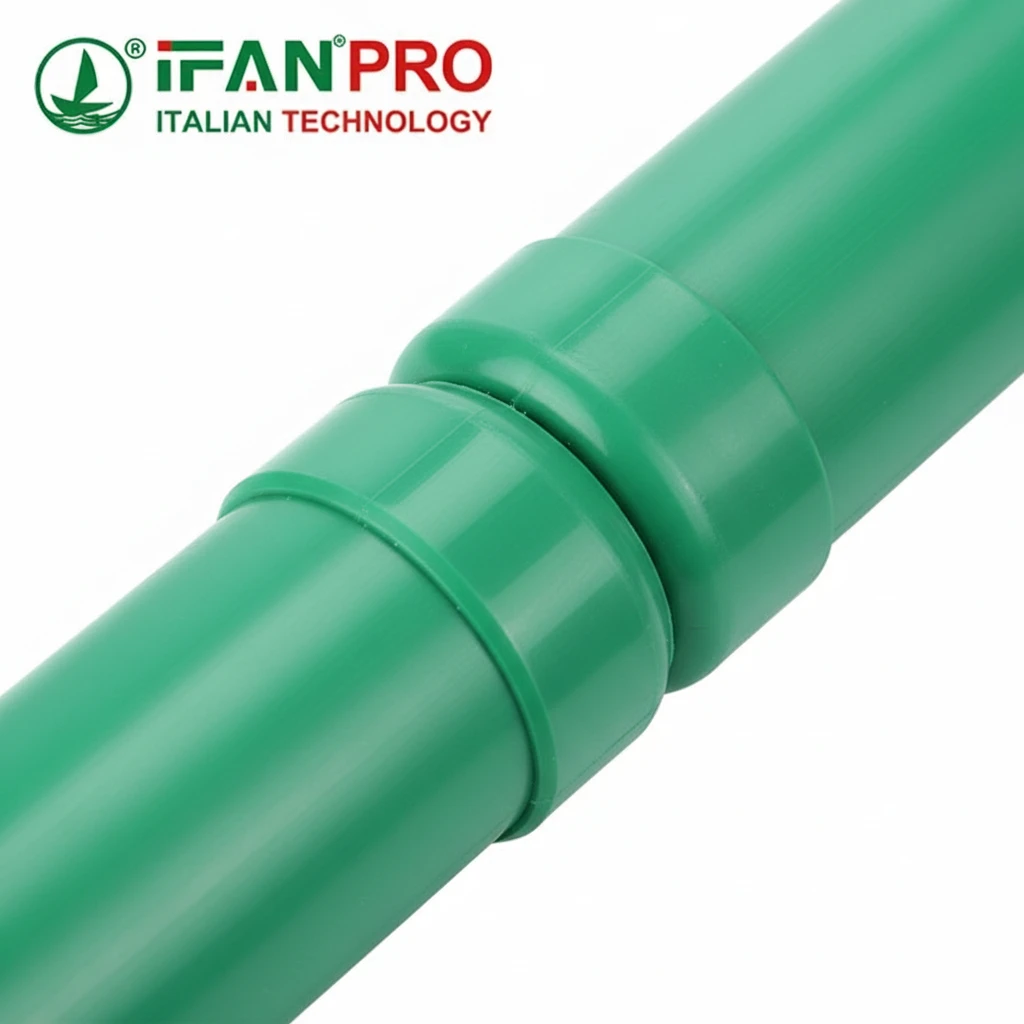
A perfect fusion joint shows three visual signs: a uniform melt bead (flash) around the entire circumference of the socket, no gaps between the pipe and the fitting, and perfect alignment with no visible tilt or rotation. The melt bead should be evenly sized all around, indicating consistent heat and pressure during fusion.
The Melt Bead: Your Window Into the Joint
When you push the heated pipe into the valve, melted plastic squeezes out around the socket edge. This creates a raised ring called the flash or melt bead. This bead tells you what happened inside the joint.
A perfect bead is uniform in size all the way around. It looks like a smooth, rounded collar. If the bead is bigger on one side and smaller on the other, your insertion was crooked. This means the melted material pressed more on one side, leaving the opposite side with less material and a weaker bond.
The bead should be clean and free of bubbles. Bubbles indicate moisture or contamination that boiled during fusion. If you see bubbles, the joint may fail later.
What the Bead Size Tells You
The size of the melt bead correlates with insertion depth and pressure. A proper bead extends about 1-2mm from the fitting edge for smaller diameters, and 2-3mm for larger ones.
If you see no bead at all, you under-inserted. The pipe did not go deep enough to push melted material out. This joint has insufficient contact area inside. It will pull apart under pressure.
If you see an excessively large bead, you over-inserted or used too much force. The pipe went too deep, potentially blocking the valve mechanism or creating internal obstructions.
Alignment Matters for Valve Function
Gate valves have internal mechanisms that must align with flow direction. If your fusion joint is crooked, the entire valve sits at an angle. This creates stress on the pipe system and can make the valve harder to operate.
Check that the valve handle aligns properly with your installation plan. If the valve body tilts even slightly, the internal gate may not seal completely when closed. This leads to slow leaks through a “closed” valve.
The table below shows visual inspection criteria:
| Visual Feature | What It Indicates | Is It Acceptable? |
|---|---|---|
| Uniform bead all around | Straight insertion, even pressure | ✓ Yes, perfect joint |
| Bead larger on one side | Crooked insertion | ✗ No, weak side may fail |
| No visible bead | Under-insertion | ✗ No, insufficient bond |
| Bubbles in bead | Moisture or contamination | ✗ No, internal voids present |
| Smooth, shiny bead | Correct temperature | ✓ Yes, good fusion |
| Dull or rough bead | Too cold or degraded material | ✗ No, poor fusion |
| Pipe centered in fitting | Correct alignment | ✓ Yes, proper installation |
| Pipe off-center | Crooked insertion | ✗ No, stress concentration |
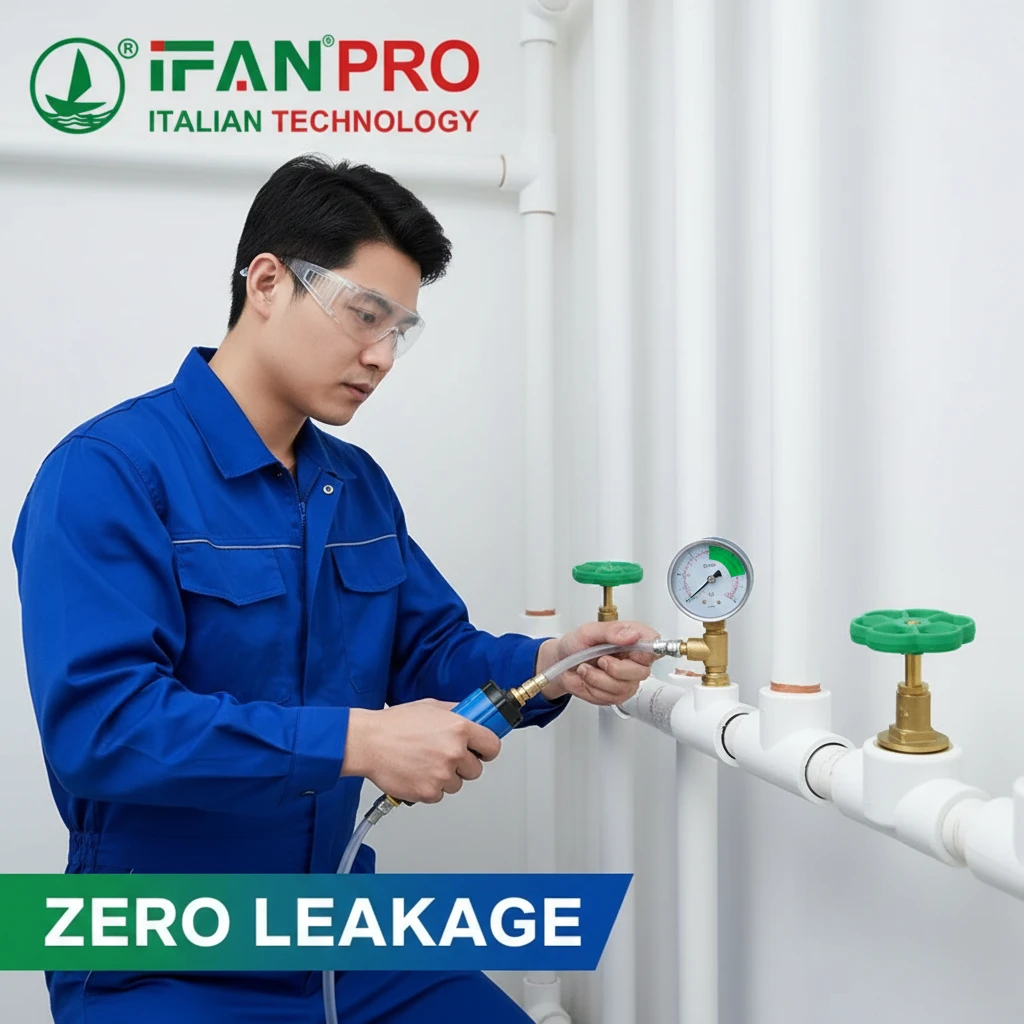
Why is Allowing Adequate Cooling Time Critical Before Pressure Testing?
Patience is the hardest part of installation. But rushing this step guarantees failure.
Allowing adequate cooling time is critical because the fused joint needs time to recrystallize and regain its full strength. If you apply pressure too soon, the still-soft material will deform or separate at the bond line. Standard cooling time is 15-30 minutes for small diameters and up to 2 hours for large valves, depending on ambient temperature.
The Science of Cooling: Recrystallization
When you heat PPR to 260°C, the crystalline structure of the plastic melts into an amorphous state. The molecules flow and mix between the pipe and valve surfaces. As the material cools, it recrystallizes into a solid, strong structure. This process takes time.
During the first few minutes, the joint is still soft. The molecular chains are re-forming their bonds. If you disturb the joint now—by moving it, bending it, or applying internal pressure—you break those forming bonds. The material will separate along the bond line, creating a weak joint that may not leak immediately but will fail under long-term pressure.
Cooling Time Guidelines
Cooling time depends on several factors: pipe diameter, ambient temperature, and whether the joint can move during cooling.
The table below provides minimum cooling times before pressure testing:
| Valve/Pipe Diameter | Minimum Cooling Time | Notes |
|---|---|---|
| 20mm (1/2 inch) | 15 minutes | Longer in cold rooms |
| 25mm (3/4 inch) | 20 minutes | Protect from drafts |
| 32mm (1 inch) | 30 minutes | No movement allowed |
| 40mm (1 1/4 inch) | 45 minutes | Keep joint undisturbed |
| 50mm (1 1/2 inch) | 60 minutes | Full strength not reached |
| 63mm (2 inch) | 90-120 minutes | Best to wait overnight |
Environmental Factors That Affect Cooling
Cold environments speed cooling but create other problems. In very cold conditions, the outside of the joint cools quickly while the inside stays warm. This creates internal stress. Protect cooling joints from cold drafts with insulation if necessary.
Hot environments delay cooling. In summer heat or direct sun, a 50mm joint may need more than 60 minutes to cool internally. If you pressure test too soon, the joint may still be warm and weak.
Water cooling is never acceptable. Never pour water on a joint to speed cooling. This shocks the material and creates weak crystalline structures. Always let joints cool naturally in still air.
The Rushing Trap
We understand pressure to finish a job. Clients want systems operational quickly. But a pressure test failure caused by rushing costs far more time than waiting for proper cooling. You must cut out the failed joint, clean everything, and re-fuse a new valve. This adds hours and wastes materials.
Always build cooling time into your installation schedule. Explain to clients that this waiting period ensures the system will work for decades without leaks.
Conclusion
Master these three key factors—correct heating time, proper insertion depth, and adequate cooling—and your PPR gate valve joints will never leak. For premium valves with clear installation guides, choose IFAN’s complete range of PPR gate valves designed for reliable fusion every time.


Commentaires récents