

I’ve seen too many projects delayed by leaks from poorly sealed PVC threads. A simple sealing mistake can cause major water damage and frustration.
To seal PVC pipe threads perfectly, you must use the right sealant, apply it correctly, and test the connection. The best methods include using PTFE tape (Teflon tape) or a non-hardening, non-corrosive pipe thread sealant paste made for plastic. Proper application technique is more critical than the product itself for creating a lasting, leak-free seal.
This guide will walk you through the best practices, common mistakes, and professional tips to ensure your threaded PVC connections are perfectly sealed every time.
What Are the Best Thread Sealants for PVC Pipe Connections?
Choosing the wrong sealant is the most common mistake I see. Using a product meant for metal can crack your PVC fittings.
The best thread sealants for PVC are PTFE tape (Teflon tape) and non-hardening pipe dope formulated specifically for plastic. You must avoid hard-setting pastes and sealants containing oils or solvents that can degrade and crack PVC material. For pressurized water systems, a combination of tape and paste often provides the most reliable seal.

Understanding Your Sealant Options
The goal of a thread sealant is to fill the microscopic gaps between threaded connections. For PVC, you need a sealant that works without damaging the plastic. Here are the two main types:
1. PTFE Tape (Teflon Tape): This is a thin, white tape you wrap around the male threads. It lubricates the threads for easier tightening and fills the gaps.
- Best For: Standard water pressure applications, gas lines (use yellow gas-grade tape), and connections you may need to adjust later.
- Pros: Clean, easy to use, doesn’t expire, and allows for disassembly.
- Cons: Can be tricky to apply correctly; if wrapped in the wrong direction, it can unravel during assembly.
2. Pipe Dope (Thread Sealant Paste): This is a paste applied to the threads.
- CRITICAL: You must use a non-hardening formula labeled “Safe for Plastic” or “For All Pipes Including PVC.”
- Best For: Larger diameter pipes, high-pressure systems, or irregular threads. It’s also excellent when used with tape for a dual seal.
- Pros: Fills thread imperfections better, easier to apply evenly on large threads.
- Cons: Messier, can dry out in the container, and some formulas can make disassembly difficult.
Products to Avoid
Never use these on PVC:
- Hard-setting pastes (like some pipe joint compounds): They can stress and crack PVC when they harden.
- Sealants with solvents or oils: These chemicals can weaken the PVC’s structure over time, leading to sudden failure.
- Teflon tape for metal pipes: While it may work, it’s often thicker and less ideal than standard tape for plastic.
Sealant Comparison Table
| Sealant Type | Best Used For | Key Advantage | Main Caution |
|---|---|---|---|
| PTFE Tape (White) | Cold & hot water lines, low-pressure applications. | Clean, allows for future adjustment. | Must wrap in correct direction (clockwise). |
| PTFE Tape (Yellow/Gas) | Natural gas and propane lines. | Specifically rated for fuel gases. | Never use for water lines. |
| Non-Hardening Paste (for Plastic) | High-pressure water, large pipes, imperfect threads. | Excellent gap-filling ability. | Must be “plastic-safe”; can be messy. |
| Tape & Paste Combo | Critical, high-pressure, or vibration-prone connections. | Provides a dual, highly reliable seal. | Apply tape first, then a thin layer of paste over it. |
At IFAN, we always recommend checking the manufacturer’s instructions on both the pipe and the sealant. When in doubt, a plastic-safe, non-hardening paste is often the most foolproof choice for beginners because it ensures complete thread coverage.
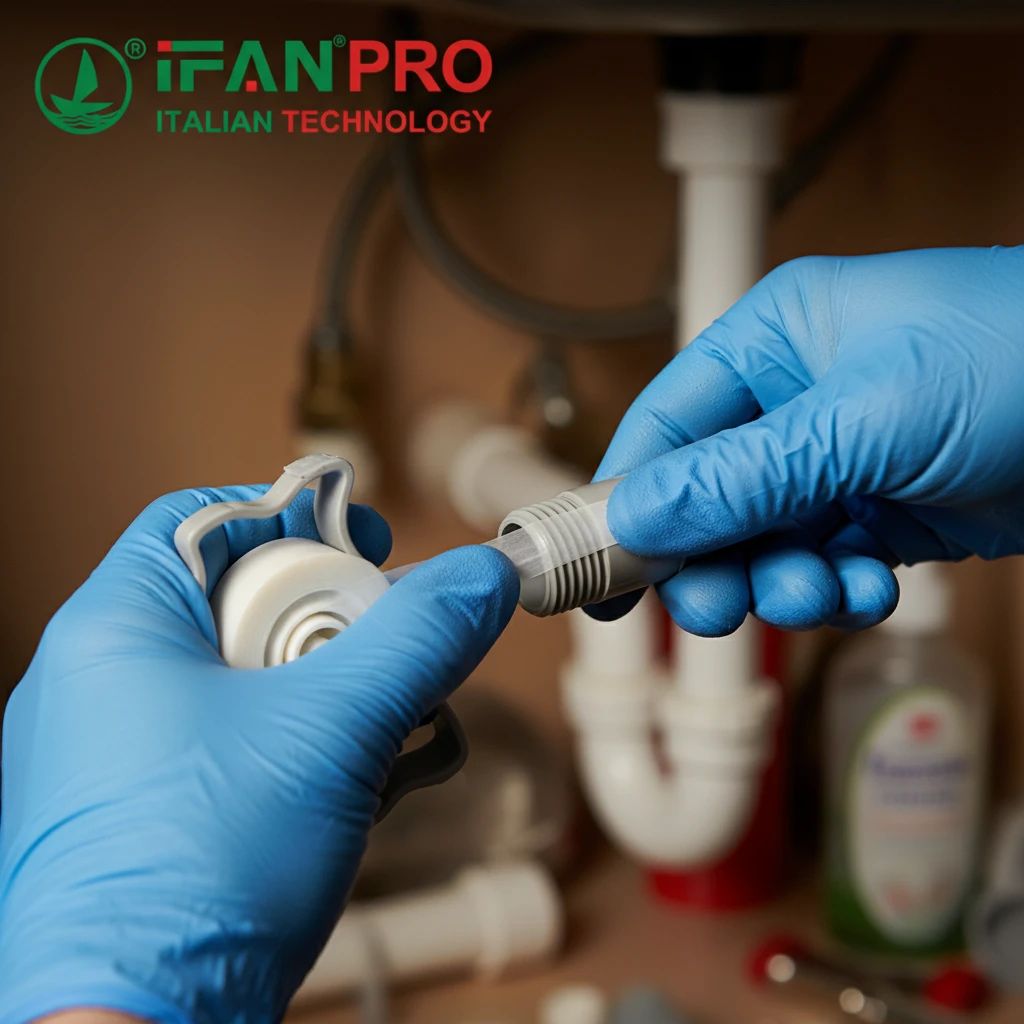
How Do You Properly Apply Sealant Tape on PVC Pipe Threads?
Applying tape seems simple, but doing it wrong is a leading cause of leaks. I’ve fixed many connections where tape was bunched up or wrapped backwards.
To properly apply sealant tape, start at the end of the male threads, holding the tape taut. Wrap it clockwise (looking from the end of the pipe) for 4 to 6 full turns, overlapping each layer by 50%. Ensure the tape covers all threads neatly and smoothly without stretching or folding, and keep the first thread clean for easy starts.
Step-by-Step Guide to Wrapping Tape
A perfect tape job creates smooth layers that fill the thread valleys. Follow these steps:
Step 1: Prepare the Threads. Make sure the male threads are clean, dry, and free of dirt or old sealant. Any debris will prevent a good seal.
Step 2: Start Correctly. Hold the end of the tape against the pipe, just behind the first thread. Do not cover the very first thread. Leaving it bare makes it much easier to start threading the fitting by hand.
Step 3: Wrap with Tension. Pull the tape taut as you wrap. Wrap in the clockwise direction (to the right). This is crucial because when you screw the fitting on (also clockwise), the tape will tighten, not unravel. Wrap tightly so the tape conforms to the thread shape.
Step 4: Overlap and End. Overlap each new wrap so it covers half of the previous layer. After 4 to 6 full wraps (for standard 1/2″ or 3/4″ pipe), tear the tape and press the end firmly against the threads. For larger diameter pipes (1″ and above), you may need 7 or 8 wraps.
Step 5: Inspect Before Assembly. The threads should be fully covered with smooth, layered tape. There should be no folds, wrinkles, or loose ends.
Common Mistakes and How to Avoid Them
Here is a table of frequent errors I see in the field:
| Common Mistake | What Happens | How to Avoid It |
|---|---|---|
| Wrapping Counter-Clockwise | The tape unwinds as you tighten the fitting, leaving gaps. | Always wrap in the same direction you will turn the fitting (clockwise). |
| Too Few Wraps | The tape is too thin to fill all gaps, leading to leaks. | Use a minimum of 4-6 wraps for standard pipes. |
| Too Many Wraps | The tape acts as a lubricant, but too much can prevent the fitting from tightening fully. | The fitting should turn smoothly but become snug. If it gets hard to turn very early, you may have too much tape. |
| Loose, Sloppy Wrapping | Creates folds and voids that become leak paths. | Keep the tape taut and wrap neatly with good overlap. |
| Covering the First Thread | Makes it hard to start the fitting straight, leading to cross-threading. | Always start behind the first thread. |
Remember, PTFE tape’s main job is to fill gaps and lubricate. It does not act as a glue. The seal is created by the tape compressing into the thread valleys, so a smooth, layered application is key. Once the fitting is tightened, do not back it off, as this will break the seal. If you need to adjust it, it’s best to remove the fitting, clean off the old tape, and reapply new tape.
Can You Use Pipe Dope on PVC Threads to Prevent Leaks?
Yes, but the choice of product is critical. I’ve witnessed the costly damage caused by the wrong paste eating away at PVC.
You can use pipe dope on PVC threads, but only a non-hardening sealant paste that is explicitly labeled as safe for plastic pipes. Never use standard pipe dope made for metal, as it often contains oils and solvents that chemically attack and weaken PVC, leading to cracks and catastrophic failures over time.
The Right Paste vs. The Wrong Paste
Pipe dope, or thread sealant paste, can be an excellent choice for PVC. The paste flows into every tiny imperfection in the threads, creating a very reliable seal. However, the chemistry of the paste must be compatible with the plastic.
The Correct “Plastic-Safe” Paste:
- Formula: It is a non-hardening, solvent-free compound. It stays pliable forever.
- Function: It lubricates threads for assembly and fills voids without applying stress.
- Label: Always look for phrases like “For All Pipes,” “Safe for Plastic,” or “Use on PVC, CPVC, ABS.”
The Dangerous Metal Paste:
- Formula: Often contains oils, kerosene, or other solvents to help it penetrate metal threads.
- The Problem: These solvents attack the molecular structure of PVC. They cause the plastic to become brittle and crack, sometimes days or weeks after installation. The failure is often sudden and severe.
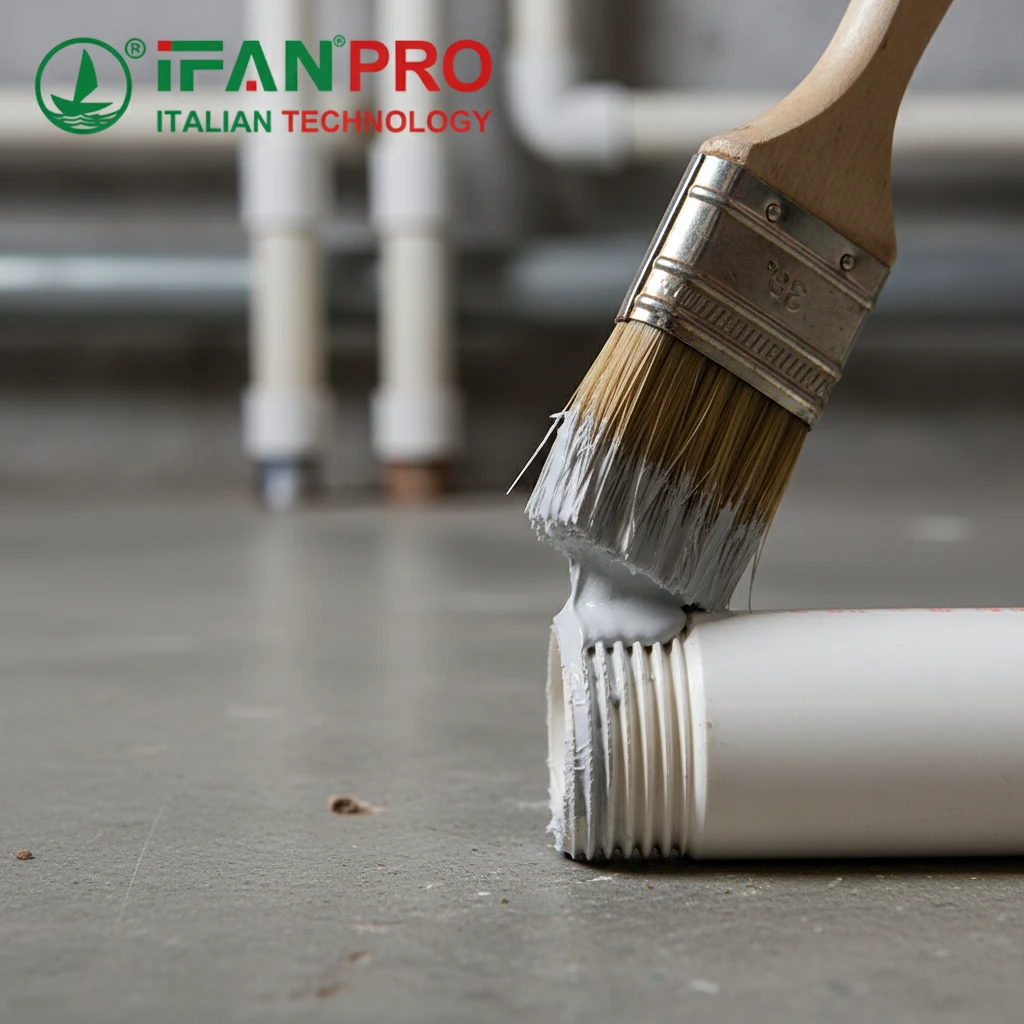
How to Apply Pipe Dope Correctly
Applying paste is simpler than tape, but still requires care.
1. Preparation: Ensure threads are clean and dry, just like with tape.
2. Application: Using the brush in the can or a small stick, apply a moderate, even coat to the male threads only. You do not need to apply it to the female threads inside the fitting.
- How much is enough? Cover all the threads completely, but avoid globs of paste. A good rule is that you should still be able to see the thread shape through the paste.
3. Assembly: Hand-tighten the fitting, then use a wrench to turn it 1 to 2 full turns past hand-tight. The paste will spread and fill all gaps. Wipe away any excess paste that squeezes out.
When to Choose Paste Over Tape
Consider using a plastic-safe pipe dope in these situations:
- Large Diameter Pipes (Over 2″): Wrapping tape neatly on large threads is difficult. Paste is much easier to apply evenly.
- High-Pressure Systems: Paste typically provides a more consistent and complete fill of thread irregularities under high pressure.
- Old or Slightly Damaged Threads: Paste is better at filling in nicks and imperfections.
- Where Vibration is Present: The non-hardening, flexible nature of the paste can maintain a seal under slight movement better than tape.
For the ultimate seal, especially in critical applications, many professionals use a combination method: they first wrap the threads with 2-3 turns of PTFE tape, then apply a thin layer of plastic-safe pipe dope over the tape. This combines the lubricating and gap-filling properties of both sealants for maximum reliability.
At IFAN, we stock and recommend high-quality, plastic-safe thread sealants. Using the correct product is a simple step that prevents one of the most common and destructive causes of PVC system failure.
How Do You Test PVC Threaded Connections for a Perfect Seal?
Never assume a connection is good. A proper test saves time and money by finding leaks before the system is closed up.
To test PVC threaded connections, first perform a visual and tactile inspection after assembly, then conduct a pressure test. The most reliable method is a hydrostatic test: fill the system with water, pressurize it to 1.5 times its normal operating pressure, and hold it for a minimum of 30 minutes while checking all joints for any drops in pressure or visible weeping.
The Two-Phase Testing Approach
Testing should be a two-step process: an initial check right after assembly, followed by a formal system-wide pressure test.
Phase 1: Immediate Post-Assembly Check
As soon as you tighten a threaded connection, do this:
- Visual Check: Look for sealant (tape or paste) squeezing out evenly around the joint. This usually indicates good coverage.
- Tactile Check: Feel around the joint with your finger. It should be dry. If you feel moisture immediately, the seal is likely insufficient.
- Alignment Check: Ensure the fitting is straight and not cross-threaded. A crooked fitting will almost certainly leak.
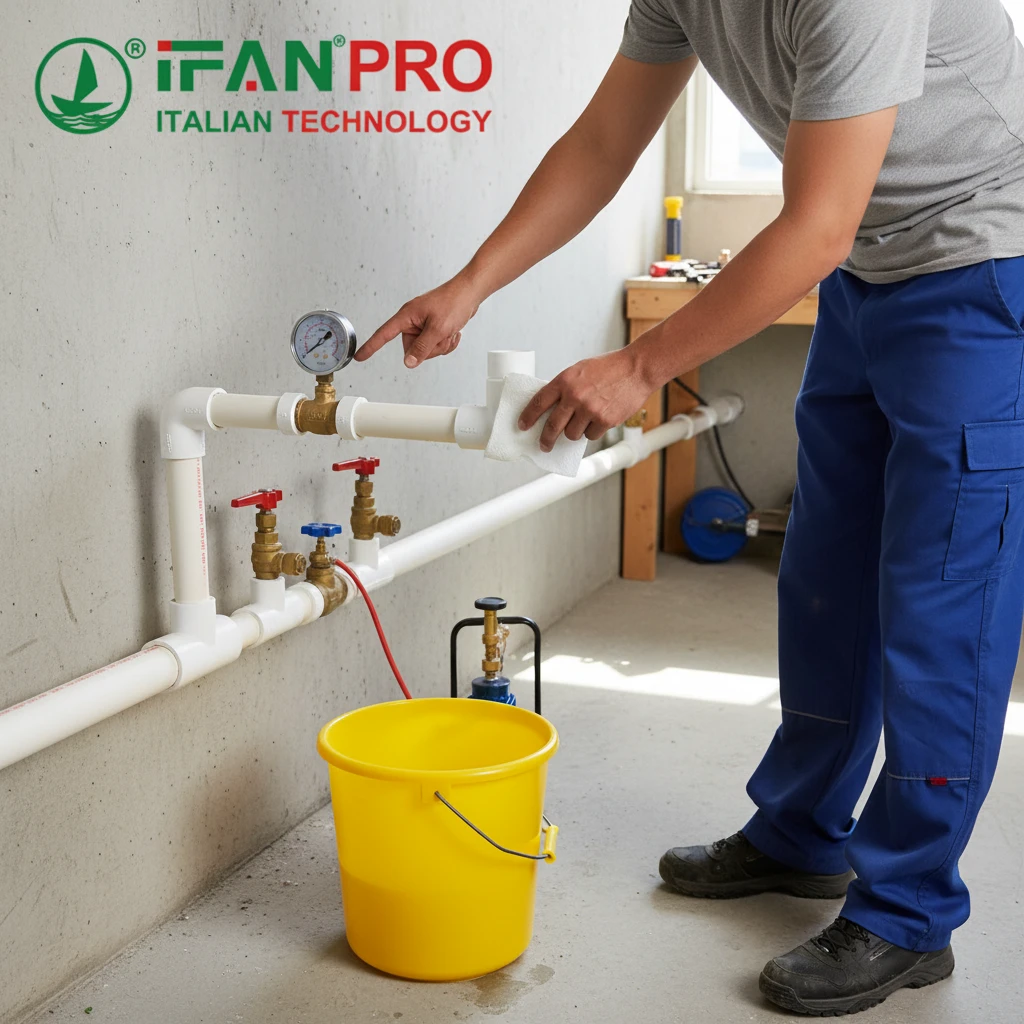
Phase 2: Formal Pressure Testing
For a complete plumbing system or a critical run, a formal pressure test is mandatory. Here’s how to do a simple hydrostatic test:
Step 1: Isolate the Section. Close all valves to isolate the section of new pipe you are testing.
Step 2: Fill with Water. Connect a water hose to a drain valve or fixture port. Slowly fill the entire pipe section with water. It is crucial to bleed all air out from the highest points, as compressed air can give false pressure readings and is dangerous.
Step 3: Pressurize the System. Using a test pump, increase the pressure in the system. The standard test pressure is 1.5 times the designed working pressure. For a typical residential system (60-80 PSI), testing at 100-120 PSI is common.
Step 4: Hold and Observe. Once at test pressure, close the valve to the pump and observe the pressure gauge.
- Hold Time: A minimum of 30 minutes is standard. Professional codes often require 2 hours.
- Pass Criteria: The pressure should remain stable. A small drop (like 1-2 PSI) might be due to temperature changes, but a steady, significant drop indicates a leak.
Step 5: Physical Inspection. While the system is under pressure, physically inspect every single threaded joint. Look for: - Weeping: A slow bead of water forming.
- Dripping: An active drip.
- Spraying: A fine mist or spray from a pinhole leak.
Troubleshooting a Leaking Threaded Connection
If you find a leak, don’t just tighten it more. Follow this process:
| Leak Symptom | Likely Cause | Corrective Action |
|---|---|---|
| Slow weep at the joint | Insufficient sealant, or tape wrapped backwards. | Depressurize the system completely. Disassemble the joint, clean all old sealant off, reapply correctly, and retighten. |
| Active drip | Cross-threading, damaged threads, or severe under-application of sealant. | Depressurize. Disassemble and inspect threads for damage. If threads are damaged, the fitting must be replaced. |
| Leak from a crack near the thread | Over-tightening, or use of a corrosive/hardening sealant. | The fitting is ruined and must be cut out and replaced. This is why using a torque wrench (not over-tightening) and correct sealant is vital. |
A final, simple test for non-pressurized drains is the bucket test. After assembling a drain line, pour a bucket of water down it and watch the joints below for any drips.
At IFAN, we know that high-quality PVC pipes and fittings with clean, precise threads are the foundation of a leak-free system. Pairing them with correct sealing and testing methods guarantees professional results your clients can trust.
Conclusion
Perfectly sealing PVC threads requires the right materials, careful technique, and thorough testing. For reliable connections, start with high-quality IFAN PVC pipes and fittings designed for seamless assembly.


Commentaires récents