
I once saw a poorly seated PEX elbow cause a leak that ruined a finished wall. That costly mistake taught me that correct installation is everything for a stable, long-lasting connection.
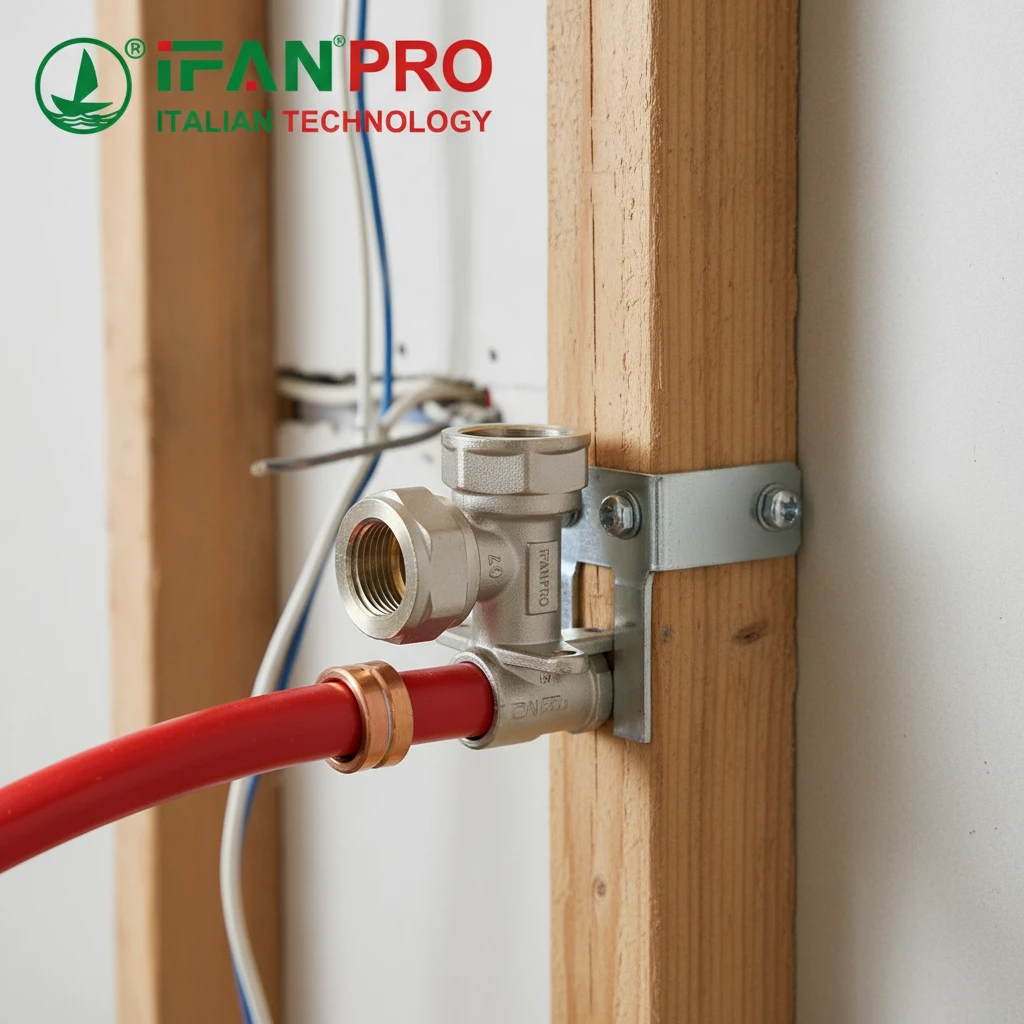
You install a PEX female seated elbow for stable turns by first securing its threaded seat firmly into a mounting block or fixture, then correctly crimping the PEX pipe onto the elbow’s barbed end. The fixed seat prevents twisting stress on the joint, and a proper crimp ensures a permanent seal, creating a solid and reliable pipe turn.
Many installers rush the seating step, which leads to future problems. Let’s walk through the complete, correct process to ensure your installation stays leak-free for years.
What Are the Steps to Secure the Seat Before Connecting the PEX Pipe?
Securing the seat is the foundation. A wobbly seat means a weak turn. I always tell my team: “Secure it like you’ll never see it again.”
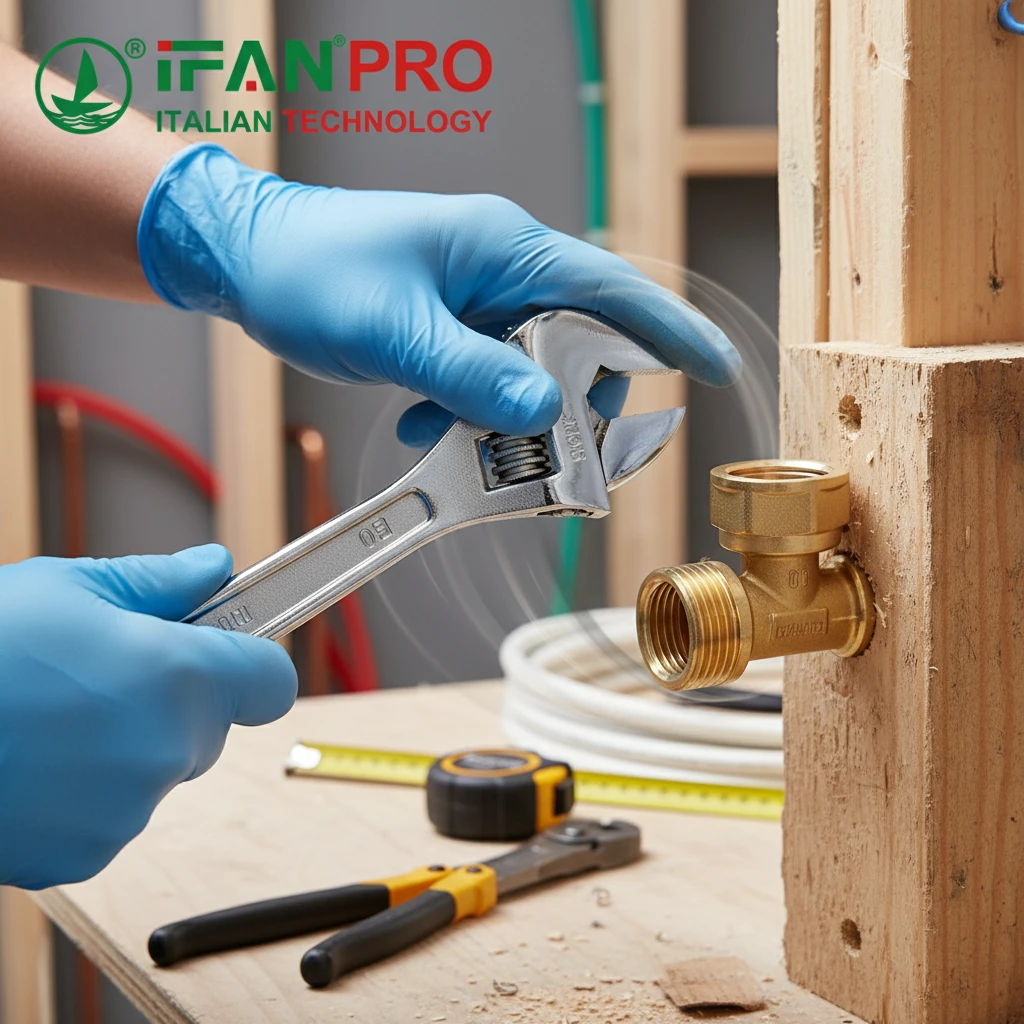
To secure the seat, first thread it by hand into the receiving port on a mounting block, manifold, or fixture to avoid cross-threading. Then, use an appropriate wrench to tighten it 1.5 to 2 full turns past hand-tight. This creates a solid, stationary anchor point that absorbs pipeline stress and prevents the elbow body from rotating later.
The Critical Role of the Female Seat
First, understand why this step is non-negotiable. The “female seated” design separates the anchoring function from the piping connection. The seat (the threaded female end) gets permanently mounted. The elbow body (with the PEX barb) then connects to it. This design absorbs all the linear and rotational forces from the pipe, protecting the actual PEX crimp joint from stress. If you skip proper seating, all that force transfers to the crimp ring, which is the number one cause of premature failure at turns.
Step-by-Step Seating Guide
Follow these steps to create a perfect foundation:
- Inspect and Clean: Check the threads on both the elbow seat and the receiving port for debris or damage. Wipe them clean.
- Hand-Thread First: Never start threading with a wrench. Screw the elbow seat into the port by hand until it stops turning freely. This ensures you are not cross-threading, which can strip the plastic.
- Apply Sealant (If Required): For sealed systems (like air or gas) or if the manufacturer recommends it, apply a small amount of thread sealant or Teflon tape designed for plastic. For many pressurized water applications, the rubber gasket inside the seat provides the seal.
- Final Tightening: Use a strap wrench or an appropriate open-ended wrench. Grip the flat sides of the seat’s hexagonal base. Tighten firmly. A good rule is to go 1.5 to 2 full turns past hand-tight. You want it very snug, but do not over-torque and risk cracking the port or the seat itself.
Common Mistakes to Avoid
- Mistake: Using pipe wrenches or pliers on the plastic. They can crush or deform the fitting.
- Solution: Always use a strap wrench or a correct-sized open-ended wrench.
- Mistake: Overtightening until you hear cracking.
- Solution: Tighten until firm resistance is met, then stop. Use your feel; plastic should not be tightened like metal.
- Mistake: Not supporting the mounting block. The torque can twist the entire manifold.
- Solution: Hold the block securely with your other hand or mount it firmly before installing fittings.
A perfectly secured seat is rock-solid and will not move. This stability is what guarantees your pipe turn won’t loosen over time.
How Do You Properly Crimp the PEX onto the Elbow’s Barbed End?
The crimp is your permanent seal. A bad crimp fails, no matter how good the seat is. I’ve audited jobs where 1 in 10 crimps was faulty due to simple tool error.
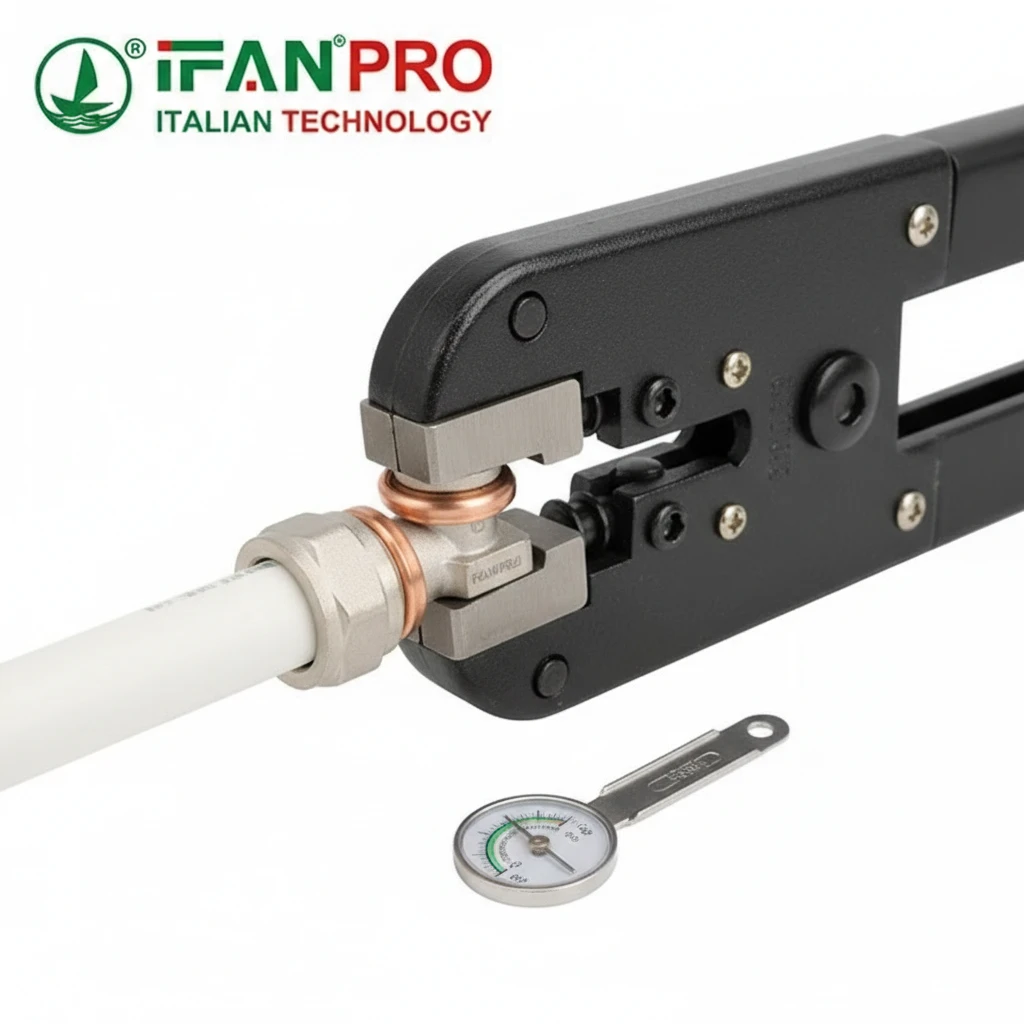
You properly crimp the PEX by first sliding a copper or stainless steel crimp ring onto the pipe. Then, fully insert the pipe onto the elbow’s barbed end until it bottoms out. Finally, place the crimping tool’s jaws squarely over the ring and compress them until the tool’s go/no-go gauge indicates a complete, correct crimp.
The Anatomy of a Perfect Crimp
A crimp connection works by creating uniform, 360-degree compression. The ring squeezes the PEX tubing tightly against the barbs on the fitting. These barbs hold the pipe from pulling back, and the compressed seal prevents water from leaking out. Every step must be precise.
Detailed Crimping Procedure
Let’s break down the process:
- Cut & Deburr: Use a sharp PEX tubing cutter. Make a perfectly square, clean cut. Then, use a deburring tool to remove any inner and outer plastic burrs. A smooth pipe end is essential for a full seal.
- Slide on the Ring: Always slide the crimp ring onto the pipe before inserting the fitting. Position it about 1/2 inch to 1 inch from the end.
- Full Insertion: Push the PEX tubing onto the elbow’s barbed end. You must push it all the way until the pipe’s end contacts the fitting’s shoulder. Look for a visual indicator like a slight bulge in the pipe at the base of the fitting. Incomplete insertion is the top cause of leaks.
- Position the Ring: Slide the crimp ring so it is positioned 1/8 to 1/4 inch from the end of the pipe, centered over the barbed area.
- The Crimp Itself: Place the crimping tool’s jaws over the ring. Ensure they are perpendicular to the ring and the pipe. Squeeze the tool handles firmly and completely until the tool releases or the jaws fully close. Many tools have a “go/no-go” gauge; the handle should reach the “go” zone.
Crimp Quality Verification
How do you know it’s a good crimp? Check these three things:
- Visual: The ring should have a uniform, symmetrical indentation all around.
- Tactile: You should not be able to spin the ring on the pipe.
- Gauge Check: Use a go/no-go crimp gauge. A proper crimp will fit into the “go” slot but not the “no-go” slot.
| Crimp Tool Type | Key Action | How to Verify Quality |
|---|---|---|
| Manual Ratcheting Crimper | Squeeze until the ratchet releases. | The tool’s release confirms full crimp. Always follow with a go/no-go gauge. |
| Battery-Powered Crimper | Trigger until the tool beeps/stops. | The automatic stop signal confirms completion. Periodic gauge checks are still advised. |
Take your time with each crimp. A single rushed connection can lead to a catastrophic leak inside a wall.
How Does the Seat Ensure the Fitting Stays Fixed During and After Installation?
The brilliance of this design is its division of labor. People often don’t appreciate how the seat solves the biggest problem with fixed elbows.
The seat ensures the fitting stays fixed by acting as a solid, immovable anchor point that is mechanically fastened (threaded) into a structure. It absorbs all the torque from the pipe movement and pressure surges, isolating the delicate PEX crimp joint from rotational and linear forces that would otherwise cause it to loosen or leak over time.
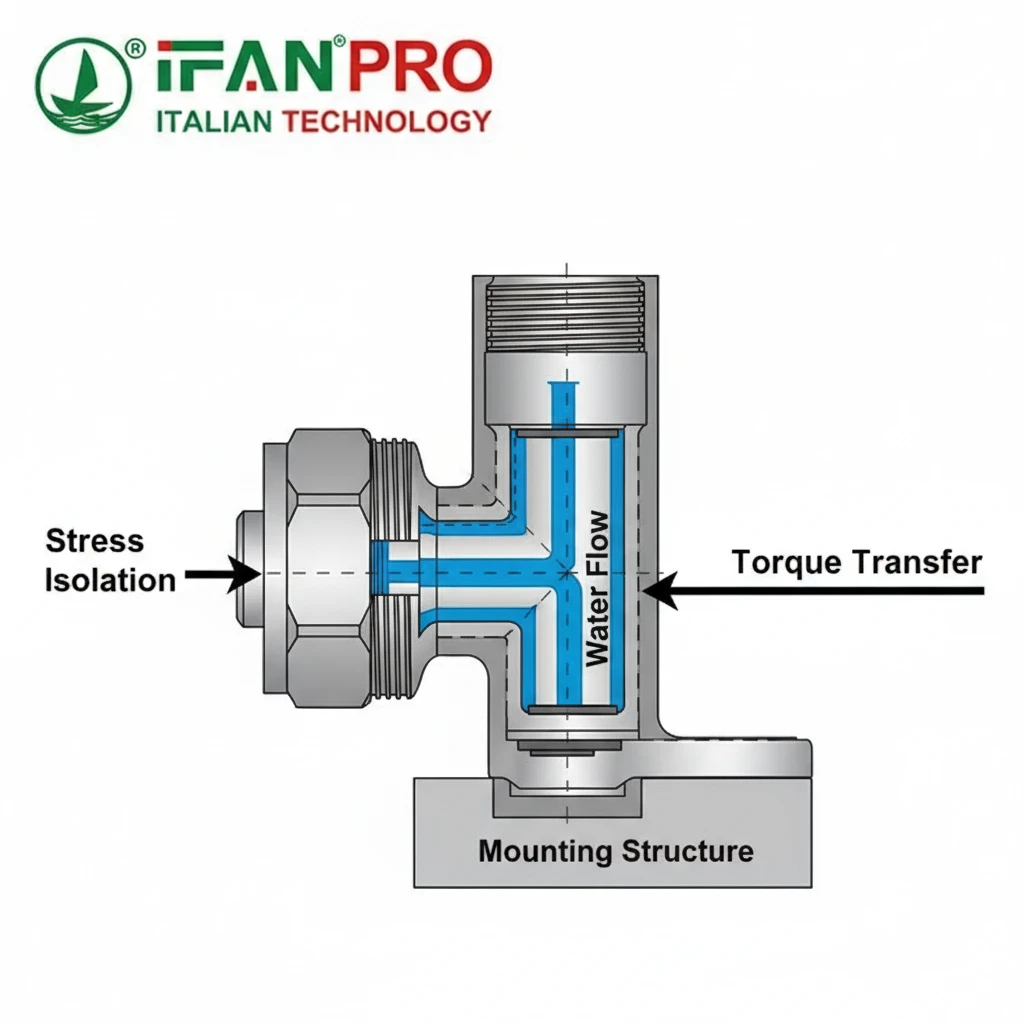
Isolating Stress: The Core Engineering Principle
Imagine trying to hold a hose that has water pulsing through it. It wants to whip and twist. If you hold it by the soft hose itself, it’s hard to control. But if you clamp the metal nozzle end to a post, the hose stays still. The seated elbow works exactly like that.
The threaded seat is the “clamp.” Once torqued into a manifold or blocking, it becomes part of the rigid structure. When water flows, turns, or experiences pressure spikes (water hammer), the energy tries to move the pipe. Instead of that force traveling into the crimp connection, it transfers directly into the solid structure via the seat.
Before and After: A Force Comparison
Let’s compare what happens with and without a properly used seat.
Scenario: A traditional fixed PEX elbow directly in the wall.
- Force on Crimp: High. Every vibration and pressure change tries to slightly rotate or pull the fitting.
- Result: Over months or years, this “fatigue” can work the PEX material loose from the barbs or deform the crimp ring, leading to a slow leak.
Scenario: A female seated elbow, properly mounted.
- Force on Crimp: Very Low. The seat takes the rotational and bending forces.
- Force on Seat: High, but this is transferred safely into the mounting block, which is screwed to a stud.
- Result: The crimp joint only handles the job it’s best at: forming a seal. Its integrity remains unchanged for decades.
The Importance of Proper Mounting Hardware
The seat’s performance depends on what you thread it into. Always use proper mounting hardware:
- Manifolds: Designed for multiple seats, made of strong polymer or brass.
- Mounting Blocks: Single or double blocks that nail or screw to wooden studs.
- Fixture Bodies: Integrated into the back of shower valves or other fixtures.
Never thread a seated elbow into an unsupported, thin piece of plastic or a loose fixture. The anchor must be as solid as the seat itself. This system is why professional plumbers rely on seated fittings for all critical, inaccessible turns—it’s the most reliable method available.
What Final Checks Guarantee a Stable and Reliable Pipe Turn?
Installation isn’t done until it’s verified. My final check has caught small errors that would have become big problems.
Final checks to guarantee a stable turn include a visual and tactile inspection of the seat tightness and crimp placement, a pull test on the PEX pipe to confirm it is locked on the barbs, and, most importantly, a full-system pressure test held for a minimum period to confirm there are no leaks under operating conditions.
The Three-Stage Final Inspection
Don’t just turn on the water and hope. Follow this structured inspection:
Stage 1: Visual & Tactile Check (Before Pressurization)
- Seat: Ensure it is flush and tight. It should not rotate at all by hand.
- Crimp Ring: Verify it is centered and has a uniform, concentric indentation.
- Pipe Insertion: Look for the slight bulge in the PEX at the fitting base, confirming full insertion.
- Alignment: Check that the pipe runs smoothly into the elbow without any sharp kinks or excessive tension pulling on the fitting.
Stage 2: The Pull Test
This is a simple but critical test. After crimping, try to pull the PEX pipe straight off the fitting with a firm, steady force. The pipe should not slide off or show any movement. If it moves, the crimp is insufficient, or the pipe was not fully inserted. You must cut the pipe, remove the fitting, and redo the connection.
Stage 3: The Mandatory Pressure Test
This is the ultimate proof. You must test the entire system, not just the one fitting.
- Isolate the Section: Close valves to test the new section of piping.
- Pressurize: Connect a test pump. Fill the pipes with water and purge air.
- Test Pressure: Raise the pressure to at least 1.5 times the system’s normal operating pressure (e.g., 100 PSI for a typical 60-80 PSI system).
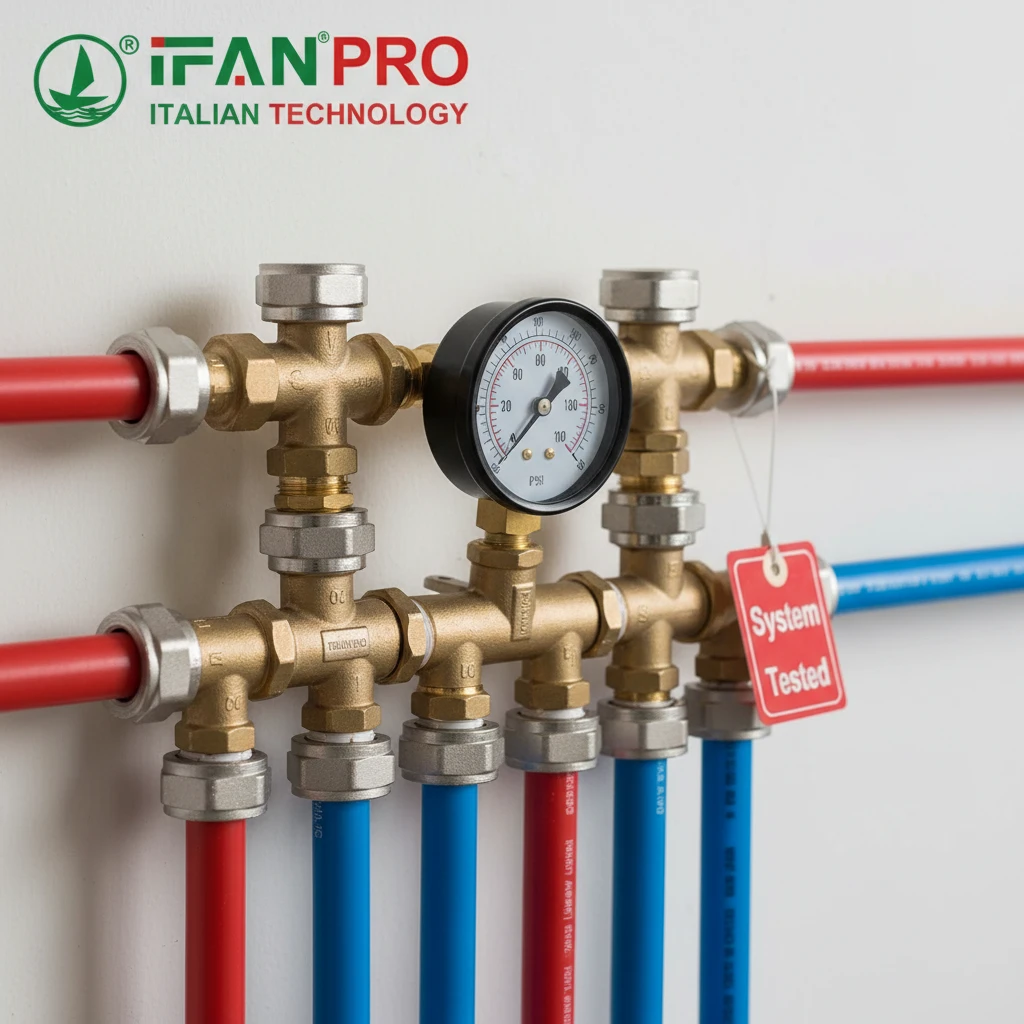
- Hold and Observe: Maintain this pressure for a minimum of 15 minutes, but 60 minutes is ideal. Watch the pressure gauge for any drop.
- Physical Inspection: While under pressure, closely inspect the seated elbow and all other new joints for even the smallest bead of water.
Post-Test Verification
After a successful pressure test, drain the system. Do one final visual check on the crimp and seat now that they have experienced stress. Everything should look exactly as it did before. Once confirmed, you can insulate or close up the walls with absolute confidence.
Conclusion
For a perfectly stable PEX turn, always secure the seat firmly and crimp with precision. For reliable, easy-to-install seated fittings, choose IFAN’s PEX female seated elbows and compatible crimp systems.


Commentaires récents