
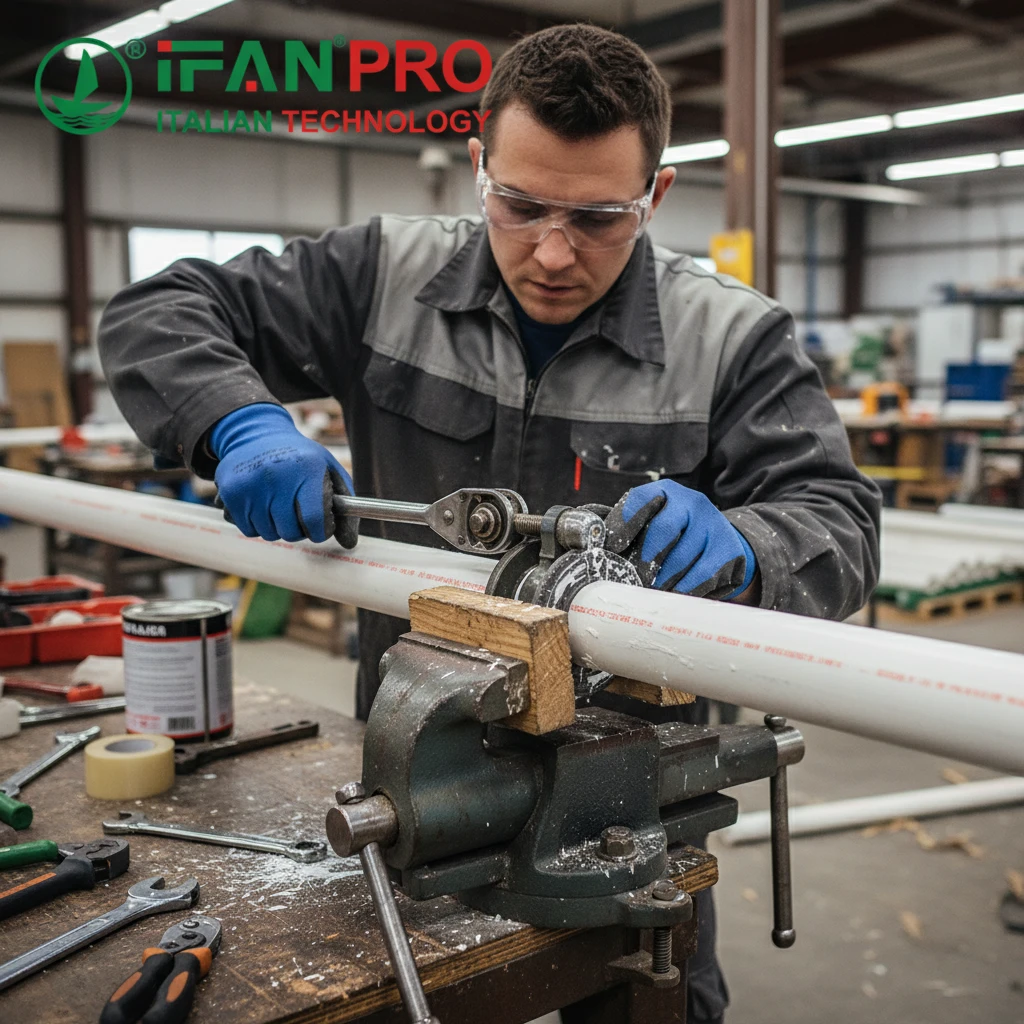
I once saw a perfect plumbing project delayed because a DIYer cracked a costly PVC pipe while trying to cut threads. That moment taught me that threading PVC requires a careful touch and the right know-how.
You can cut threads on a PVC pipe using either manual tools like a ratchet-style pipe threader and dies, or a powered pipe threading machine. The key is to use sharp tools designed for plastic, apply steady, gentle pressure, and liberally use a proper cutting oil or paste to reduce heat and friction, which prevents the pipe from cracking.
Threading PVC can unlock flexible installation options, but doing it wrong leads to waste and frustration. Let’s walk through the exact tools and steps to get it right on your first try.
What Tools Are Needed to Cut Threads on a PVC Pipe Manually or with a Machine?
Having the wrong tools is the first step toward failure. I’ve received too many photos from clients showing threads torn up by tools meant for metal.
To cut threads manually, you need a ratchet-style pipe threader (or a die stock) with the correct die size for your pipe, a pipe cutter or fine-tooth saw, a reamer or utility knife, and heavy-duty PVC thread-cutting oil. For machine threading, you need a powered pipe threading machine with a sharp die head, a pipe vise to secure the pipe, and the same specialized cutting lubricant.
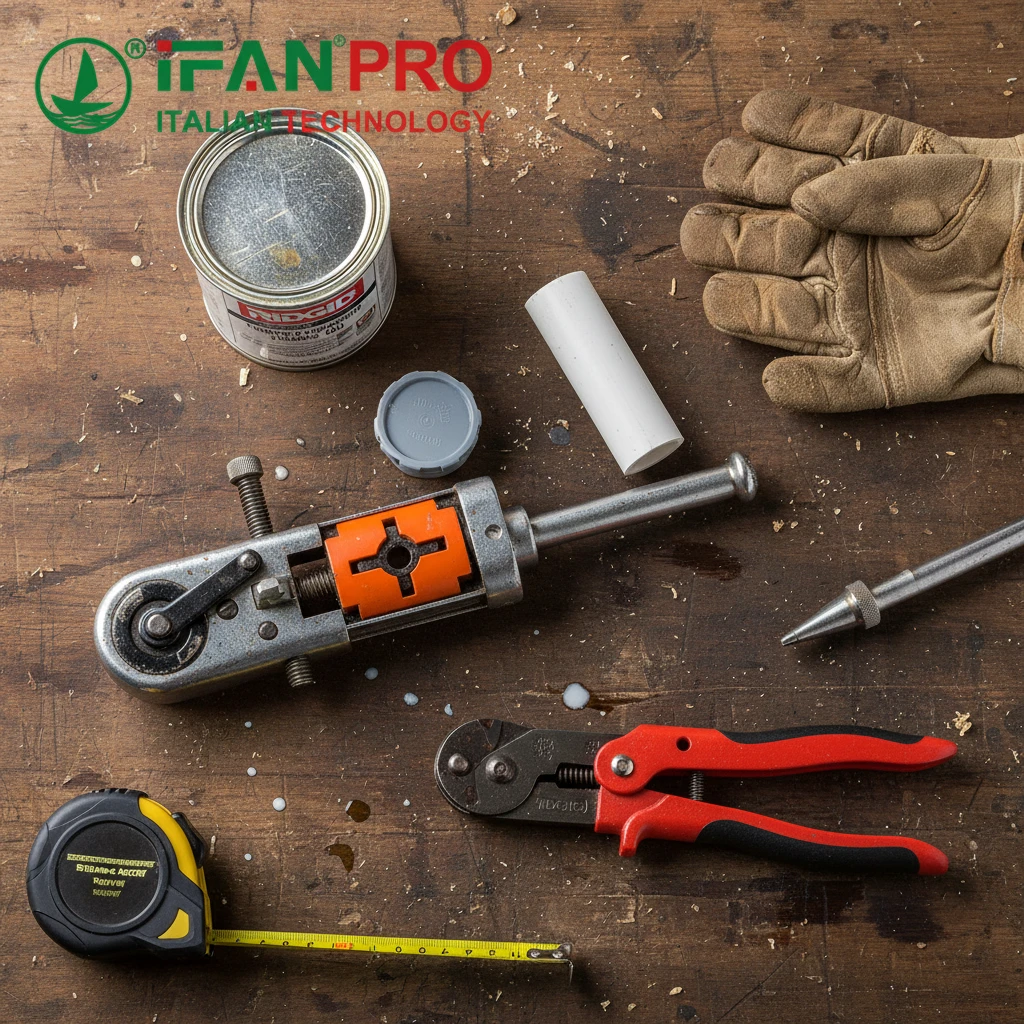
Essential Manual Threading Tools
If you’re doing a small job or are on a tight budget, manual tools are the way to go. But you cannot use just any tools from your garage.
First, you need a way to cut the pipe to length cleanly. A plastic tubing cutter is the best choice. It makes a clean, square cut without creating burrs or dust. A fine-tooth hacksaw can work, but you must cut very straight and then clean up the end thoroughly.
Next, you must prepare the pipe end. The inside edge will have a slight ridge or burr after cutting. You must remove this with a pipe deburring tool, a reamer, or even a sharp utility knife. A smooth inner edge is crucial for a good seal later.
The core tool is the threader. You need a ratchet-style pipe threader or a sturdy die stock. Most importantly, you must use sharp dies that are designed or suitable for plastic. Dies made only for hardened steel will grab and shred PVC. Many general-purpose dies list both metal and plastic.
Finally, and most critically, you need lubricant. Never use standard oil. You must use a heavy-duty, non-petroleum-based thread-cutting paste or oil made for plastics. Petroleum can degrade PVC. This lubricant cools the cut and reduces friction.
Machine Threading Setup
For frequent threading or larger diameters, a machine saves time and ensures consistency. The setup is more involved but follows the same principles.
You need a powered pipe threading machine. These often have interchangeable die heads. Ensure the dies are sharp. The machine must have a secure vise or chuck to hold the PVC pipe firmly without crushing it. You still use the same plastic-specific cutting lubricant, applying it generously to the die before starting.
Tool Checklist Table
| Tool Category | Purpose | Manual Option | Machine Option |
|---|---|---|---|
| Cutting | To cut pipe to length | Plastic Tubing Cutter, Fine-tooth Saw | Power Saw with Guide |
| Prepping | To remove inner burr | Deburring Tool, Reamer, Utility Knife | Reamer Attachment |
| Holding | To secure pipe | Bench Vise with Jaw Protectors | Integrated Machine Vise |
| Threading | To cut the threads | Ratchet Threader with Plastic Dies | Threading Machine with Sharp Die Head |
| Lubricating | To cool and reduce friction | PVC Thread-Cutting Paste/Oil | PVC Thread-Cutting Paste/Oil |
Choosing the right tool for each step is 80% of the battle. Using a dull metal die or no lubricant is a guaranteed way to ruin your pipe.
What Are the Step-by-Step Instructions for Threading a PVC Pipe Correctly?
Rushing the steps is a common mistake. I guide my clients through this sequence to prevent costly errors.
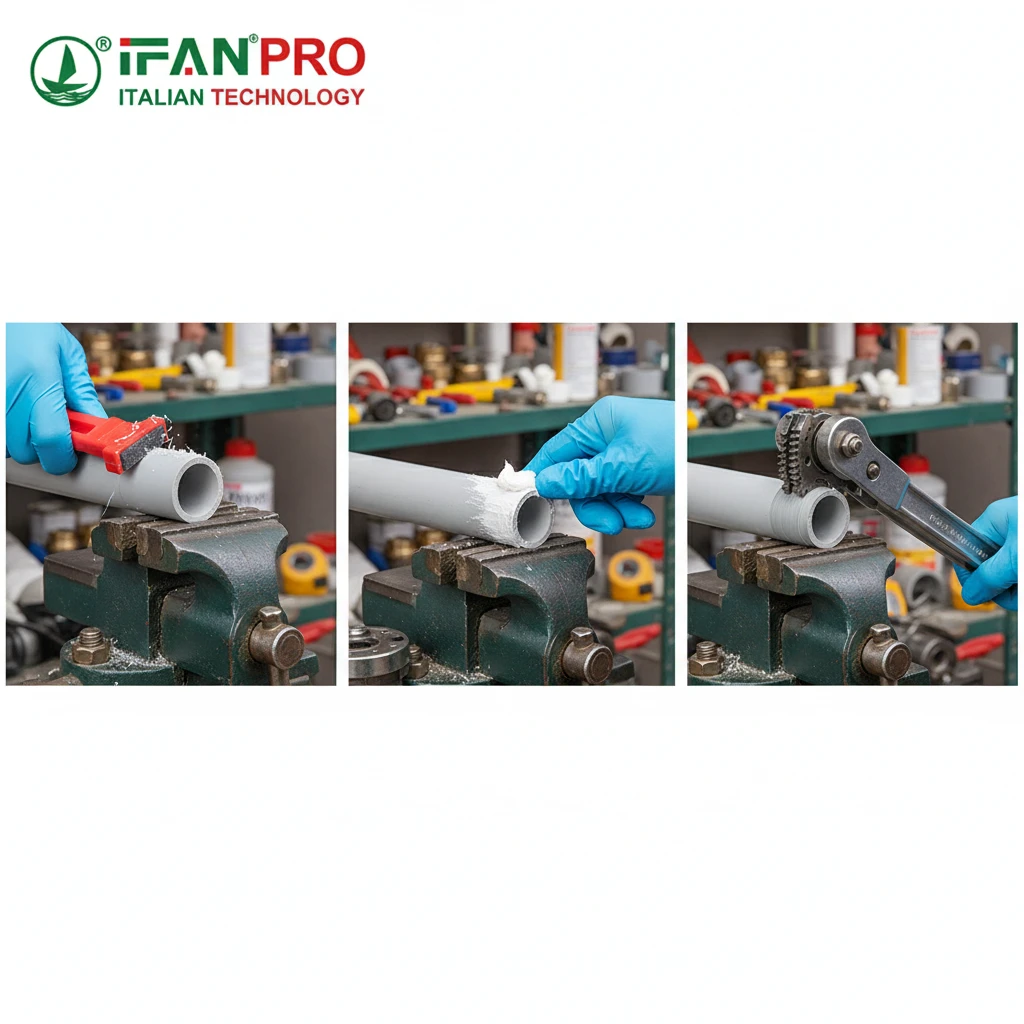
First, cut the pipe square and deburr the inside edge. Then, secure the pipe firmly in a vise without over-tightening. Apply lubricant to the pipe end and the die. Start the die onto the pipe squarely, using steady, moderate pressure. Turn the tool, back off occasionally to clear chips, and reapply lubricant. Cut threads to the standard length, then clean off all lubricant and plastic debris from the new threads.
Detailed Step-by-Step Guide
Follow these steps in order for a perfect thread every time.
Step 1: Measure, Mark, and Cut
Measure and mark your cut line clearly. Use a tubing cutter or fine-tooth saw. Make sure the cut is perfectly square to the pipe’s length. A crooked cut makes it impossible to start the die straight, leading to cross-threaded, weak connections.
Step 2: Prepare the Pipe End
After cutting, use your deburring tool or knife to remove the internal ridge. Then, chamfer (bevel) the outer edge of the pipe very slightly with a file or sandpaper. This small bevel helps the die start evenly and cleanly.
Step 3: Secure the Pipe
Place the pipe in a vise. This is critical. Pad the vise jaws with soft wood or dedicated jaw protectors. Tighten the vise enough so the pipe cannot rotate, but do not crush or deform the pipe. A deformed pipe will not thread correctly.
Step 4: Lubricate and Align the Die
Coat the first inch of the pipe end with your PVC cutting paste. Also, put a generous amount of paste into the cutting teeth of the die. Align your ratchet threader or die stock so it is perfectly perpendicular to the pipe.
Step 5: Start Cutting the Threads
Apply firm, downward pressure and begin turning the tool clockwise. You will feel it bite. After the first full turn, stop and check that the die is still square. If it’s crooked, back it off and restart. A crooked start ruins the pipe.
Step 6: Continue Cutting and Clearing Chips
Use steady, even pressure. After every one to two full turns, reverse the tool about a half-turn to break off the plastic chips (swarf). This prevents clogging. Reapply lubricant frequently. The process should feel smooth, not jerky or grating.
Step 7: Cut to Proper Length
Standard thread length is roughly equal to the pipe’s diameter. A common rule is to cut until you have 7-8 full threads. Do not over-thread, as this weakens the pipe wall. When finished, turn the tool counter-clockwise to back it all the way off the new threads.
Step 8: Clean the Threads
Use a clean rag and a brush (an old toothbrush works) to remove every bit of cutting paste and plastic chips from the new threads and the inside of the pipe. Residual debris will compromise your seal.
Common Pitfalls to Avoid
- Skipping Lubricant: This causes instant overheating, melting the plastic and fusing it to the die.
- Forcing it: If you need extreme force, the die is dull, or you are not square. Stop and check.
- Ignoring Chips: Not backing off to clear chips creates packed, rough threads that are prone to leaking.
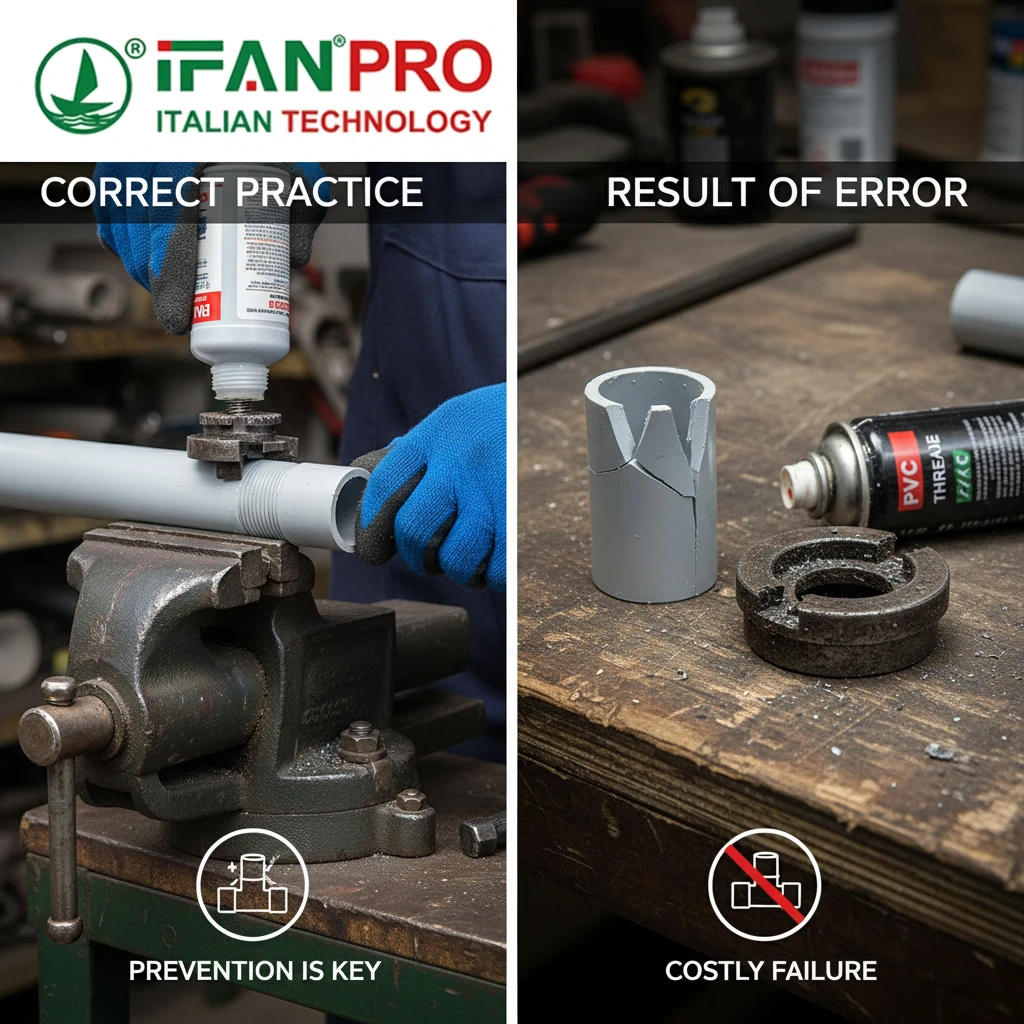
How Do You Prevent PVC Pipes from Cracking During the Thread Cutting Process?
Cracking is the number one fear. It usually stems from three avoidable errors: heat, stress, and poor technique.
You prevent cracking by controlling heat with constant, generous lubrication, by avoiding physical stress through proper pipe support in the vise, and by using sharp, plastic-appropriate tools with correct, steady cutting pressure. Never attempt to thread old, brittle, or damaged PVC pipe.
The Three Main Causes of Cracks
Understanding why PVC cracks during threading helps you prevent it. The primary culprits are heat stress, mechanical stress, and material weakness.
1. Heat Stress: The Silent Killer
PVC is a thermoplastic. Friction from cutting generates heat. If the heat builds up too much (because of a dull die, no lubricant, or going too fast), the PVC softens, loses its structural integrity, and develops micro-fractures that turn into full cracks, sometimes hours later.
- Solution: Use lubricant copiously. It is not a suggestion; it is a requirement. The lubricant cools the cutting area. Stop and add more if you see smoke or melted plastic.
2. Mechanical Stress: Twisting and Crushing
If the pipe is not supported correctly, the twisting force of the threader can cause torsion cracks. If the vise is too tight, it creates compression points that become stress concentrators.
- Solution: Pad the vise jaws securely. Ensure the pipe is held close to the end being threaded (within 6 inches) to minimize flex and leverage. The pipe should not bend or bow during the process.
3. Tool and Technique Errors
A dull die requires excessive force and creates more heat and tearing than cutting. Starting the die crookedly puts uneven stress on one side of the pipe wall.
- Solution: Use only sharp dies. Start the die perfectly square, even if it takes two tries. Apply firm but not Herculean pressure. Let the sharp tool do the work.
Preventive Measures Checklist
Use this table as a quick safety guide before you start threading.
| Risk Factor | What Causes It | How to Prevent It |
|---|---|---|
| Heat Fracture | Dull dies, no lubricant, high speed. | Use sharp dies, flood with PVC lubricant, cut slowly. |
| Torsion Crack | Pipe not secured close to end, excessive force. | Secure pipe in padded vise within 6″ of end. Use steady, moderate force. |
| Crush Crack | Vise jaws tightened too much. | Pad jaws and tighten just enough to prevent rotation. |
| Weak Point Failure | Threading old/weathered pipe or threading too deep. | Only thread new, high-quality pipe. Stop after 7-8 full threads. |
Finally, inspect your PVC before you begin. Do not thread pipe that is already scratched, gouged, or has been exposed to sunlight and become brittle. Start with a sound product from a reputable supplier like IFAN to give your project the best foundation.
When Should You Use Threaded PVC Pipes Versus Other Connection Methods?
Choosing the wrong connection type leads to leaks and repairs. Threads are a great tool, but they are not always the right tool.
Use threaded connections on PVC pipes when you need a demountable joint for future access, maintenance, or adjustment, or when connecting to existing threaded metal fittings (like valves or pumps). For permanent, sealed, and pressure-tight joints, solvent welding (gluing) is superior. Push-fit fittings are best for quick, temporary, or low-pressure DIY repairs.
Understanding Connection Types
Each connection method has its superpower. Knowing when to use each will make your plumbing system more reliable and easier to work on.
The Case for Threaded Connections
Threads create a mechanical joint. You can unscrew it. This is their biggest advantage. You should choose threading in these situations:
- For Future Access: Any point in the system you might need to open later—for example, before a water softener, at a pump connection, or for a filter housing.
- For Equipment Connections: Connecting PVC pipe to metal equipment with threaded ports, like water heaters, pressure gauges, or certain types of valves.
- For Adjustable Sections: Where the exact length might need fine-tuning during installation or in the future.
However, threaded joints have downsides. They are not as leak-proof as welded joints under high, constant pressure. They can vibrate loose over time and usually require a sealant like Teflon tape or pipe dope.
The Case for Solvent Welding (Gluing)
This is the standard for permanent PVC plumbing. The cement chemically melts and fuses the pipe and fitting into a single piece. It is extremely strong and leak-proof.
- Use it for: All permanent, buried, in-wall, or high-pressure water lines. It is the most reliable method for static installations where you will never need to take it apart.
The Case for Push-Fit/Slip Connections
These fittings use rubber O-rings and grab rings. You simply push the pipe in.
- Use them for: Very quick repairs, temporary lines, or in tight spaces where gluing or threading is hard. They are good for low-pressure applications but are generally not recommended for permanent, concealed, or high-pressure systems.
Decision Guide Table
| Connection Method | Best Used For | Main Advantage | Main Disadvantage |
|---|---|---|---|
| Threaded | Equipment hookups, access points, adjustable sections. | Demountable, reusable. | Can leak if not sealed perfectly; not as strong as welded. |
| Solvent Welded | Permanent water lines, pressure systems, buried pipe. | Extremely strong, leak-proof, permanent. | Cannot be disassembled; requires careful preparation. |
| Push-Fit / Slip | Quick repairs, temporary work, tight spaces, low-pressure lines. | Extremely fast, no tools or drying time. | Higher cost per fitting; not for permanent high-pressure use. |
In professional practice, a hybrid approach is common. For instance, you might have a main system that is solvent welded, but include a short, threaded section (a “union”) at a key location to allow for service. When you need reliable threaded PVC components, sourcing from a specialist like IFAN ensures you get fittings with clean, precise threads that seal correctly the first time.
Conclusion
Threading PVC requires the right tools, a patient technique, and an understanding of when to use it. For projects demanding reliable threaded connections, choose high-quality IFAN PVC pipes and fittings for a perfect, leak-free result.


Commentaires récents