
I once watched a plumber spend hours trying to fit pipes around a cramped kitchen cabinet. That day, I realized that smart fittings matter more than brute force.
Cross tees, also called four-way fittings, help you build a modern home water system by connecting one supply line to multiple outlets in a single, compact point. They simplify layouts in bathrooms and kitchens, reduce the number of joints needed, and work perfectly with today’s purification and hot water distribution systems when installed correctly.
Let’s explore how to use these space-saving fittings effectively in your next project.
Upgrading Modern Home Water Purification and Hot/Cold Distribution
Modern homes demand more from their plumbing. I’ve seen homeowners struggle to connect water filters, softeners, and instant hot water systems using outdated methods.
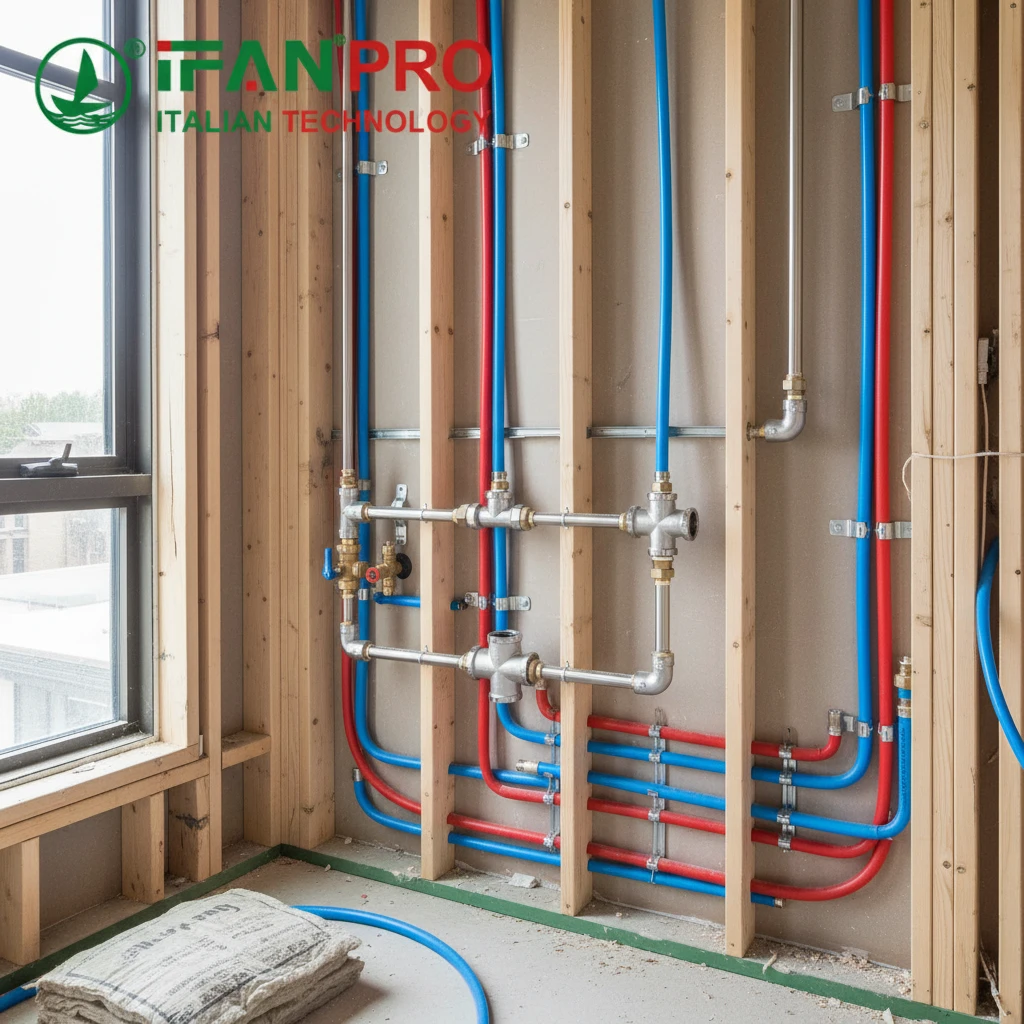
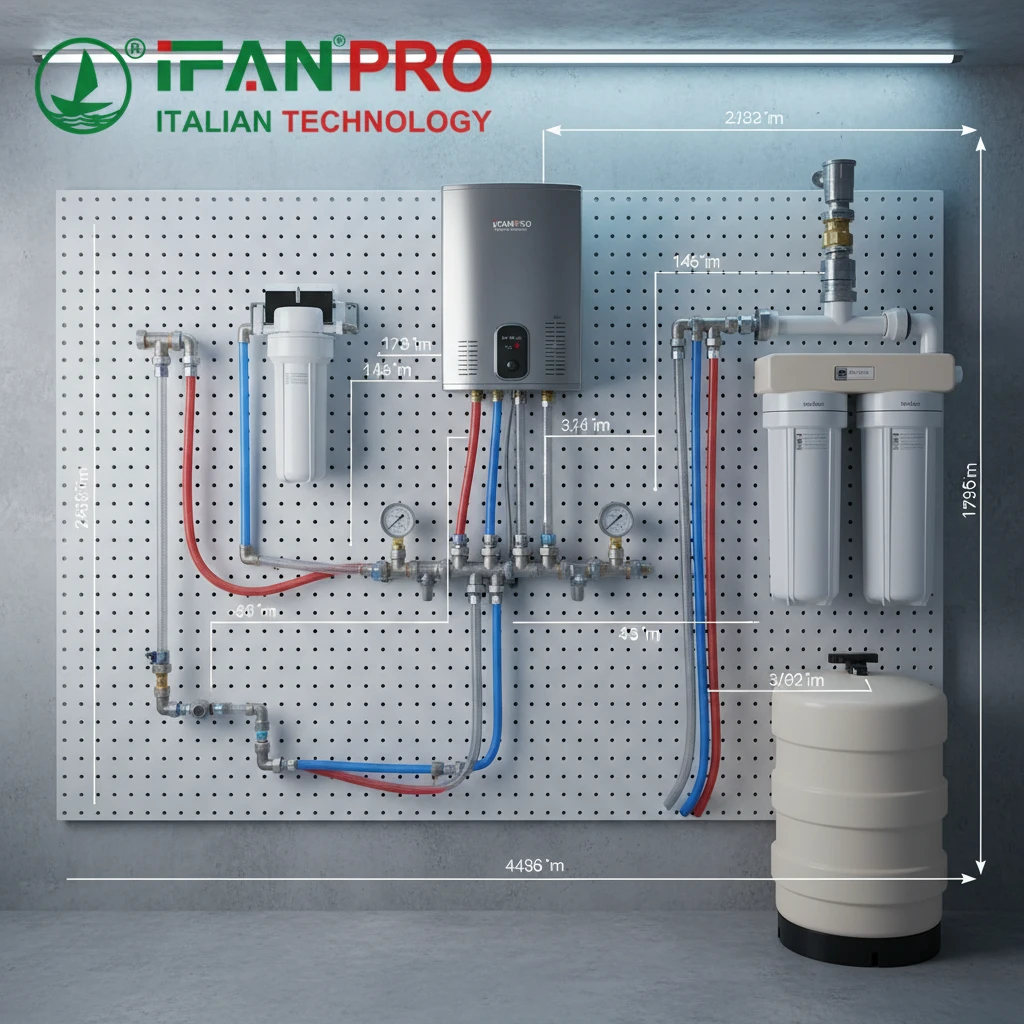
Cross tees enable modern water purification and distribution by creating a central hub where one main water line splits into multiple paths. This allows you to direct water to a filter, then to a hot water heater, and finally to cold taps—all from one compact fitting. This setup reduces pressure loss and keeps your system organized.
The Central Hub Concept
Think of a cross tee as a traffic roundabout for water. Instead of water traveling through a long series of T-connections, it arrives at one central point. From there, it can go in four directions simultaneously.
This design is perfect for modern water treatment. Typically, you have one main cold water line entering the house. You might want to:
- Send water to a whole-house filter
- Send filtered water to the kitchen drinking tap
- Send the same filtered water to the water heater
- Keep an unfiltered line for outdoor hose bibs
A standard approach would require multiple tees, elbows, and pipe lengths. A cross tee does all of this in one spot. The result is a cleaner installation with fewer potential leak points.
Managing Temperature Zones
In hot water distribution, cross tees offer similar advantages. You can create a loop system where hot water circulates continuously, providing instant hot water at every tap. A cross fitting at key points allows the loop to both supply fixtures and return cooler water to the heater.
The table below shows typical cross tee applications in modern homes:
| Application | Input | Output 1 | Output 2 | Output 3 |
|---|---|---|---|---|
| Water Filtration Hub | Main Cold Water | To Whole-House Filter | To Kitchen (Unfiltered) | To Outdoor Faucets |
| Hot Water Manifold | From Water Heater | To Bathroom Sink | To Kitchen Sink | To Shower |
| Recirculation Loop | Hot Supply Line | To Fixtures | Return Line to Heater | Bypass to Next Zone |
Pressure and Flow Considerations
One concern with cross tees is maintaining adequate water pressure. When you split one pipe into four, each branch gets less flow. This is actually a feature, not a bug, in well-designed systems.
By using a cross tee as a manifold, you can size each branch appropriately. For example, a 3/4-inch main line feeding a cross tee can split into:
- One 1/2-inch line to a filter
- One 1/2-inch line to a water softener
- One 3/8-inch line to a refrigerator ice maker
- One 1/2-inch line to an outdoor spigot
Each branch gets the flow it needs, and you avoid the common mistake of undersizing a critical line. This organized approach also makes future upgrades easier. When a homeowner wants to add a new water feature, you simply tap into the existing hub rather than running new lines from the main source.
Space Magicians: Simplifying Bathroom and Kitchen Layouts with Four-Way Designs
Space is always at a premium. I’ve crawled through enough tight cabinet spaces to know that every inch counts.
Four-way cross tees act as space magicians by consolidating multiple connection points into one fitting. In bathrooms, they allow a single supply line to feed a sink, toilet, and bidet simultaneously. In kitchens, they connect the faucet, dishwasher, and instant hot water dispenser from one location behind the sink cabinet, eliminating the need for complex pipe arrays.
The Bathroom Challenge
A typical bathroom needs water at several points. You have the sink faucet, the toilet fill valve, and perhaps a bidet or a separate shower. In a small bathroom, the space behind walls and under the sink is extremely limited.
Traditional plumbing would require:
- A tee for the sink supply
- Another tee further down for the toilet
- Possibly an elbow to navigate around obstacles
This approach consumes space and creates a spider web of pipes. It also makes future repairs difficult because you cannot access any single fixture without disturbing others.
The Cross Tee Solution
With a cross tee, you bring one supply line to a central spot. From there, three branches go directly to each fixture. The entire assembly fits neatly in a small wall cavity or under the sink base.
Consider a typical powder room layout. The toilet and sink often sit on the same wall, close together. A cross tee mounted at the ideal height allows:
- One branch going up to the sink faucet
- One branch going sideways to the toilet fill valve
- One branch capped for future use (bidet or hand shower)
This configuration uses less pipe and fewer fittings. More importantly, it leaves the wall cavity open for insulation or other utilities.
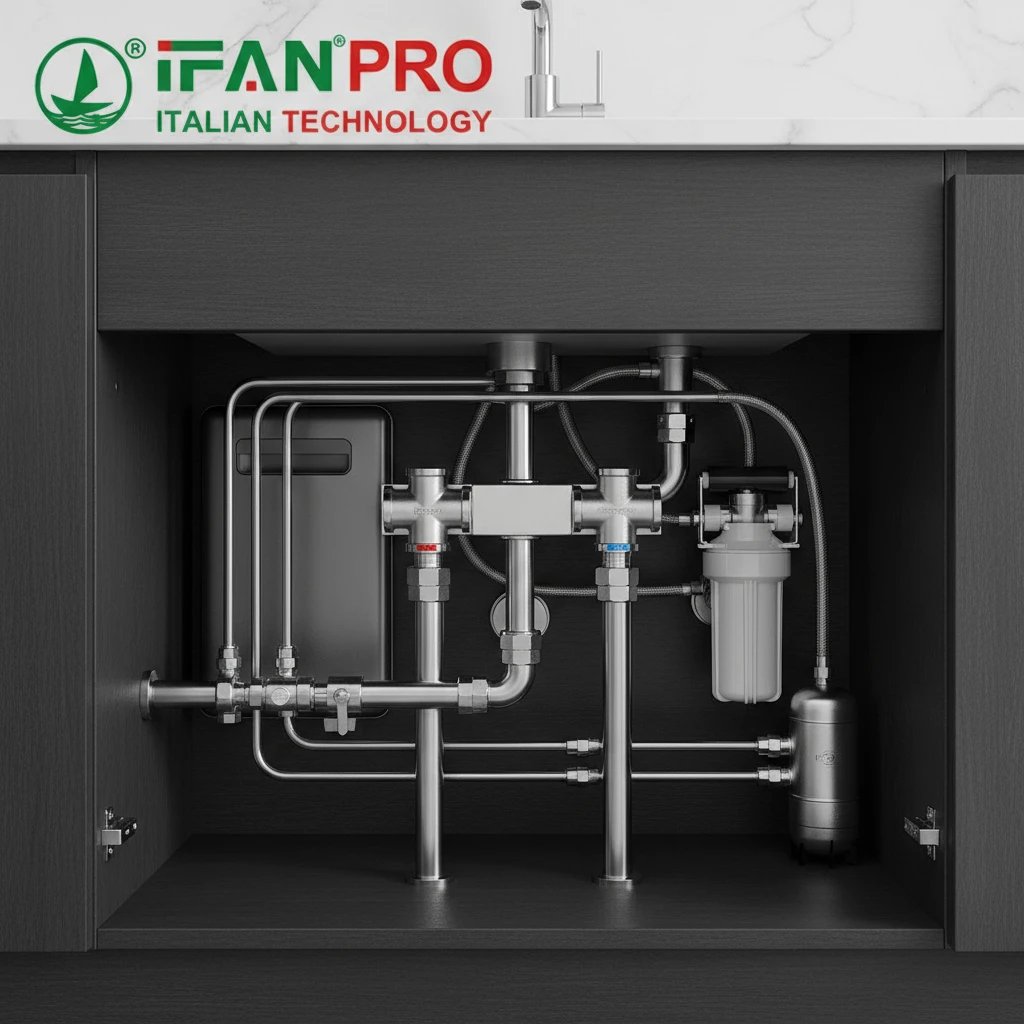
Kitchen Cabinet Organization
Kitchens present an even greater challenge. Behind the sink cabinet, you typically need connections for:
- The main faucet (hot and cold)
- The dishwasher (usually hot water only)
- An instant hot water dispenser
- A reverse osmosis drinking water system
- Possibly an ice maker line
Without careful planning, this area becomes a nightmare of tangled pipes. Homeowners lose valuable storage space, and plumbers struggle to access shut-off valves.
A cross tee manifold solves this problem elegantly. Mount a pair of cross tees (one for hot, one for cold) high on the back wall of the cabinet. From each cross, run dedicated lines to each appliance. The result is a clean, accessible layout that preserves cabinet space.
The table below illustrates a typical kitchen manifold setup:
| Location | Hot Water Cross Tee Outputs | Cold Water Cross Tee Outputs |
|---|---|---|
| Output A | Kitchen Faucet (Hot) | Kitchen Faucet (Cold) |
| Output B | Dishwasher | Refrigerator/Ice Maker |
| Output C | Instant Hot Water Tank | Reverse Osmosis System |
| Output D | Spare/Capped for Future | Spare/Capped for Future |
Aesthetic and Practical Benefits
Beyond space savings, this approach looks professional. When you open a cabinet door and see organized pipes rather than a mess, it builds confidence in the workmanship. Homeowners appreciate this attention to detail, and it makes future maintenance straightforward.
Safe and Healthy: Rust-Proof Stainless Steel for Daily Water Systems
Water quality is a health issue. I’ve tested water from old galvanized pipes and seen the rust particles with my own eyes.
Stainless steel cross tees ensure safe, healthy water by completely eliminating rust and corrosion. Unlike iron or galvanized fittings, stainless steel does not flake or degrade over time, keeping your drinking water free from metal particles. Its smooth interior surface also resists bacterial growth and biofilm formation, making it ideal for daily water systems.

Why Rust Matters
Rust is not just an aesthetic problem. When iron pipes corrode, they release particles into the water. These particles can:
- Discolor water, making it brown or yellow
- Impart a metallic taste
- Stain laundry and fixtures
- Clog aerators and appliance valves
More seriously, corrosion can create pinhole leaks. A tiny rust spot on a fitting can grow over time, eventually causing a failure. In a wall or ceiling, this leads to water damage and expensive repairs.
Stainless steel contains chromium, which forms a protective oxide layer on the surface. This layer prevents oxygen from reaching the underlying metal, so rust cannot form. Even after decades of service, a stainless steel fitting looks essentially the same as the day it was installed.
Health Considerations
For drinking water systems, material purity matters. Some metals can leach into water, especially if the water is slightly acidic or contains certain minerals. Stainless steel is inert in water. It does not add anything to the water, and it does not react with common disinfectants like chlorine.
The smooth surface of stainless steel also discourages biofilm. Bacteria need rough surfaces to attach to and colonize. Stainless steel’s polished finish gives bacteria nowhere to hide. This makes it an excellent choice for whole-house water systems where hygiene is paramount.
Comparing Common Fitting Materials
The table below compares stainless steel with other materials used for water fittings:
| Material | Rust Resistance | Lifespan | Effect on Water Quality | Cost |
|---|---|---|---|---|
| Stainless Steel | Excellent | 50+ years | None; inert | Moderate-High |
| Brass | Good | 30-50 years | May leach lead if not lead-free | Moderate |
| Galvanized Steel | Poor | 20-40 years | Rust particles, reduced quality | Low |
| Plastic (PP-R) | Excellent | 50+ years | None; inert | Low-Moderate |
| Copper | Good | 40-50 years | Can leach copper in acidic water | Moderate-High |
When to Choose Stainless Steel
Stainless steel cross tees are ideal for:
- Main water entry points where durability matters most
- Exposed installations where appearance counts
- Areas with aggressive water chemistry
- Commercial kitchens and food service areas
- Any application where absolute reliability is required
For residential use, stainless steel fittings on main lines provide peace of mind. They will never rust, never need replacement, and never compromise water quality.
Quick Connections: Female Thread Installation Tips Without Extra Adapters
Installation speed matters on every job. I’ve seen projects delayed by a shortage of adapters and fittings.
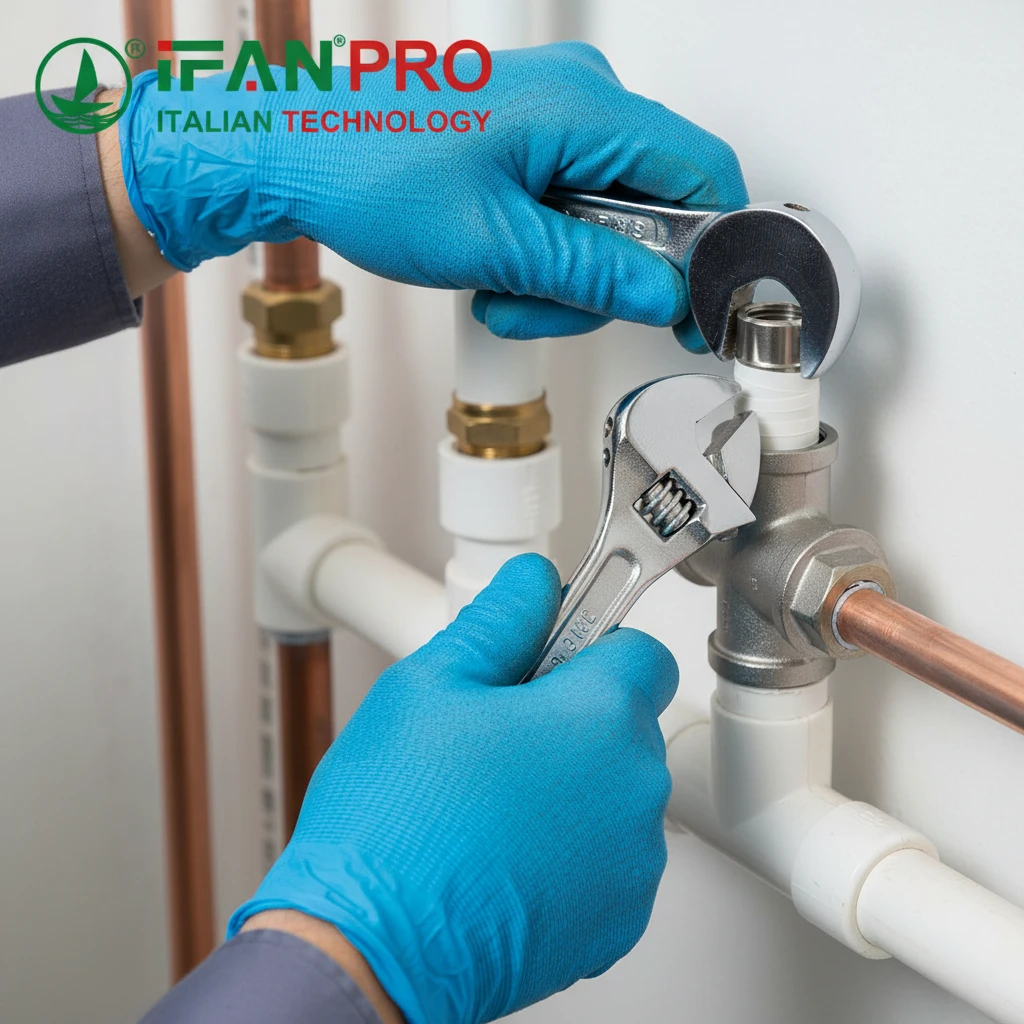
Female thread connections on cross tees allow quick, direct installation without extra adapters by accepting standard male-threaded pipes or valves directly. To ensure success, use thread sealant tape correctly, avoid overtightening which can crack fittings, and always align the fitting before final tightening to prevent stress on the threads.
Understanding Female Threads
A female threaded fitting has threads on the inside. It accepts a male threaded pipe or valve screwed into it. This is the most common connection type in plumbing because it is simple and reliable.
Cross tees with female threads offer several advantages:
- No need for separate adapters
- Direct connection to shut-off valves
- Easy disassembly for future changes
- Compatibility with standard pipe sizes
Proper Thread Sealing Techniques
The most common mistake with threaded connections is improper sealing. Water will find the smallest gap in the threads. Follow these steps for a reliable seal:
1. Clean the Threads: Remove any debris or old tape from both male and female threads.
2. Apply Tape Correctly: Wrap PTFE (Teflon) tape around the male threads in the direction of tightening. Usually, this means clockwise when looking at the end of the pipe. Wrap evenly, covering the threads but not overlapping excessively. Two to three wraps is typically sufficient.
3. Add Pipe Dope (Optional): For extra security, apply a thin layer of pipe thread sealant over the tape. This lubricates the threads during assembly and provides additional sealing.
4. Hand Tighten First: Screw the fitting together by hand until it stops. This ensures the threads engage correctly without cross-threading.
5. Wrench Tighten Carefully: Use a wrench to tighten further, but do not overtighten. For most plastic fittings, one to two turns beyond hand-tight is enough. Stainless steel fittings can take more torque, but excessive force can still strip threads or crack the fitting body.
Alignment Tips
With female thread fittings, you face a common problem: the fitting ends up facing the wrong direction when fully tightened. This happens because threads rarely stop at the perfect alignment point.
To solve this:
- Start with the fitting backed off slightly
- Tighten gradually, checking alignment frequently
- If the fitting passes the desired position, do not back it up. Backing up can break the seal. Instead, add an extra wrap of tape and try again, stopping sooner.
For stainless steel fittings, you have more flexibility. You can use a backup wrench on the fitting body while tightening the male thread, allowing precise control over the final orientation.
Avoiding Common Problems
The table below outlines common female thread installation issues and solutions:
| Problem | Cause | Solution |
|---|---|---|
| Leak at threads | Insufficient tape or sealant | Remove, clean, and reapply with proper technique |
| Cracked fitting | Overtightening | Replace fitting; tighten only 1-2 turns past hand-tight |
| Cross-threading | Starting at an angle | Remove, realign, and start straight; replace if damaged |
| Wrong orientation | Threads stop at incorrect position | Use more tape to adjust stopping point; or use an adapter |
| Difficult to turn | Debris in threads | Clean threads; apply lubricant like pipe dope |
Material-Specific Tips
Different materials require different handling:
PP-R Female Threads: These are often integrated into fusion-welded fittings. Be gentle when tightening metal pipes into plastic threads. Use a backup wrench on the fitting body to avoid twisting the pipe.
Stainless Steel Female Threads: These are very strong but can gall (seize) if over-tightened. Use an anti-seize compound on stainless-to-stainless connections.
Brass Female Threads: Brass is softer than steel. Avoid using steel pipe nipples with brass fittings, as the harder steel can damage the brass threads.
Conclusion
Cross tees simplify modern plumbing layouts while improving water quality and installation speed. For reliable, rust-proof performance, choose IFAN’s stainless steel and PP-R cross fittings, designed for quick installation and long service life.


Commentaires récents