

I once saw a critical PVC pump valve fail during a factory audit, causing a full production line to stop. The reason was simple: a lack of basic, consistent care.
To maintain your PVC pump valve long-term, you must combine daily visual checks, regular proper cleaning to prevent clogs and scale, proactive inspection of internal parts for early wear, and scheduling professional service based on performance data, not just when it breaks. This routine prevents sudden failures and expensive downtime.
A well-maintained valve lasts for years. Let’s break down this routine into simple, actionable steps you can start today.
What Daily Checks Keep Your PVC Pump Valve Running Smoothly?
Waiting for a problem is costly. A two-minute daily check can save you from a two-day shutdown.
Daily checks keep your PVC pump valve running smoothly by catching small issues before they become big failures. Focus on three things: looking for leaks or cracks, listening for unusual noises, and checking system pressure to ensure it matches the valve’s operating range. This simple habit is your first line of defense.
The Power of a Two-Minute Routine
Think of daily checks like checking the oil in your car. You don’t need to be a mechanic. You just need to know what to look and listen for. This routine is fast but powerful. It builds a history of your valve’s normal condition, so you instantly notice when something is “off.”
First, use your eyes. Do a visual inspection of the entire valve and its connections.
- Look for Leaks: Check around all connection points, the valve body, and the seal areas. A small drip might seem harmless, but it indicates a failing seal or a crack, and it can lead to bigger problems or fluid loss.
- Look for Cracks or Damage: PVC is strong but can become brittle from sun exposure (UV) or physical impact. Scan the valve body for any hairline cracks, discoloration (which can mean chemical stress), or obvious physical damage.
- Look for Vibration: Is the valve vibrating more than usual? Excessive vibration can loosen fittings and stress the valve body.
Next, use your ears. Listen to the valve while it operates.
- Normal Sound: A well-functioning valve should have a steady, consistent flow sound.
- Unusual Noises: Hissing can mean an internal or external leak. Chattering or knocking sounds often mean there is cavitation (air bubbles forming and collapsing inside) or the valve is struggling against a pressure surge. Grinding noises are a major red flag for internal component wear.
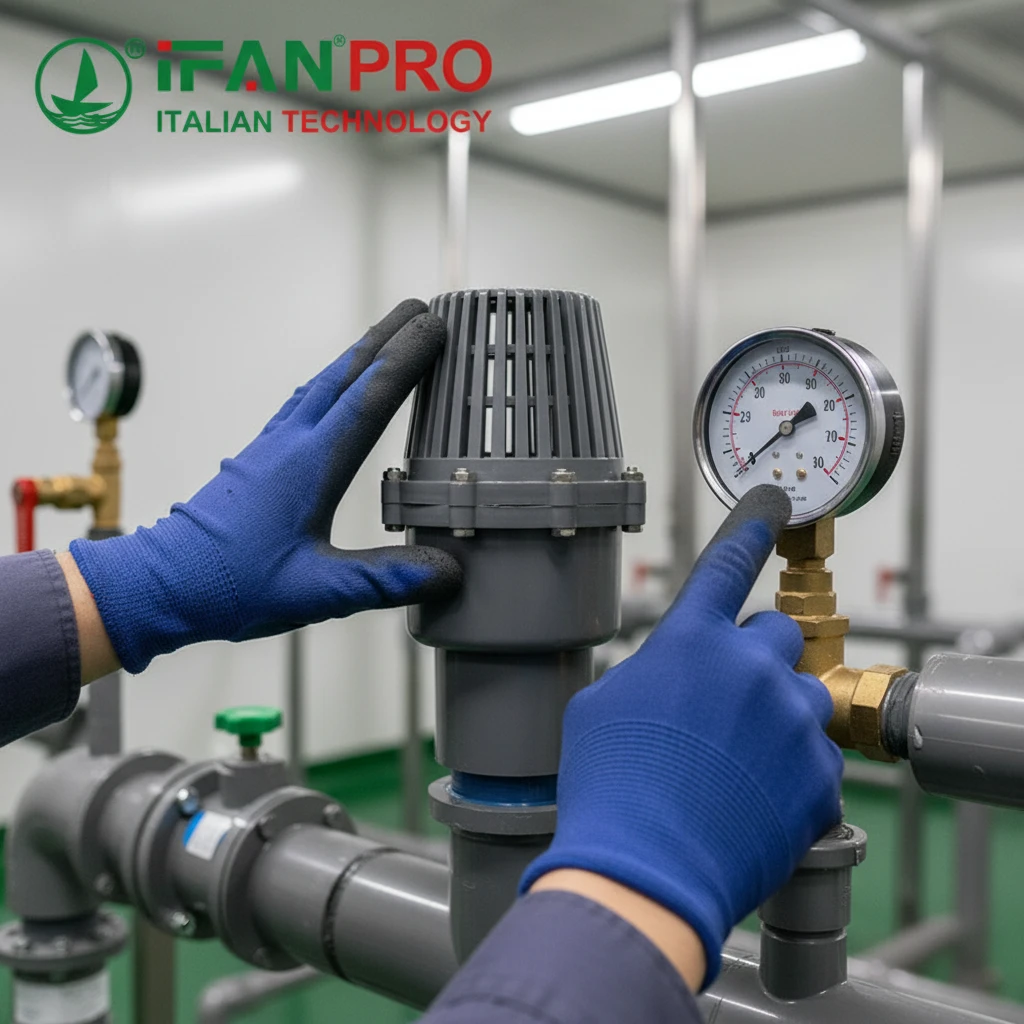
Finally, check the gauges. Your system likely has pressure gauges before and after the valve.
- Compare the Readings: The pressure should be within the valve’s rated range, which is printed on its body or in its manual.
- Watch for Fluctuations: Is the pressure steady, or is it jumping around? Unstable pressure puts extra stress on the valve and can point to a problem elsewhere in the pump system.
Daily Check Quick Guide
| What to Check | How to Check It | What is “Normal” |
|---|---|---|
| Visual Inspection | Look at valve body and connections. | No drips, no cracks, no unusual discoloration. |
| Auditory Inspection | Listen during operation. | Consistent fluid flow sound; no hissing or knocking. |
| Pressure Check | Read inlet/outlet pressure gauges. | Pressure is stable and within valve’s rated range. |
By making this a daily habit, you move from reactive repairs to predictive maintenance. You become the expert on your own equipment.
How Should You Clean and Descale a PVC Pump Valve Correctly?
Improper cleaning is a common cause of valve damage. I’ve seen people use harsh chemicals that weaken the PVC.
To clean and descale a PVC pump valve correctly, first flush it with clean water. For scale, use a mild acid solution like diluted vinegar, not harsh chemicals. Always disassemble the valve as per the manual, soak parts gently, scrub with soft tools, rinse thoroughly, and ensure everything is completely dry before reassembly to prevent damage.
Why Correct Cleaning Matters
Cleaning isn’t just about removing gunk. Doing it wrong can degrade the PVC material, warp seals, or leave harmful residues that contaminate your fluid. The goal is to remove buildup without damaging the valve itself.
First, safety and preparation are key. Isolate the valve from the system, release any pressure, and drain it completely. Gather the right tools: soft-bristled brushes (like old toothbrushes), clean lint-free cloths, and plastic scrapers—never metal, which can scratch PVC.
Step-by-Step Cleaning and Descaling Process
Follow this safe sequence:
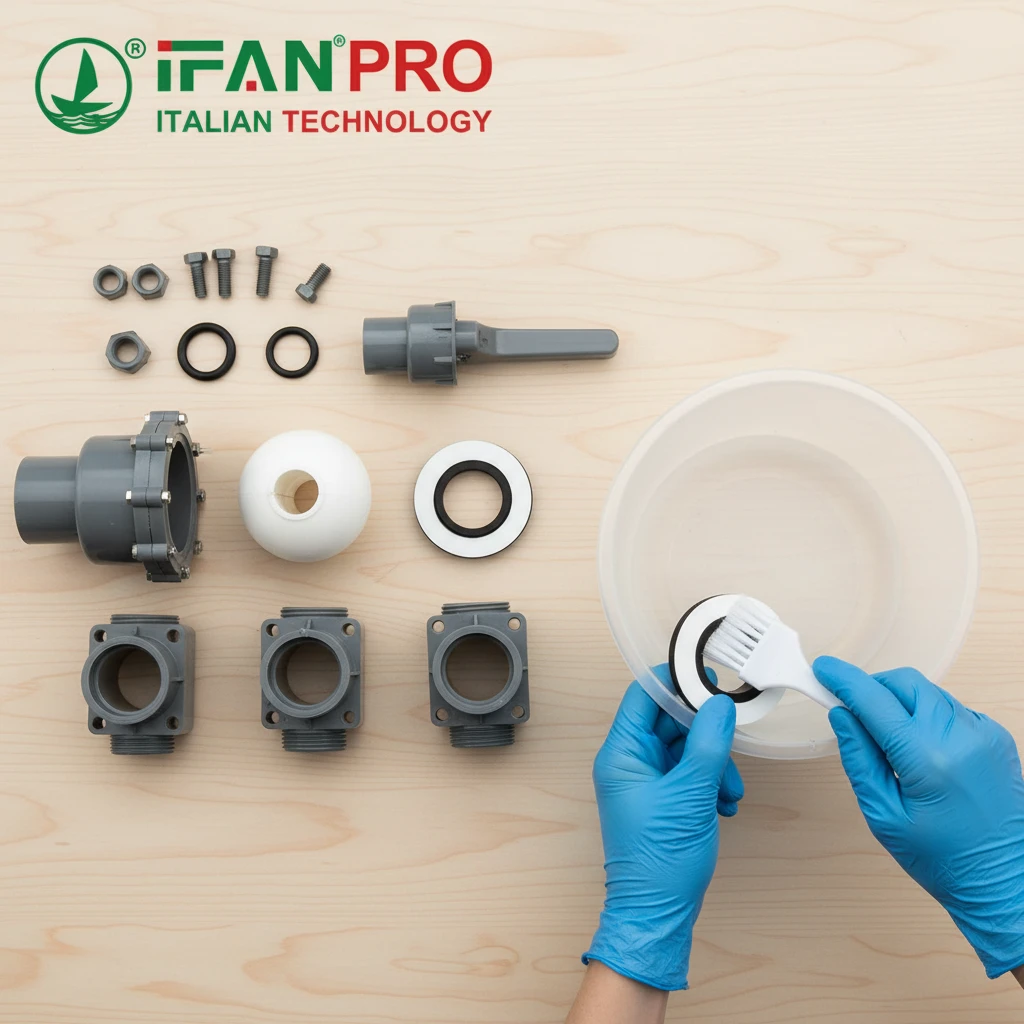
- Disassembly: Carefully take the valve apart. Refer to the manual for the order of parts. Lay them out on a clean surface in the order you remove them. This makes reassembly much easier.
- Initial Rinse: Rinse all parts with clean, warm water to remove loose debris.
- Descaling (if needed): If you see mineral scale (hard, crusty deposits), use a mild solution. A mix of 1 part white vinegar to 4 parts water is often effective. Soak the parts for 15-30 minutes. Avoid strong acids or abrasive cleaners, as they can chemically attack the PVC plastic.
- Gentle Scrubbing: After soaking, use a soft brush to gently remove any remaining scale or organic buildup. For stubborn spots on the valve body, a plastic pick or wooden stick can help.
- Final Rinse: Rinse every part thoroughly with clean water to remove all cleaning solution residues. Any leftover acid, even mild vinegar, can cause long-term damage.
- Drying: This step is critical. Use compressed air or a clean, dry cloth to remove all moisture from every component and internal passageway. Reassembling a damp valve can trap water and lead to corrosion of metal springs or bolts, or cause microbial growth.
- Reassembly and Lubrication: Put the valve back together carefully. Apply a compatible silicone-based grease to O-rings and moving parts like the stem. This reduces friction, protects seals, and ensures smooth operation. Do not use petroleum-based greases, as they can degrade PVC and rubber seals.
Do’s and Don’ts of PVC Valve Cleaning
| Do’s | Don’ts |
|---|---|
| Use mild solutions like diluted vinegar. | Use strong acids (e.g., muriatic acid) or solvents. |
| Use soft brushes and plastic tools. | Use metal brushes or scrapers that can scratch. |
| Rinse all parts thoroughly with clean water. | Leave any cleaning chemical residue. |
| Dry components completely before reassembly. | Reassemble parts while they are still wet. |
| Lubricate with compatible silicone grease. | Use standard petroleum-based lubricants. |
A clean valve operates with less friction, seals better, and gives you a clear view of the actual condition of its components during inspection.
How Can You Identify Early Wear in PVC Pump Valve Components?
Finding wear early is the secret to cheap repairs. Replacing a $5 O-ring is better than replacing a $500 valve.
You can identify early wear in PVC pump valve components by looking for specific signs: fluid leaks often mean worn seals, difficult operation points to stem or seat wear, and changes in flow or pressure indicate internal erosion or blockage. Regular disassembly and inspection of key parts is the most reliable method.
Knowing What to Look For
Internal parts wear out slowly. By knowing the symptoms, you can predict failure. The main components to watch are the seals (O-rings, gaskets), the stem, the seat, and the valve body itself.
First, watch for performance clues while the valve is running. These are your early warning signals.
- External Leakage: The most obvious sign. If you see a leak from the stem area (where the handle connects), the stem seal or O-ring is worn. A leak from the body connections suggests a gasket failure.
- Operation Becomes Hard: If the valve handle becomes stiff or hard to turn, it could mean the stem is corroded (if metal), the stem threads are dirty or damaged, or the seat is warped and creating excessive friction.
- Inconsistent Flow or Pressure: If you cannot control the flow as precisely as before, or if pressure drops unexpectedly, the internal seat may be eroded or damaged. This prevents the valve from sealing or modulating flow properly.
Hands-On Inspection During Cleaning
The best time to check for wear is during your regular cleaning when the valve is disassembled. Here’s what to examine:
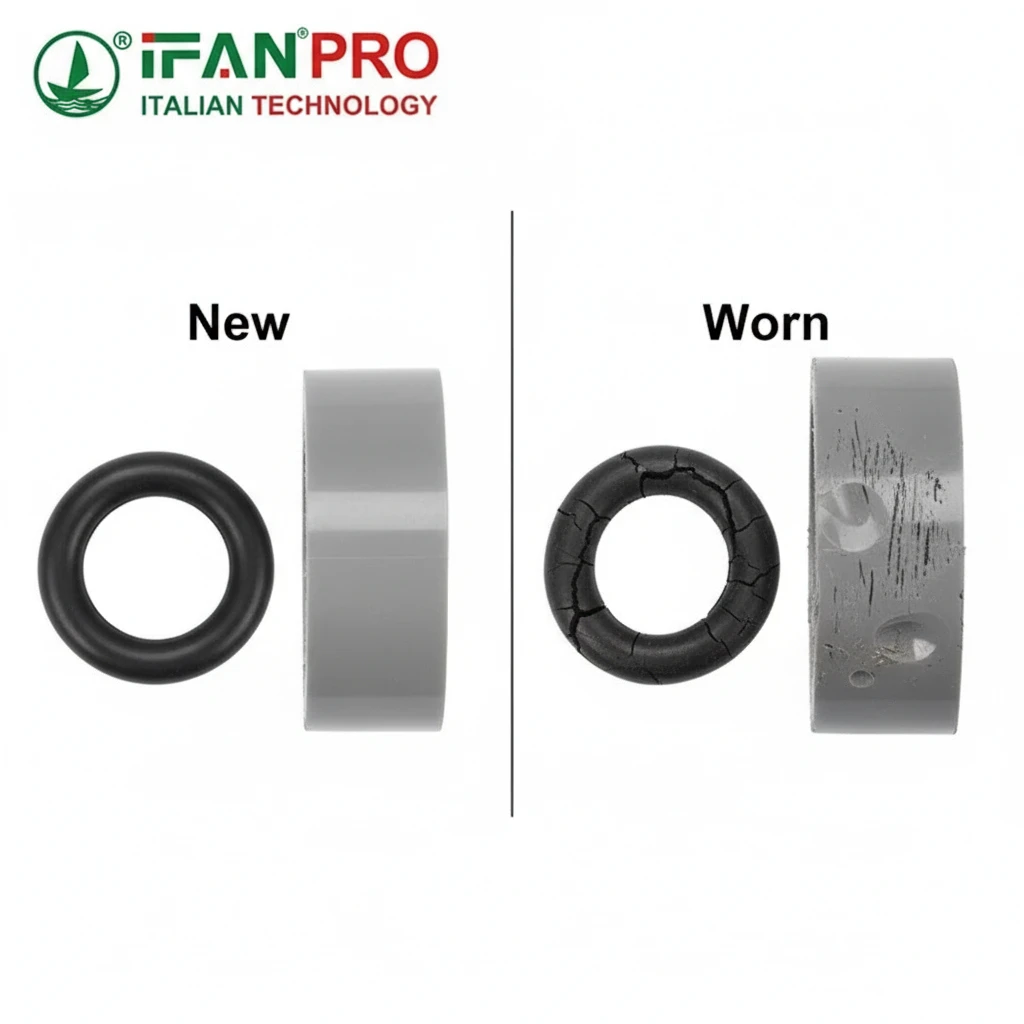
1. Inspect Seals (O-rings and Gaskets):
Look for loss of elasticity—they should be springy, not hard or brittle. Check for flattening, cracks, nicks, or any grooves worn into them. Even a small imperfection can cause a leak.
2. Inspect the Valve Stem:
If it’s a metal stem, look for pitting, corrosion, or worn threads. If it’s a PVC stem, look for cracks, warping, or scoring marks. A bent stem will never operate smoothly.
3. Inspect the Valve Seat:
This is the surface the seal closes against. It must be smooth. Run your finger over it (carefully). Feel for grooves, pits, or erosion. A damaged seat will prevent a tight seal, causing internal leakage even when the valve is “closed.”
4. Inspect the Valve Body Interior:
Look inside the ports and the main chamber. Check for scoring, discoloration from chemical attack, or excessive buildup that cleaning didn’t remove. Also, look for any cracks, especially around threaded sections, which are stress points.
Common Wear Signs and Their Meanings
| Component | Signs of Early Wear | What It Leads To |
|---|---|---|
| Seals (O-rings) | Cracks, hardness, flattening, nicks. | External leaks, loss of sealing pressure. |
| Stem | Corrosion (metal), cracks (PVC), worn threads. | Difficult operation, handle stiffness, leaks. |
| Seat | Grooves, pits, erosion, uneven surface. | Internal leakage, poor flow control, dripping. |
| Valve Body | Cracks (esp. at threads), significant discoloration. | Catastrophic failure, leaks at connections. |
Keeping a small stock of common spare parts—like seal kits—based on these inspections lets you perform quick, low-cost fixes and avoid major downtime.
When Should You Schedule Professional Service for PVC Pump Valves?
Professional service is not a failure; it’s smart planning. Schedule it before your daily checks tell you to.
You should schedule professional service for PVC pump valves based on operating hours or time intervals from the manufacturer’s manual, or immediately after your daily checks reveal persistent issues like leaks you can’t fix, unexplained pressure drops, or rising contamination levels that point to internal wear beyond simple cleaning.
Moving from Reactive to Scheduled Maintenance
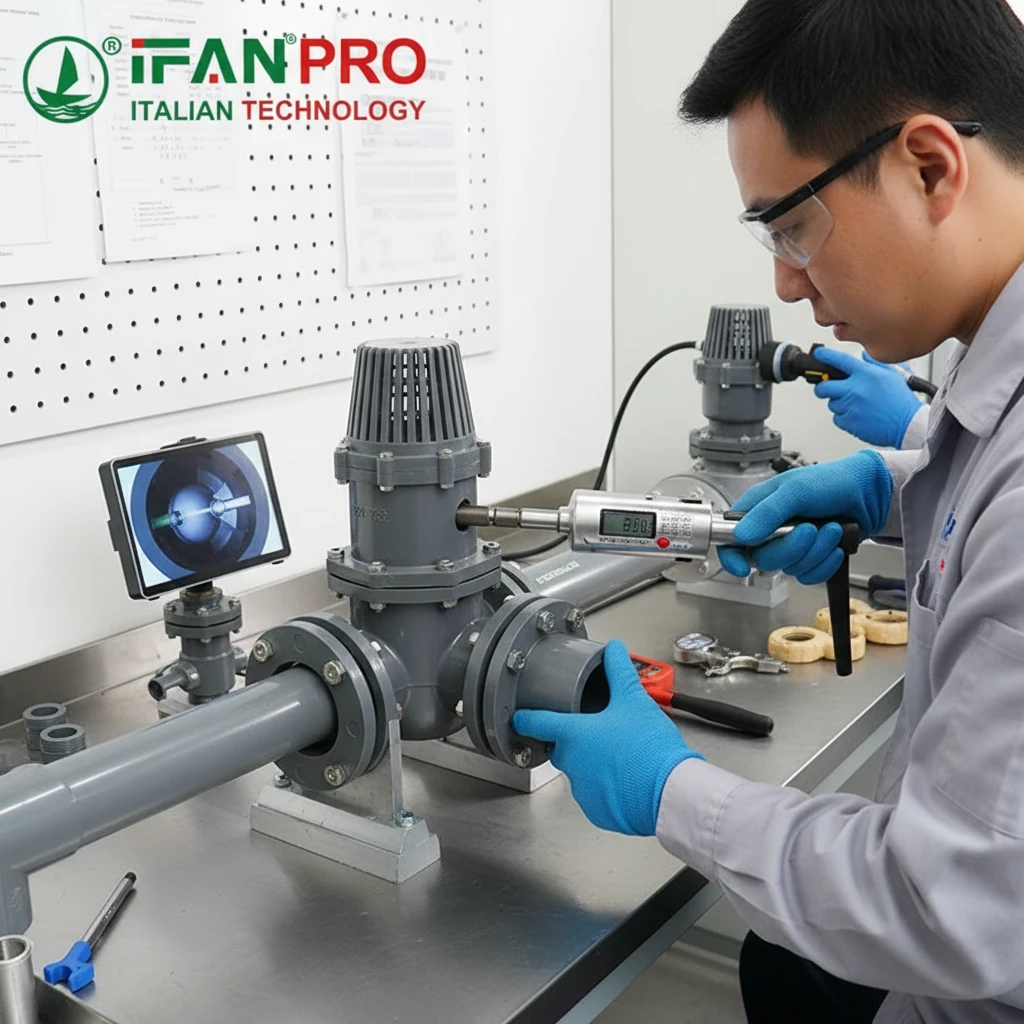
Relying only on fixes when something breaks is expensive. Professional service is a planned investment. It involves a technician doing a full diagnostic, potentially using tools you don’t have, and performing deeper repairs or calibrations.
First, follow the manufacturer’s plan. Your valve’s manual will have a recommended service interval. This is usually based on:
- Operating Hours: For example, “Inspect every 2,000 running hours.”
- Calendar Time: For example, “Service annually, regardless of use.”
Use this as your baseline schedule. Mark it on your calendar.
Key Triggers for Calling a Professional
However, real-world conditions may require service sooner. Schedule a professional if you notice any of the following during your daily checks and basic maintenance:
1. Recurring or Unfixable Leaks:
You’ve replaced the O-ring, tightened the connections, but the leak returns or persists. This could mean a cracked valve body, a badly warped seat, or a problem not visible during a simple disassembly.
2. Persistent Performance Problems:
The valve cannot maintain stable pressure, or flow rates are consistently lower than they should be, even after a thorough cleaning. This indicates internal wear or damage that affects the valve’s core function, like severe seat erosion or a damaged internal mechanism.
3. Signs of Major Internal Damage:
During your inspection, you find deep scoring inside the body, a cracked housing, or major corrosion on internal metal parts. These issues require professional assessment and likely parts replacement that goes beyond a simple seal kit.
4. Critical System Requirements:
If the valve is in a critical application where failure would cause safety risks, environmental issues, or very high financial loss, schedule professional service more frequently. It’s a form of insurance.
Maintenance Schedule Example
| Valve Service Level | Who Does It? | Frequency / Trigger | Key Actions |
|---|---|---|---|
| Daily Checks | Your on-site staff. | Every day. | Visual, auditory, pressure check. |
| Basic Cleaning & Inspection | Your maintenance team. | Every 3-6 months (or per manual). | Clean, descale, inspect wear parts. |
| Professional Service | Certified technician or valve specialist. | Annually, or after major triggers. | Full diagnostic, precision calibration, repair of complex issues. |
A professional service call provides a detailed report on the valve’s health and can forecast its remaining lifespan, helping you plan budgets and avoid surprises.
Conclusion
Consistent daily checks, proper cleaning, early wear identification, and planned professional service will maximize your PVC pump valve’s life. For durable, easy-to-maintain PVC pump valves, partner with IFAN for quality you can rely on.


Commentaires récents