
I have seen too many plumbing failures start with a poor glue job. A quick, messy application might seem fine, but it often leads to leaks and frustration months later.
To apply PVC glue correctly, you must clean and prepare the surfaces, apply both primer and cement generously, twist the pipe into the fitting to spread the glue evenly, and hold it firmly for 30 seconds to set. The key is to create a complete, uniform layer of solvent-welded plastic for a bond that is stronger than the pipe itself.
Getting this simple process right is crucial for a permanent, leak-free system. Let’s break down each step to ensure your next project is bulletproof.
How Do You Prepare PVC Surfaces Before Applying the PVC Cement?
Skipping preparation is the number one mistake. I’ve inspected failed joints where the glue just coated dirt, never bonding to the plastic.
You prepare PVC surfaces by first cutting the pipe square and deburring it, then thoroughly cleaning both the pipe end and the fitting socket with a clean rag and PVC cleaner/primer. This removes all dirt, grease, and the glossy outer layer, exposing the raw plastic for the cement to chemically weld.
Why Preparation is Non-Negotiable
PVC cement does not work like an adhesive that “sticks” things together. It is a solvent weld. The cement’s chemicals actually melt the top layers of the PVC plastic. When you push the pipe and fitting together, these melted layers mix and then harden as one single piece of plastic. If the surface is dirty or shiny, the solvent cannot properly melt the plastic, resulting in a weak bond.
Here is a simple step-by-step guide to perfect preparation:
- Cut Square: Use a PVC cutter or a fine-tooth saw with a miter box. A crooked cut leaves gaps.
- Deburr: After cutting, use a deburring tool or a knife to remove the plastic ridge (the burr) from the inside and outside of the pipe. A burr can scrape cement from the fitting socket, creating a leak path.
- Dry Fit: Always test-assemble the pipes and fittings without glue. Mark the pipe and fitting with a line so you know exactly how deep to insert it when gluing. This prevents pushing the pipe in too far or not far enough.
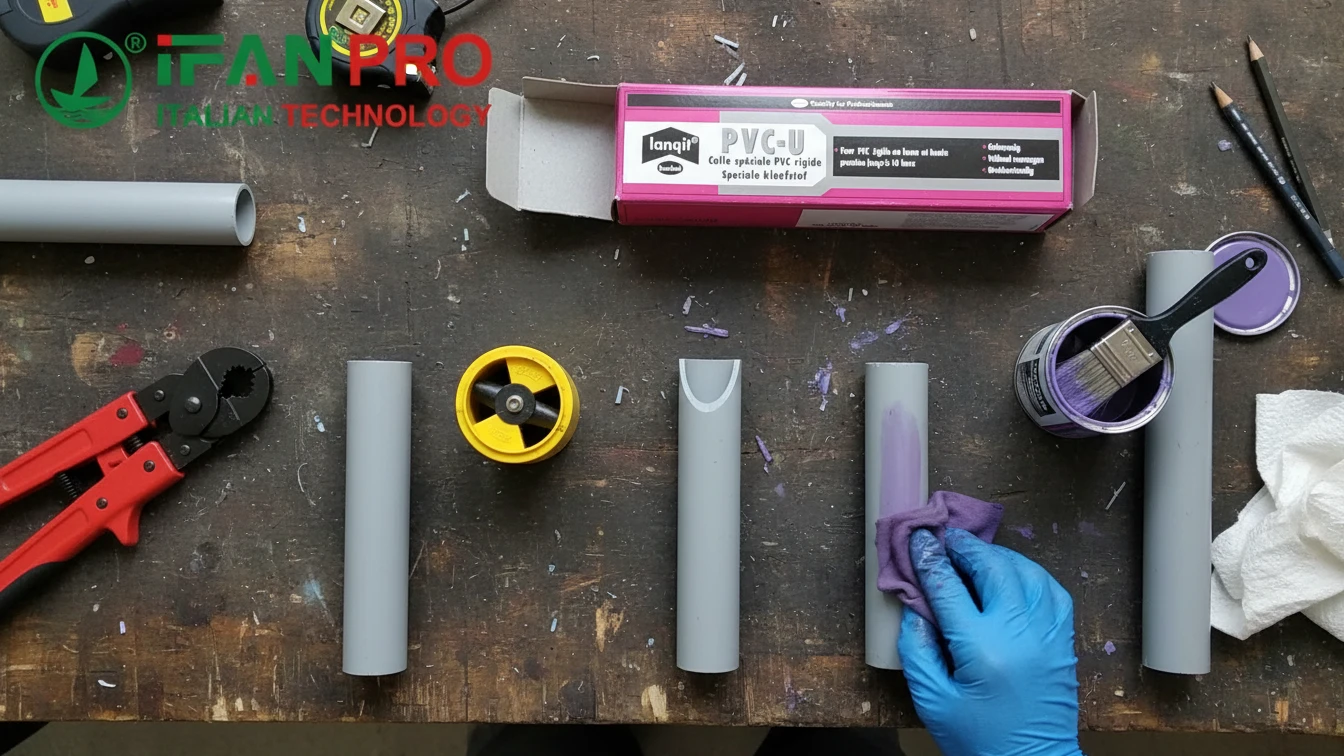
- Clean with Primer/Cleaner: This is the most critical step. Use a clean, lint-free rag and PVC primer (the purple liquid) or a dedicated PVC cleaner (clear). Swab it vigorously inside the fitting socket and around the pipe end. You will see the shiny surface turn dull. This cleans off contaminants and softens the plastic for the cement.
Common Mistakes in Surface Prep
| Mistake | Consequence | The Right Way |
|---|---|---|
| Not deburring the pipe | The burr scrapes cement off, creating a dry channel for leaks. | Always remove the inner and outer burr after cutting. |
| Wiping with a dirty rag | Transfers grease and dust onto the “clean” surface. | Use a fresh, clean rag for every few joints. |
| Skipping the primer/cleaner | The cement cannot properly melt the glossy surface, leading to a partial bond. | Always use primer or cleaner to dull the surface before gluing. |
| Not marking the dry fit | The pipe bottoms out or isn’t inserted fully, making a weak joint. | Dry fit, then draw a clear alignment line across the pipe and fitting. |
Taking two extra minutes for preparation transforms the glue from a hopeful seal into a guaranteed weld. This step addresses the most common client pain point: mysterious leaks that appear long after installation.
What is the Proper Technique to Apply PVC Glue for Maximum Strength?
Applying the glue is more than just dabbing it on. I teach a specific method that ensures full, even coverage every single time.
The proper technique is to apply a thick, even coat of primer to both surfaces, then apply a moderate coat of cement to the pipe and a light coat inside the fitting. Immediately push the pipe into the fitting, give it a quarter-turn to spread the cement evenly, and hold it steady for 30 seconds to prevent it from pushing back out.

The Step-by-Step Gluing Process
A strong bond requires the right sequence and technique. Doing things out of order can cause the cement to dry before you join the pieces.
Step 1: Apply Primer (If Required)
Check your local code. Many areas require primer. Apply a generous coat of purple primer to the outside of the pipe end (past your mark) and inside the fitting socket. Let it become tacky for a few seconds.
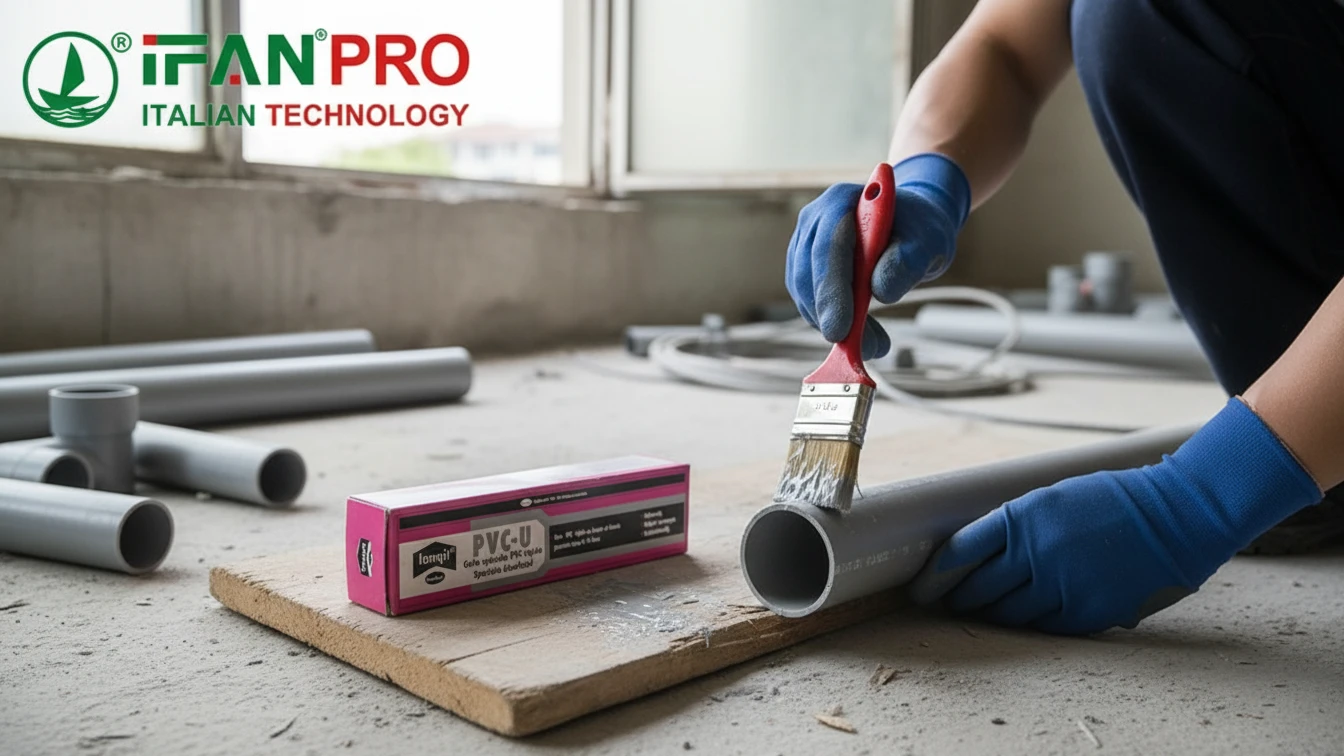
Step 2: Apply Cement Liberally and Quickly
Use the cement can’s applicator brush. First, apply a moderate, even coat to the outside of the pipe, covering from the end to just past your depth mark. Then, apply a lighter, even coat inside the fitting socket. Do not let the cement puddle inside the fitting.
Step 3: Assemble Immediately
You typically have only 10-30 seconds before the cement starts to set. Quickly align your marks and push the pipe all the way into the fitting socket until it bottoms out.
Step 4: Twist and Hold
As you push, give the pipe a quarter-turn (about 90 degrees). This twisting action ensures the cement spreads into a perfectly even film with no gaps. Hold the joint firmly together for at least 30 seconds. This is crucial to stop the pipe from slowly pushing back out due to the solvent’s pressure.
Step 5: Wipe the Bead
After holding, a small bead of melted plastic will form around the joint. Use a rag to wipe this bead away for a clean look. Do not disturb the joint itself.
Cement Application Guide by Pipe Size
The amount of cement matters. Too little creates a starved joint; too much is wasteful and messy.
| Pipe Diameter | Primer Coat | Cement on Pipe | Cement in Fitting | Hold Time |
|---|---|---|---|---|
| 1/2″ – 1″ | Generous, even | Moderate, full coverage | Light, even coat | 30 seconds |
| 1.5″ – 2″ | Generous, even | Heavy, full coverage | Moderate, even coat | 30-45 seconds |
| 3″ – 4″ | Very generous | Very heavy, full coverage | Generous, even coat | 45-60 seconds |
This technique solves the pain point of inconsistent application. By twisting and holding, you guarantee the cement forms a 360-degree weld, not just a partial bond.
How Long Should PVC Glue Cure to Achieve a Full-Strength Bond?
This is where patience pays off. I’ve seen people pressure-test a system too soon, only to blow apart a joint that seemed solid.
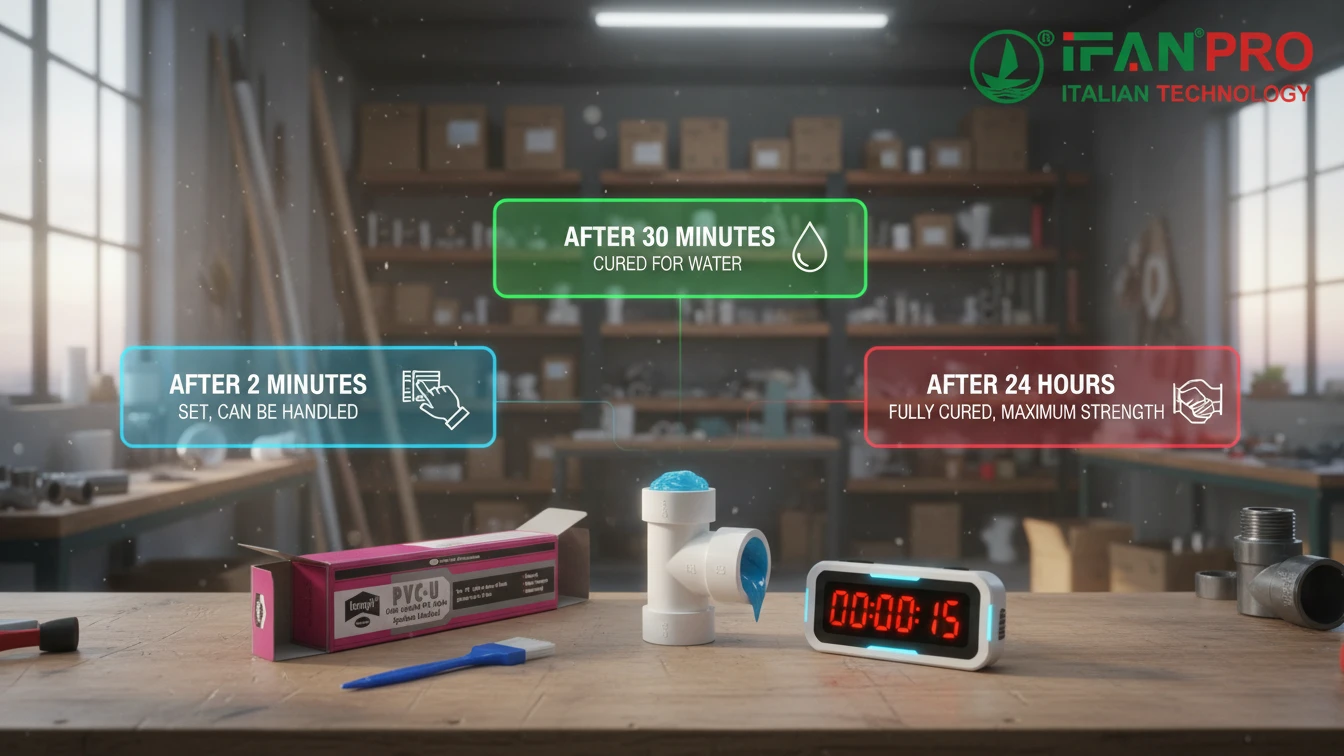
PVC glue sets enough to handle in 2 minutes and cures enough for water pressure in 15-30 minutes. However, it requires a full 24 hours to achieve its maximum chemical bond strength, especially for larger pipes or critical, high-pressure applications.
Understanding Set Time vs. Cure Time
This confusion causes many failures. The joint feels solid quickly, but the chemical welding process is still happening deep inside.
- Set Time (2-10 minutes): This is when the solvents evaporate, and the joint hardens enough that you can let go and it won’t fall apart. You can carefully move the pipe. However, the bond is still very weak and can be easily broken.
- Handling Strength (30 minutes – 2 hours): At this point, the joint has developed enough strength to withstand light handling and can often hold water pressure for a basic test. But it is not at full strength.
- Full Cure (24 hours): The chemical reaction of the solvents melting and fusing the PVC molecules is complete. The joint is now a single, homogenous piece of plastic and has reached its maximum possible strength, which often exceeds the strength of the pipe itself.
Factors That Affect Cure Time
The “24-hour rule” is a safe standard, but several factors can change it.
1. Temperature and Humidity: This is the biggest factor. PVC cement cures best at room temperature (60-80°F / 16-27°C).
- Cold Weather (Below 50°F / 10°C): The chemical reaction slows dramatically. Cure times can double or triple. Joints may never achieve full strength.
- Hot Weather (Above 90°F / 32°C): The solvents evaporate too fast, which can make the joint set before it’s fully assembled, creating a weak bond.
- High Humidity: Can cause moisture to get trapped in the joint, preventing a proper weld.
2. Pipe Size: Larger diameter pipes have more surface area. The solvent takes much longer to fully evaporate from the center of the joint.
- Small pipes (1/2″) may be functional in a few hours.
- Large pipes (4″) should always wait the full 24 hours, or even 48 hours in cool conditions.
Recommended Cure Times Before Pressure Testing
| Application | Minimum Wait Time | Recommended Safe Time |
|---|---|---|
| Drain line (low pressure) | 2 hours | 4-6 hours |
| Cold water supply line | 4 hours | 8-12 hours |
| Hot water or pressurized line | 8 hours | 24 hours |
| Main line or critical application | 12 hours | 24-48 hours |
Waiting the full cure time is the ultimate solution to the pain point of delayed failures. It ensures the bond is permanent.
How Can You Test if the PVC Glue Bond is Strong and Leak-Proof?
Never assume a joint is good. A simple test can save you from major water damage later. I always insist on testing before closing up walls.
You can test a PVC glue bond by performing a visual inspection for gaps or dry spots, then conducting a static water pressure test or an air pressure test. For drain lines, a simple bucket test will verify there are no leaks under normal use.
Visual and Physical Inspection
Start with the easiest checks before any pressure is applied.
- Look for the Bead: A continuous, small bead of melted PVC should be visible around the entire joint. This indicates sufficient cement was used and it oozed out evenly.
- Check for Gaps: There should be no visible gap between the pipe and the fitting shoulder. The pipe should be fully seated.
- Tap Test: Once fully cured (after 24 hours), gently tap the fitting with a screwdriver handle. It should sound solid. A hollow or different sound can indicate a dry or poorly bonded joint (this is not always reliable but can be a clue).
Pressure Testing Methods
For pressurized lines (water supply), a formal test is mandatory.
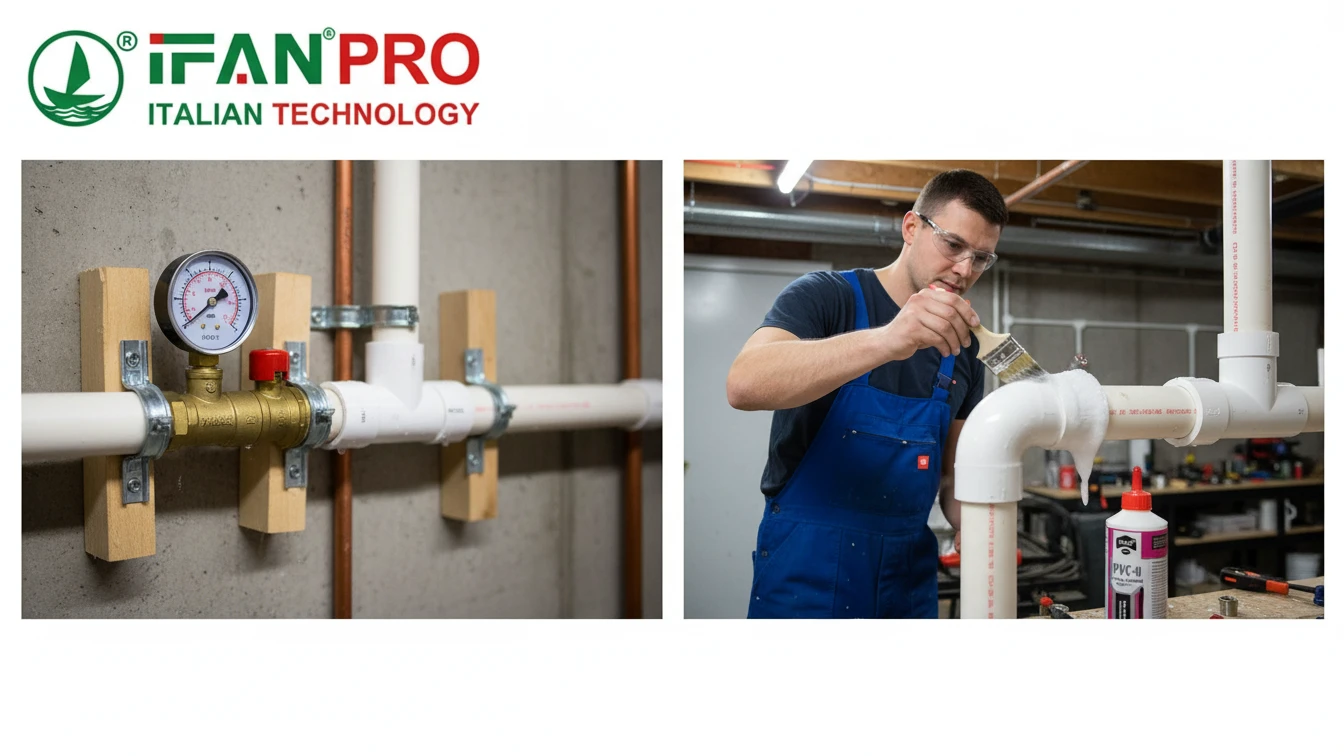
A. Water Pressure Test (The Best Method)
- Cap all ends of the system.
- Attach a hose and fill the pipes completely with water, ensuring all air is bled out.
- Connect a pressure gauge and a small hand pump.
- Pump the system to 1.5 times its normal operating pressure (e.g., 100 PSI for a 65 PSI system).
- Shut the valve and monitor the gauge for 15-30 minutes. If the pressure holds steady, the joints are good. Any drop indicates a leak.
B. Air Pressure Test (Use with Caution)
Air testing is faster but can be dangerous if pipes fail.
- Cap the system and attach an air gauge and compressor.
- Pressurize the system to a lower pressure, typically 20-40 PSI for testing.
- Submerge all joints in soapy water or brush them with soap solution. Bubbles will form at any leak.
Testing Schedule for Different Systems
| System Type | Initial Test Time | Test Method | Pass Criteria |
|---|---|---|---|
| In-Wall Drain Line | After 4-6 hour cure | Bucket Test: Pour water down the line. | No water drips from joints below. |
| Exposed Water Supply | After 8-12 hour cure | Visual + static pressure hold. | No drips, pressure stable for 15 min. |
| Buried or Concealed Main Line | After full 24-hour cure | Full water pressure test (1.5x operating PSI). | Pressure holds for 30+ minutes. |
Testing directly solves the client’s deep fear of hidden leaks. It provides proof that the preparation, application, and curing were all done correctly, giving total peace of mind.
Conclusion
A strong PVC bond depends on perfect prep, proper gluing technique, full curing time, and a final leak test. For guaranteed performance, use IFAN’s premium PVC pipes and matching solvent cements, designed to work perfectly together for a permanent seal.


Commentaires récents