
I once had a client whose project stalled because they assumed all HDPE fittings could be butt fused. This common misunderstanding can lead to costly errors on site.
No, a standard HDPE female valve does not allow for direct butt fusion because its threaded, socket-shaped end is not designed for the flat, squared-off connection required by the butt fusion process. However, it is specifically engineered for secure integration into HDPE piping systems using other reliable methods.
So, how do you properly connect these essential components? Let’s clarify the correct techniques and best practices to ensure a leak-free system.
Can HDPE Female Valves Be Directly Integrated via Butt Fusion Technique?
A contractor once tried to force a butt fusion machine onto a valve socket, damaging both. It was a clear case of using the wrong tool for the job.
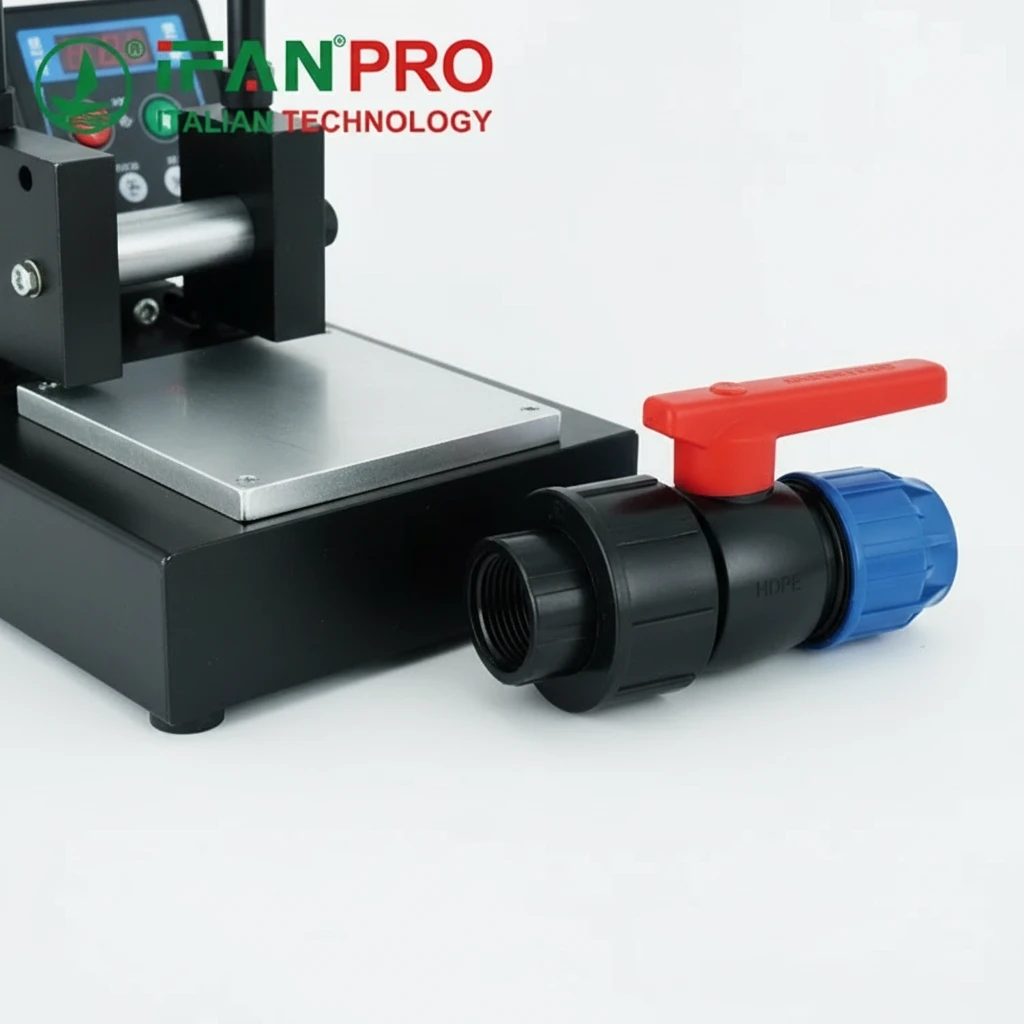
No, you cannot directly connect a standard HDPE female valve using the butt fusion technique. Butt fusion requires two plain-ended pipes or fittings to be heated and pressed together. The female valve has a threaded socket or a spigot end, which physically cannot fit into a standard butt fusion machine or create the necessary flat welding surface.
Understanding the Physical Limitation
First, you need to understand the shapes involved. The butt fusion process is designed for joining two flat, smooth ends. However, a standard HDPE female valve has a different shape. One end has internal threads (the “female” part), and the other end is usually a plain spigot (a male end) designed for socket fusion. Therefore, neither of these ends is flat.
Think of it like this: butt fusion is like welding two pieces of paper together along their edges. You need two flat edges. Conversely, a female valve is like a cup. As a result, you cannot weld the flat edge of a paper to the rim of a cup using the same method.
The Role of the Valve Design
The design of the valve itself is the main reason. The body of a female valve contains the valve mechanism (like a ball or gate). Importantly, the areas around this mechanism are not uniform or thick enough to withstand the high pressure and heat of a butt fusion machine. Consequently, the process would likely damage the internal parts of the valve, making it useless.
Connection Method Overview
So, how do they get into the pipeline? Typically, they use a different type of fusion called socket fusion or electrofusion on their spigot end. For the threaded side, they use a compatible adapter. The table below shows the mismatch:
| Component | End Type | Compatible Fusion Method |
|---|---|---|
| Standard HDPE Pipe | Plain, Flat End | Butt Fusion |
| HDPE Female Valve (Spigot End) | Plain, Rounded Spigot | Socket Fusion |
| HDPE Female Valve (Threaded End) | Internal Threads | Mechanical Connection (via adapter) |
In short, forcing a butt fusion is impossible and will damage the valve. Instead, you must use the correct connection method designed for the valve’s specific ends.
What Are the Alternative Connection Methods If Butt Fusion Is Not Suitable?
Frustration occurs when installers don’t know the alternatives. I’ve seen projects delayed for weeks while crews waited for the correct fittings.
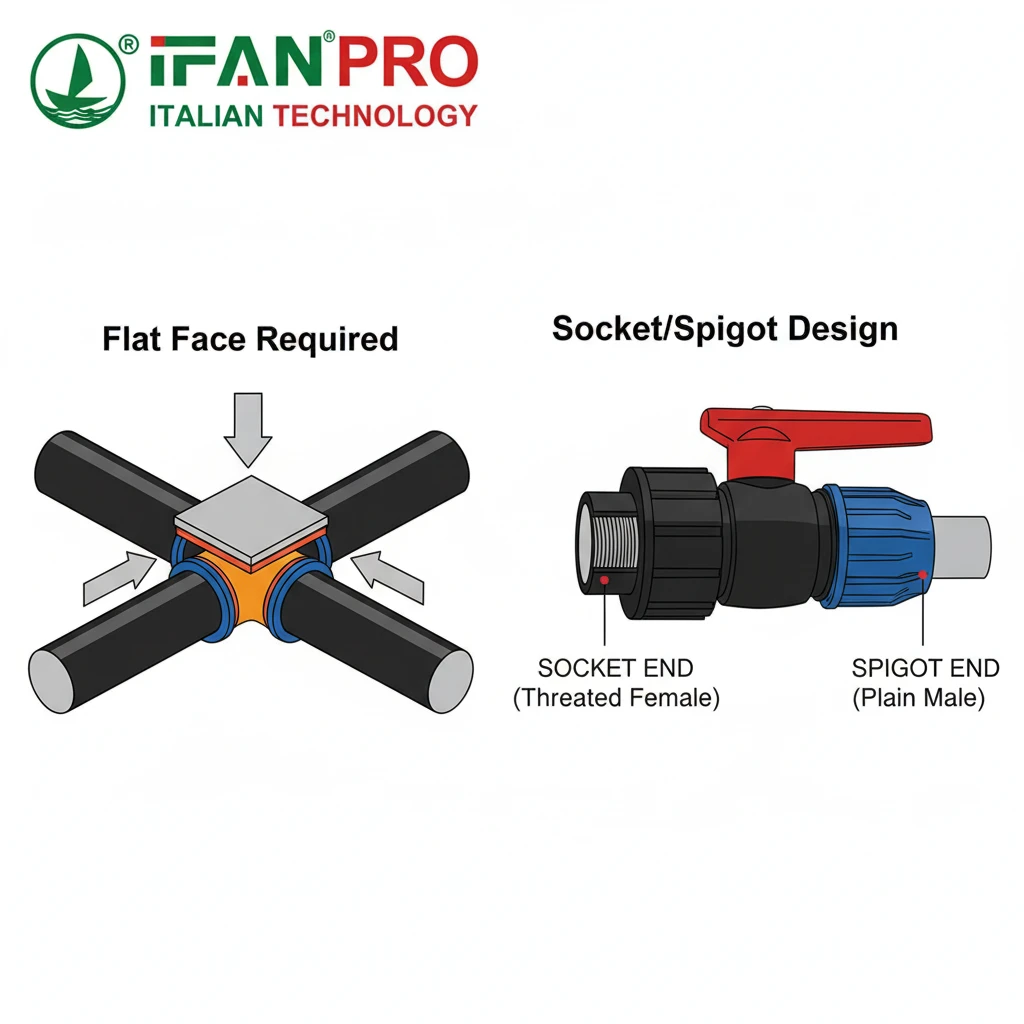
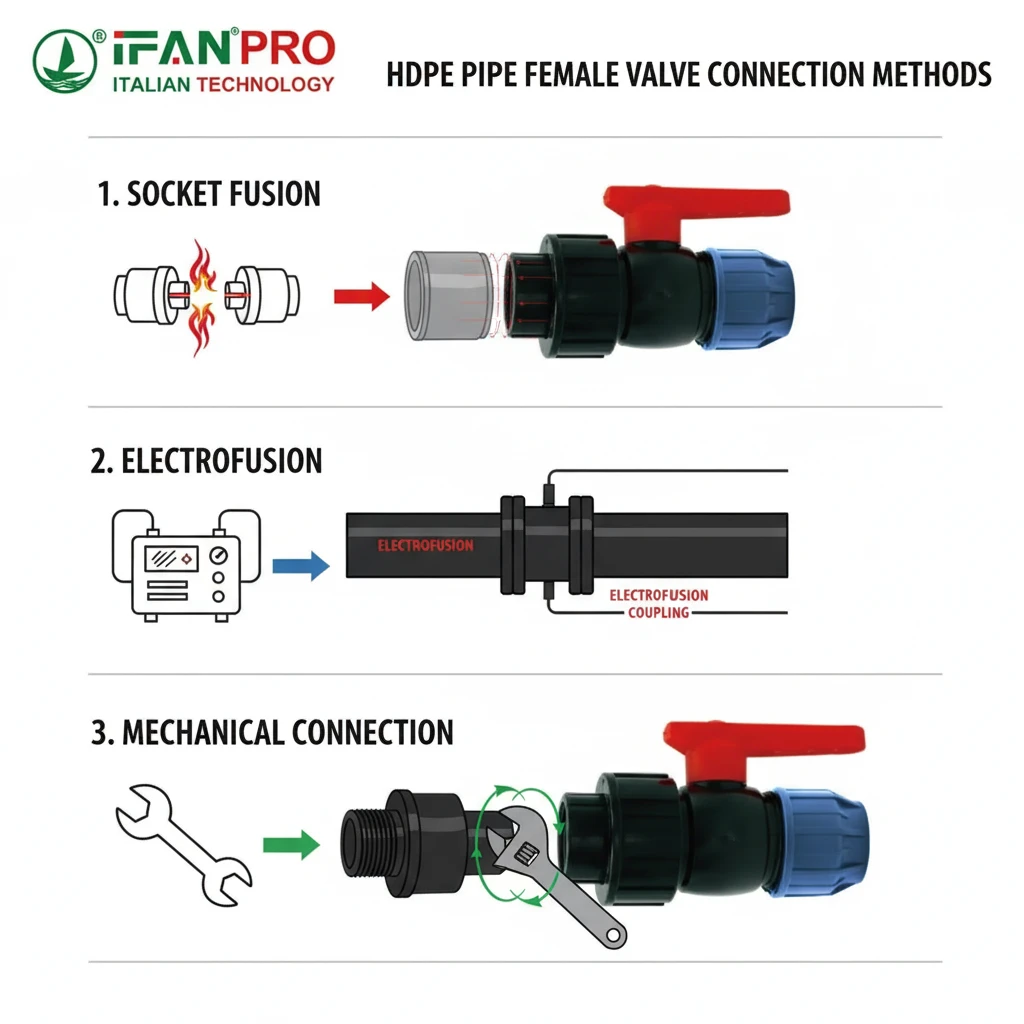
If butt fusion is not suitable, the two main alternative methods for integrating an HDPE female valve are socket fusion for its spigot end and mechanical coupling for its threaded end. Electrofusion is another excellent, though often more costly, alternative that provides superior strength and consistency.
Method 1: Socket Fusion
This is the most common method for the plain spigot end of the valve.
- How it works: You use a special tool to heat the outside of the valve’s spigot and the inside of a separate HDPE socket fitting simultaneously. Once molten, you quickly push the spigot into the socket. Then, the melted materials mix and cool, forming a permanent, leak-free joint.
- Best for: Most standard residential and commercial pressure systems. It’s reliable and the equipment is common.
Method 2: Electrofusion
This method is gaining popularity for its precision.
- How it works: You use a special electrofusion saddle or coupling that has built-in heating wires. First, you clean the pipe and the valve spigot. Next, you clamp the electrofusion fitting over them and connect a power box. The box sends a current that melts the material from the inside, creating a perfect fuse.
- Best for: Critical joints, repairs in tight spaces, or situations where operator skill with hot tools is a concern. Also, it is less dependent on the installer’s technique.
Method 3: Mechanical Coupling (for the Threaded End)
This is how you connect the “female” threaded side of the valve to the HDPE pipe.
- How it works: You use a butt fusion x male thread adapter. First, you butt fuse the plain end of this adapter to your HDPE pipe. Then, you simply screw the female valve onto the adapter’s male threads.
- Best for: Connecting to other threaded equipment or for sections that might need future disassembly. However, it is not a fused joint, so it’s a potential maintenance point.
Comparison of Alternative Methods
| Method | Used For Valve End | Joint Type | Skill Required | Relative Cost | Best Application |
|---|---|---|---|---|---|
| Socket Fusion | Spigot End | Permanent, Homogeneous | Moderate | Low | General plumbing, standard pressure lines. |
| Electrofusion | Spigot End | Permanent, Homogeneous | Low (but needs specific equipment) | High | Critical joints, tight spaces, high-reliability projects. |
| Mechanical Coupling | Threaded End | Demountable (can be taken apart) | Low | Medium | Connections requiring future access, links to non-HDPE systems. |
The key is to match the method to the valve’s design and your project’s needs. So, never try to modify the valve to fit a butt fusion machine.
How Does the Valve Design Accommodate Fusion and Threaded Connections?
A well-designed valve is a bridge between systems. I recall a project where a dual-purpose valve solved a major interface issue between new HDPE lines and old metal equipment.
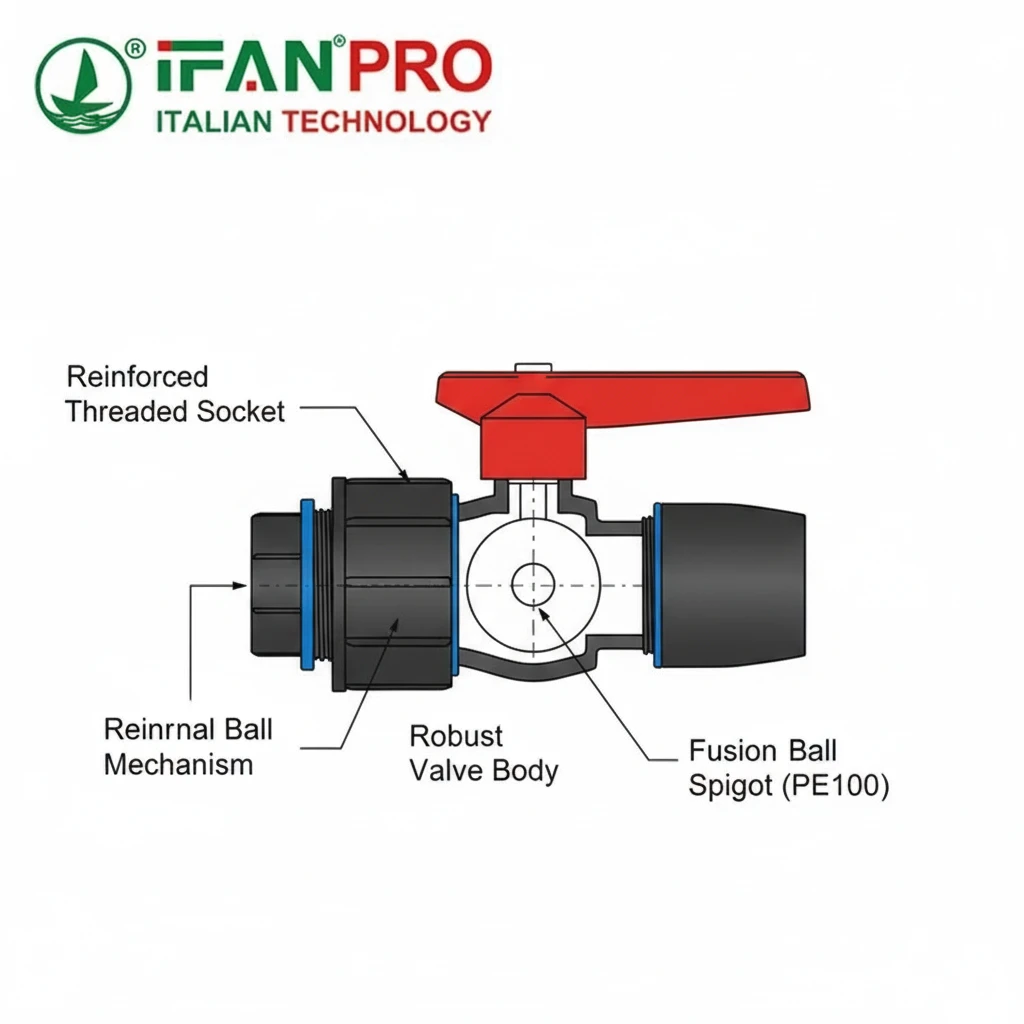
The valve design accommodates both by having different ends for different purposes. One end is a plain spigot (made of fusion-grade HDPE) designed for socket or electrofusion to the main pipeline. The opposite end features internal threads (often reinforced) to accept a threaded male adapter, creating a secure mechanical link to other system components.
The Dual-Purpose Construction
Let’s break down the typical design of a high-quality HDPE female valve. Understanding this will help you choose the right valve and install it correctly.
The Fusion End (Spigot):
This end looks like a short, plain extension of the valve body. Its design is critical:
- Material Consistency: Manufacturers make it from the same high-grade, fusion-compatible HDPE as the pipe. This ensures the molecular structure is identical for a perfect weld.
- Wall Thickness: It has a uniform and sufficient wall thickness. This is important because during socket fusion, the material must melt evenly to create a strong joint without weakening the valve.
- Surface Preparation: The surface is smooth and free from defects to ensure proper heating and fusion.
The Threaded End (Socket):
This is the “female” part of the valve, with threads on the inside.
- Reinforcement: The threaded area is often thicker or reinforced to handle the stress caused by threading and the potential for over-tightening. Also, the threads are precisely molded to match standard pipe thread dimensions (like NPT).
- Sealing Surface: Beyond the threads, there is usually a smooth, flat surface inside the socket. This is where the seal happens when you screw in a male adapter (often using a gasket or O-ring).
The Transition Zone
The valve body between the two ends is also important. It must be robust enough to handle the different stresses from a permanent fusion on one side and a mechanical connection on the other. For this reason, good manufacturers design this transition to be smooth and free of weak points.
Design Specifications Table
| Design Feature | Purpose & Requirement | What to Look For |
|---|---|---|
| Spigot End (Fusion) | To create a permanent weld with the HDPE pipe. | Uniform diameter, smooth surface, no cracks or voids, made from pure PE100/PE80. |
| Threaded Socket End | To provide a sealed mechanical connection. | Clean, sharp threads (NPT standard), reinforced wall around threads, a smooth sealing shoulder. |
| Valve Body | To house the mechanism and connect both ends. | Robust, thick-walled design, pressure-rated for the entire system, smooth interior for good flow. |
| Material Grade | To ensure fusion compatibility and long-term strength. | Certification to PE100 or PE80 standards, with traceable resin lot numbers. |
This hybrid design makes the HDPE female valve incredibly versatile. Essentially, it acts as a permanent control point in the fused HDPE line while providing a standard threaded port for connecting to pumps, meters, or other equipment.
What Quality Checks Are Vital for Fused Connections Involving HDPE Valves?
I once prevented a system failure by catching a cold fusion joint during a routine check. The installer had rushed the cooling time. This is why checks are non-negotiable.
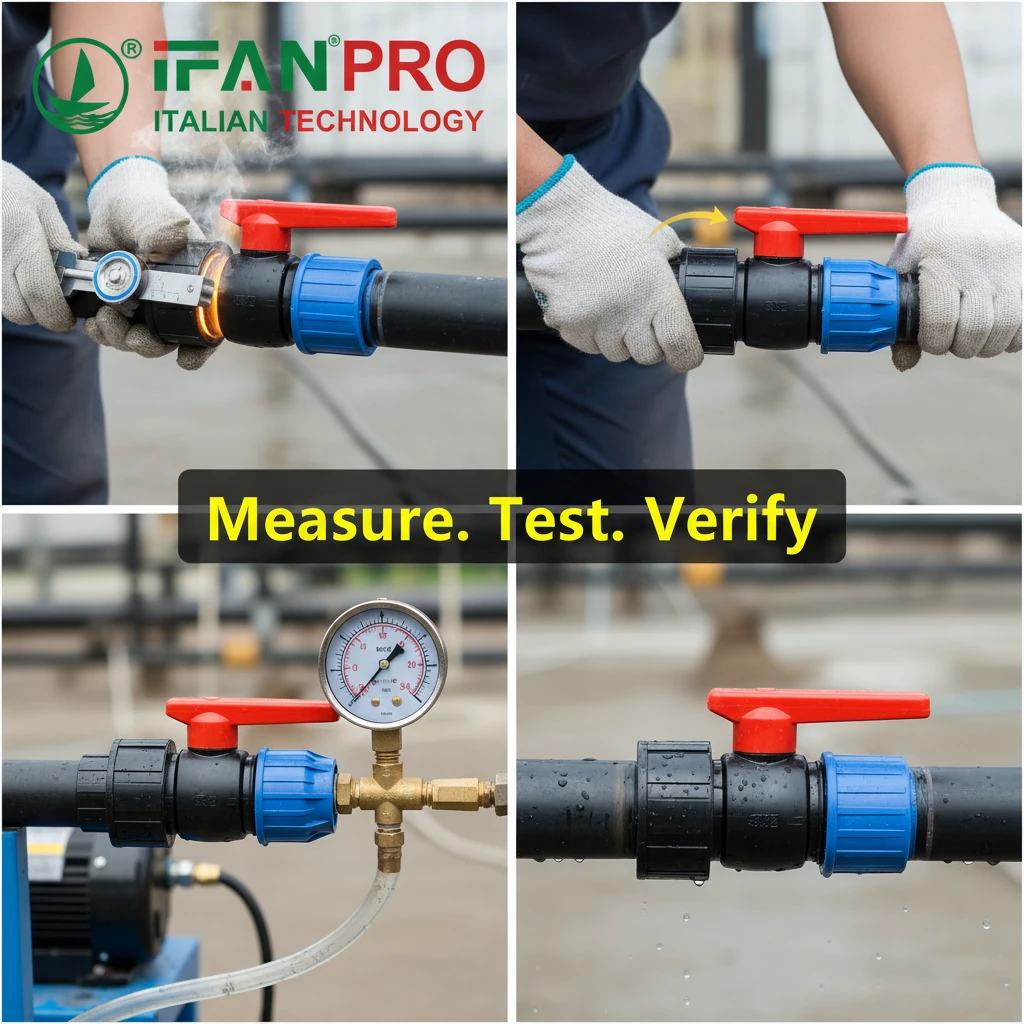
Vital quality checks for fused connections involving HDPE valves include visual inspection of the bead roll, measurement of the fusion bead size and shape, a “cold fusion” stress test, and verifying proper alignment and cooling time. For threaded connections, checks for proper thread engagement and seal installation are equally critical.
Pre-Fusion Checks: Setting the Stage for Success
Quality control starts before you even heat the tool.
- Material and Component Check: Verify that the valve and the pipe are made from the same type of HDPE (e.g., both PE100). Mismatched materials will not fuse properly. Then, check for any dirt, moisture, or damage on the spigot and socket.
- Equipment Calibration: Ensure the fusion machine (socket or electrofusion) is calibrated for the correct temperature and pressure. A poorly calibrated machine is the most common cause of bad joints.
- Preparation: The pipe and valve ends must be properly scraped (to remove oxidation) and cleaned with isopropyl alcohol. Any grease or dirt will contaminate the joint.
During and Post-Fusion Checks: The Critical Phase
These checks happen during and immediately after the fusion process.
For Socket/Butt Fusion on Adapters:
- Heat and Pressure Time: Monitor that the correct heating and fusion pressures are applied for the exact time specified in the procedure chart for that pipe/valve size.
- Visual Bead Inspection: After joining, a uniform bead of melted plastic should form around the joint. An uneven or missing bead indicates poor heating or alignment.
- Bead Measurement: The height and shape of this bead should match the specifications. Most procedures provide a “bead profile” gauge to check this.
For Electrofusion:
- Scrape and Clean: This is even more critical for electrofusion. The scraping must be deep enough.
- Clamping and Alignment: The fitting must be clamped straight and tight.
- Fusion Cycle: The fusion box must complete its full cycle, including the cooling phase, without interruption.
Post-Installation Verification Checks
After the joint has fully cooled (which can take minutes to hours depending on size), perform these tests:
- The “Cold Fusion” Test: Try to rotate the valve or pipe near the joint. A properly fused joint will not move or twist at all. Any movement means the fusion failed—this is called a “cold joint” and you must cut it out and re-do it.
- Visual Re-inspection: Look for cracks, voids, or distortions in the joint area.
- Pressure Test: The entire system should undergo a hydrostatic (water) pressure test. Hold the pressure for several hours and look for any drops, which would indicate a leak.
Threaded Connection Quality Checks
For the valve’s threaded side:
- Thread Inspection: Ensure threads are not crossed, stripped, or damaged.
- Seal/Gasket: Always use a new, compatible gasket or O-ring. Importantly, do not use thread sealant tape on plastic threads, as it can induce stress cracking.
- Tightening: Hand-tighten first, then use a strap wrench for the final 1-2 turns. However, do not over-tighten with a metal pipe wrench, as it will crush the valve.
Essential Checks Summary Table
| Check Phase | For Fused Connections | For Threaded Connections |
|---|---|---|
| Before | Material match, cleanliness, equipment calibration. | Inspect threads for damage, ensure correct gasket is used. |
| During | Correct heat/pressure time, alignment. | Proper hand-tightening sequence, alignment. |
| After (Immediate) | Bead shape and size, alignment. | Visual check for gaps, proper engagement. |
| After (Final) | Cold fusion twist test, system pressure test. | System pressure test, check for leaks at threads. |
Skipping any of these checks risks joint failure. In fact, a failed joint in a buried pipeline can cost 10 times more to repair than the original installation cost.
Conclusion
Understanding the correct connection methods for HDPE female valves prevents installation errors and ensures system longevity. For guaranteed quality HDPE female valves, fittings, and expert fusion support, trust IFAN.


Recent Comments