
I once watched a technician struggle for an hour to fit a standard valve into a cramped control panel. That frustration is exactly what mini valves are designed to solve.
You can install a mini valve in tight spaces easily by choosing the right compact connection type, using purpose-built mounting hardware, and following a methodical toolkit approach. The key is planning and using components designed for confined areas, which drastically reduces installation time and frustration.
Let’s break down the simple steps and smart choices that make this challenging job straightforward.
What Are the Compact Connection Types Available for Mini Valves?
Tight spaces leave no room for bulky fittings. I’ve seen projects delayed because the chosen valve connection needed more space than was available.
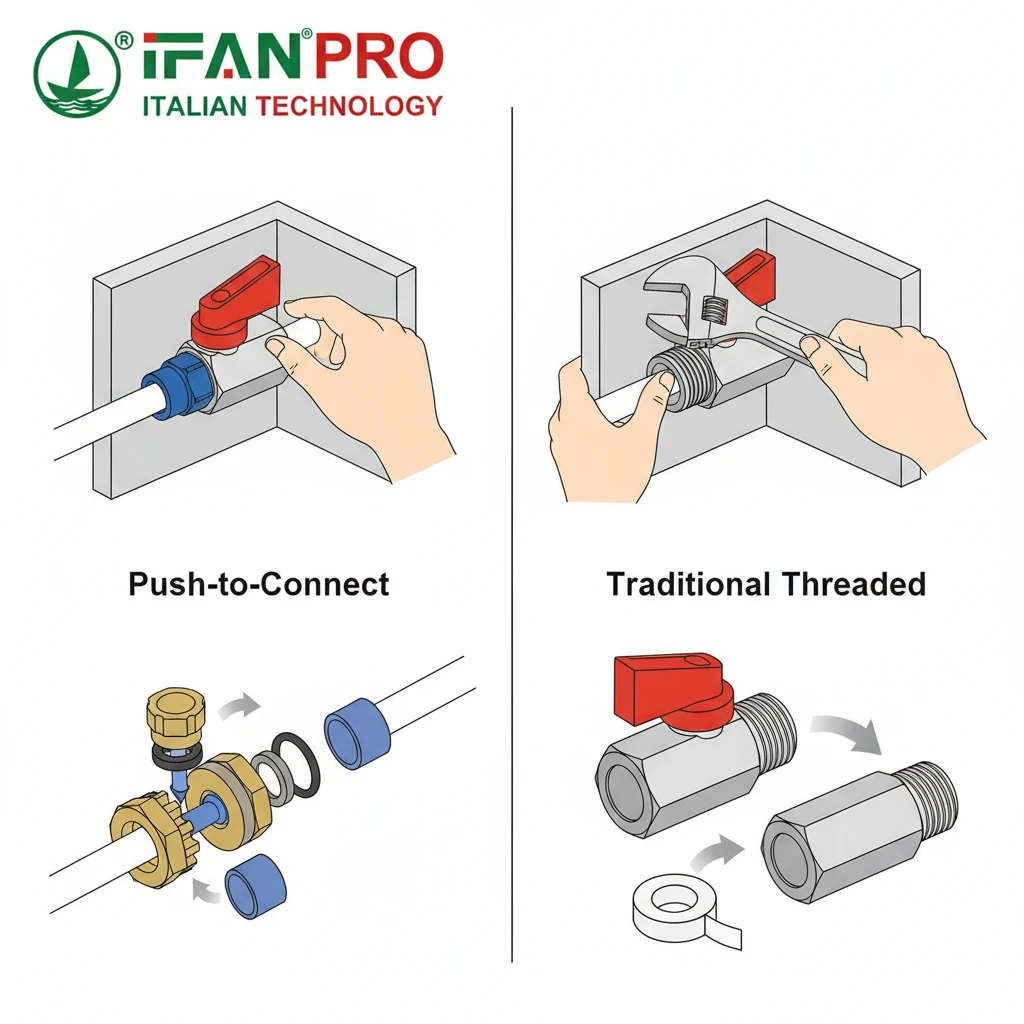
The most compact connection types for mini valves are threadless options like press-fit, push-to-connect, or barbed hose fittings. These eliminate the space needed to swing a wrench for tightening traditional threaded connections, making them ideal for dense installations where tool access is severely limited.
Why Connection Type is Your First Decision
The type of connection you choose is the most important factor for easy installation in a tight spot. Traditional threaded ports require you to turn the valve or the fitting multiple times, and you need space for a wrench. In a cabinet or a compact machine, this simple act can become impossible.
So, you need to look at threadless alternatives. These connections work in a straight line, meaning you just push the valve and the tubing together. This linear motion is much easier to manage when you can’t move your hands freely.
Comparing Your Connection Options
Here is a simple table to compare the best compact connection types:
| Connection Type | How It Works | Best For | Installation Space Needed |
|---|---|---|---|
| Push-to-Connect | Push the tubing straight into the valve port. An internal gripper and O-ring seal it instantly. | Fast, tool-free installations; frequent maintenance points. | Very Low – just straight-line access. |
| Press-Fit | Slide the tubing into the port and use a simple press tool to crimp a sleeve around it. | Permanent, highly reliable seals in hydraulic or pneumatic systems. | Low – needs space for the press tool, but no twisting. |
| Barbed Fitting | Push flexible tubing over a ribbed “barb” on the valve. A hose clamp often secures it. | Low-pressure applications like coolant lines, drainage, or air. | Very Low – just push-on action. |
| Mini Threaded | Small metric or BSPP threads. | When material compatibility requires metal threads. | High – requires wrench space for tightening. |
Making the Right Choice for Your Project
First, consider push-to-connect fittings. They are the champion for easy installation. You cut the tube straight, push it in until it clicks, and you’re done. No tools. If you need to remove it later, you just press the collet and pull the tube out. This is perfect for control panels or devices that might need servicing.
Next, think about press-fit systems. These are more permanent than push-to-connect but are still very space-efficient. You only need enough room to place the pressing tool around the fitting. The result is a robust, vibration-resistant connection that is perfect for factory equipment.
Finally, don’t forget simple barbed fittings for low-pressure jobs. They are often the smallest and cheapest option. Just remember to use a hose clamp for a secure seal if there is any pressure or vibration.
By choosing one of these compact connections from the start, you solve most of your space problems before you even pick up a tool.
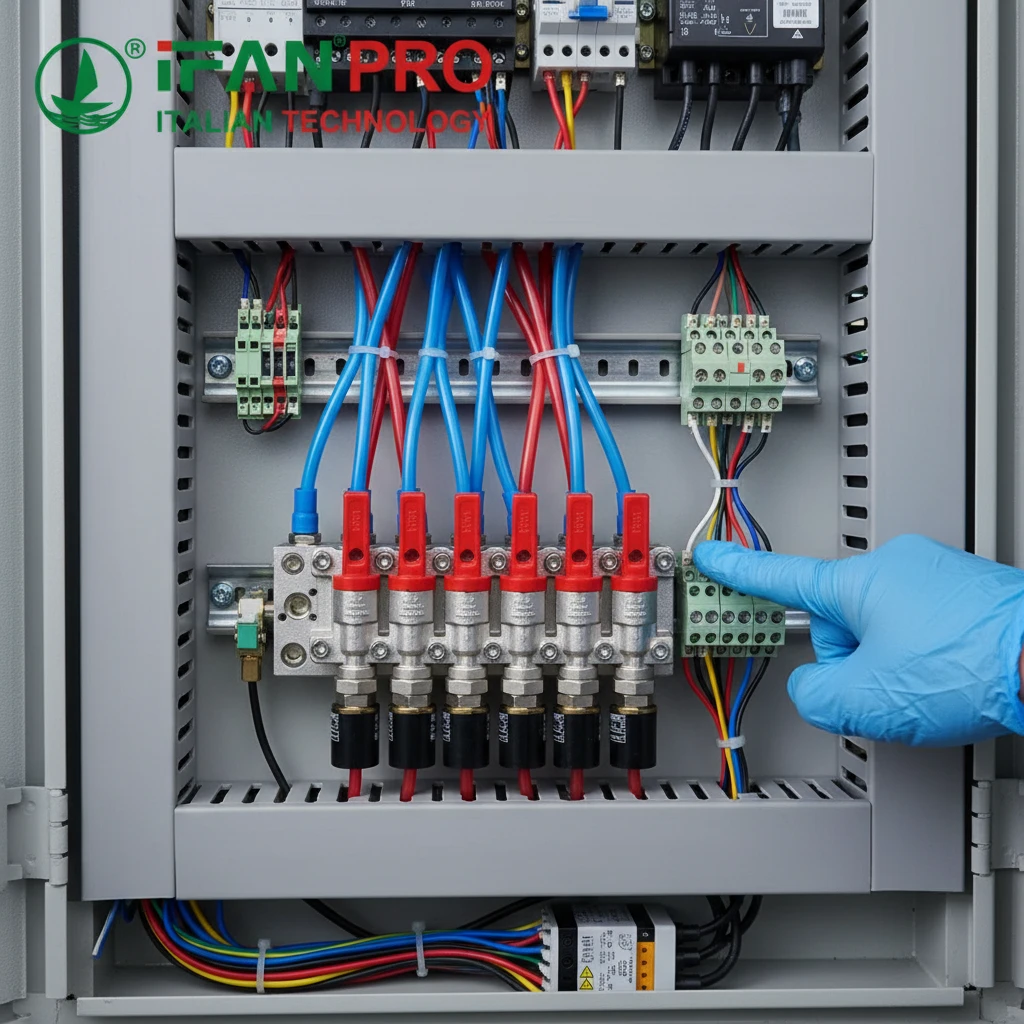
Are There Specific Mounting Brackets or Manifolds for Clustered Valve Installation?
Mounting several valves individually in a small area creates a messy web of fittings. Using a manifold changes everything.
Yes, specific mounting brackets, subplates, and especially manifolds exist for clustered valve installation. A manifold is a single block of metal with multiple ports that allows you to mount several valves neatly in a row, sharing common inlet and outlet passages. This saves immense space and reduces leak points from numerous pipe connections.
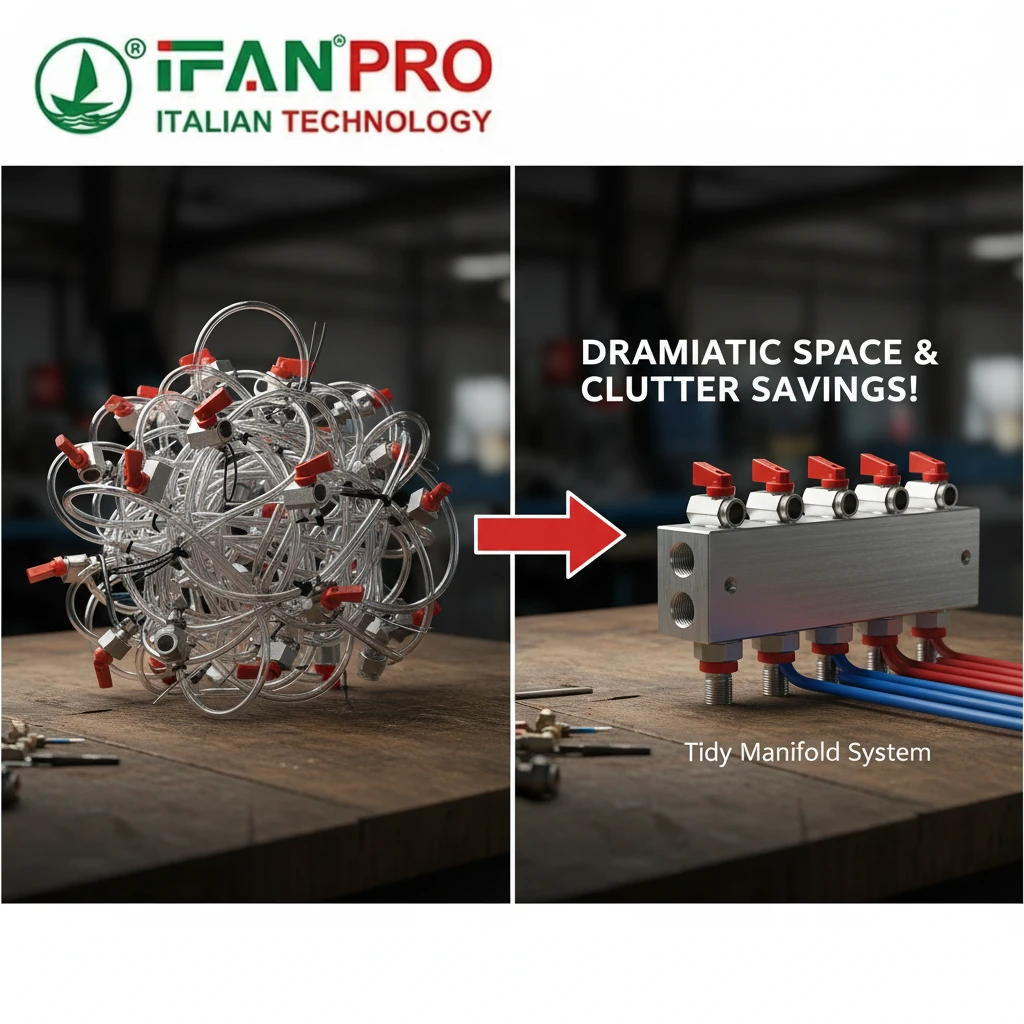
The Problem with Individual Mounting
When you install many mini valves separately, each one needs its own set of fittings and tubing to connect to the supply and the system. This creates a dense, tangled nest of connections that is hard to install, nearly impossible to troubleshoot, and prone to leaks at every fitting. In a tight space, this approach is a recipe for problems.
The smart solution is to group your valves together on a dedicated mounting system. This organizes the installation and makes it fundamentally simpler.
Your Mounting Solution Options
You have two main paths here: simple brackets or integrated manifolds.
Option 1: Mounting Brackets and Subplates
These are like small, customized shelves for your valves. A bracket holds the valve body in place, which can help manage vibration. A subplate is more advanced; it is a flat plate with threaded holes that match the valve’s mounting pattern and its fluid ports. You bolt the valve directly to the subplate, and all the fluid connections are made on the underside of the plate, keeping the top clean. This is good for organizing a small group of valves.
Option 2: The Manifold (The Best Solution for Clusters)
A manifold is the ultimate space-saver for multiple valves. Think of it as a solid metal rail with a common internal passage for supply (like air or oil). You bolt several mini valves directly on top of this rail. Each valve then taps into the common supply inside the manifold.
Benefits of Using a Manifold:
- Saves Huge Amounts of Space: It eliminates dozens of tees, elbows, and tubing runs between valves.
- Reduces Leak Points: Instead of 20 potential leak points at tube fittings, you only have the few connections at the manifold ends.
- Makes Installation Faster: You mount all valves to one piece, and the plumbing is mostly done internally.
- Easier Maintenance: The assembly is neat and organized. Replacing one valve is simple.
Choosing the Right Manifold System
When you plan your cluster, talk to your supplier like IFAN about a custom or modular manifold. They can often provide a single block pre-drilled for the exact number and type of valves you need. This turns a complex plumbing job into a simple bolt-together task, making installation in tight spaces not just easier, but cleaner and more reliable.
How Does a Modular Design Simplify Installation and Maintenance Access?
Working on a tightly packed system shouldn’t mean taking everything apart. Modular design is the key to smart access.
A modular design simplifies installation and maintenance by using standardized, pre-assembled components that snap or bolt together in a logical sequence. This allows you to install complex valve groups as easy-to-handle modules and remove or replace a single faulty valve without dismantling the entire surrounding piping or wiring.
What Does “Modular” Really Mean?
Think of modular valves like building blocks or LEGO bricks. Each valve is a self-contained unit with standardized connections for air, fluid, and sometimes even electricity. These units are designed to connect directly to each other or to a manifold without extra adapters or complex plumbing in between.
This approach changes the workflow completely. Instead of building a system piece-by-piece with tubes and fittings in the cramped final location, you can pre-assemble sections on your workbench. Then, you just install the whole module as one piece.
Step-by-Step Benefits During Installation
First, installation becomes faster and more accurate. You can lay out your valves and manifold on a clean, well-lit bench. You connect them without struggling in a confined cabinet. This means you can ensure every connection is correct and tight. Once assembled, you simply lift the entire module into place and make the main system connections. This cuts installation time in half.
Second, it reduces errors. When you are working in a tight, awkward space, you are more likely to cross-thread a fitting or forget a seal. Pre-assembly on a bench minimizes these costly mistakes.
How Modular Design Revolutionizes Maintenance
Maintenance is where modular design truly shines. Imagine a traditional piped system where one valve fails. To remove it, you might have to drain the system, cut tubing, and disturb other perfectly good valves and connections.
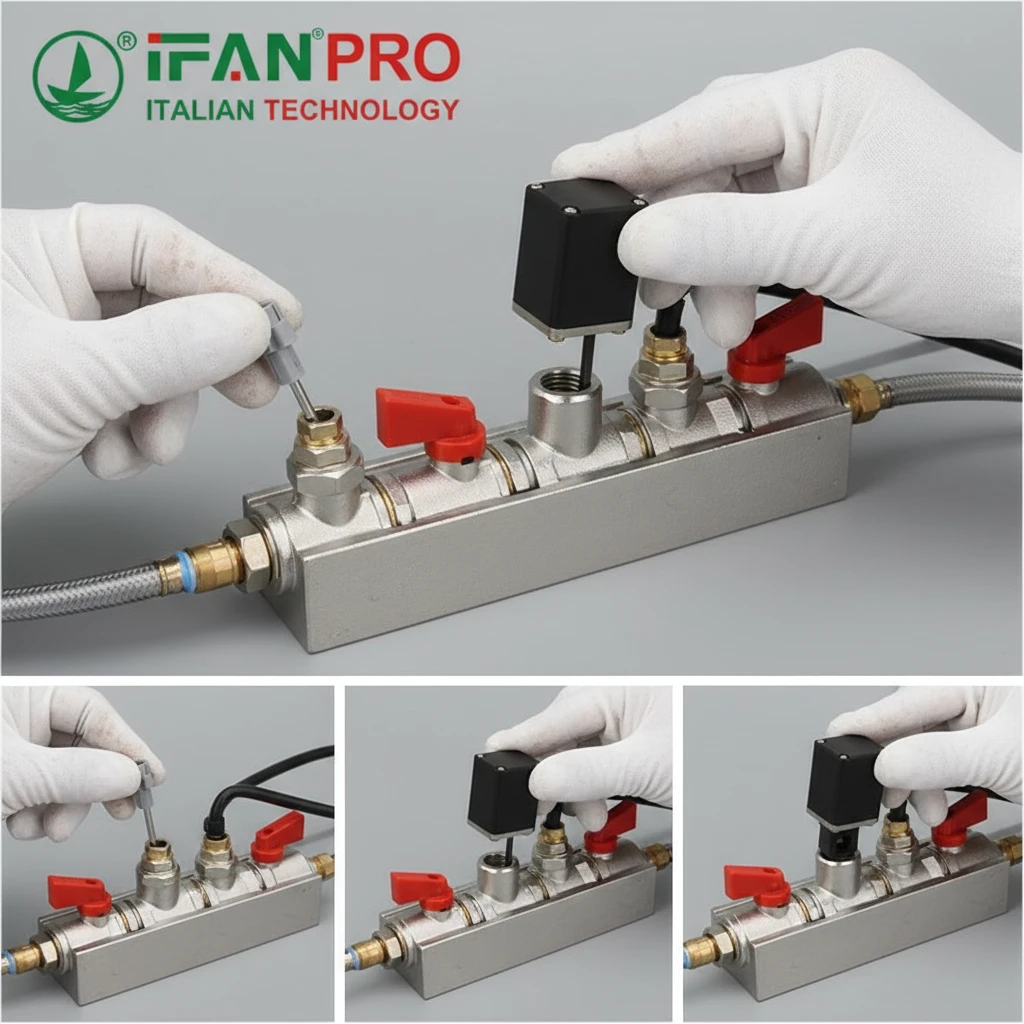
With a modular system, the faulty valve is often a single block bolted to a manifold. You simply:
- Shut off the main supply.
- Disconnect the electrical plug (if it has one).
- Unbolt the single valve from the manifold.
- Lift it straight out.
The rest of the system remains intact and pressurized. You can then bolt a new, identical module in its place, reconnect the wires, and turn the system back on. Downtime goes from hours to minutes.
Key Features of a Good Modular System
Look for these features when choosing components:
- Standardized Footprint: All valves in the series share the same mounting hole pattern and port locations.
- Integrated Sealing: Seals are often built into the interface, so no extra O-rings are needed during replacement.
- Quick-Connect Electrical: Plug-and-play connectors for solenoids instead of hard-wired connections.
By insisting on a modular design from suppliers like IFAN, you are not just buying valves; you are buying future time and hassle savings during every maintenance event.
What Tools Are Needed for Secure Installation in Confined Areas?
The wrong tools make a tight space impossible. The right, specialized tools turn it into a simple task.
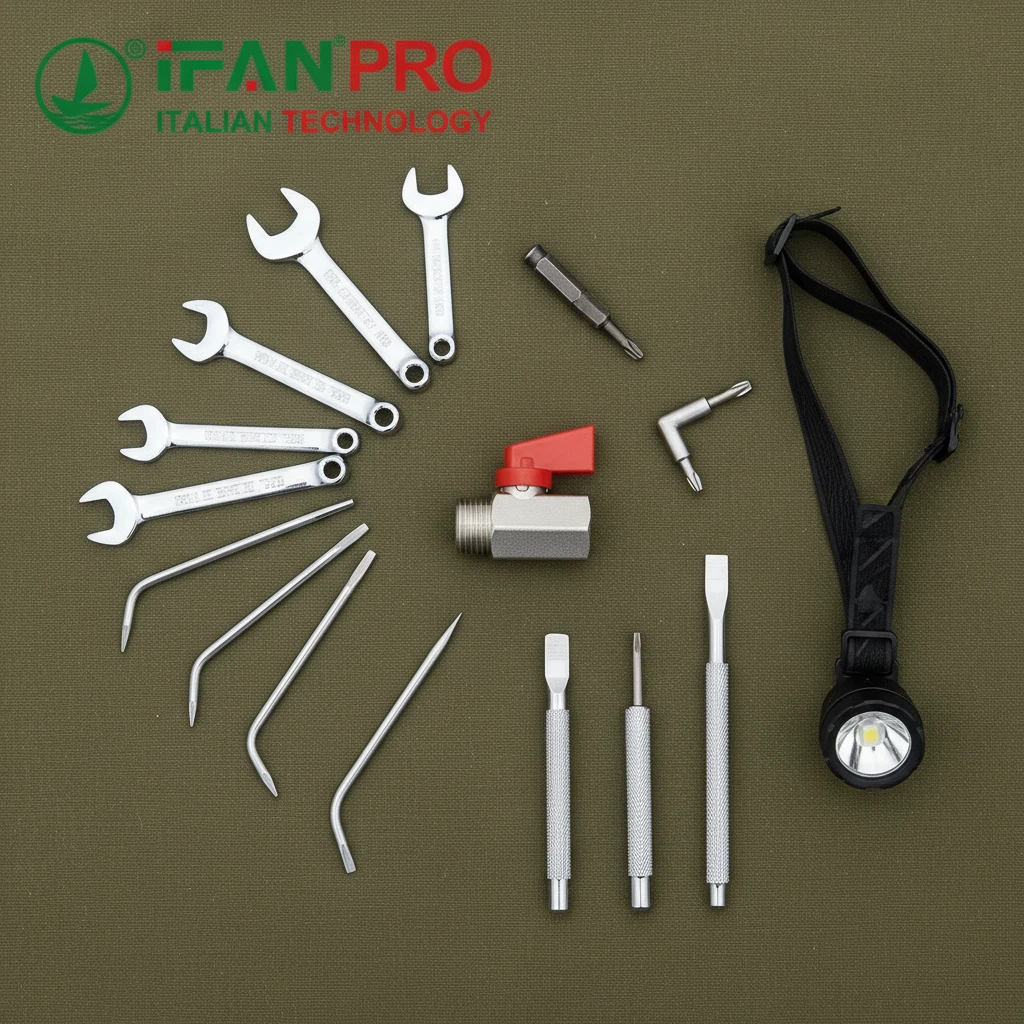
For secure installation in confined areas, you need a compact, purpose-specific toolkit: a small tube cutter for clean cuts, a deburring tool, a set of miniature wrenches or crowfoot wrenches, a right-angle screwdriver, a gooseneck pick for placing seals, and a head-mounted flashlight or flexible work light to see clearly.
Why General Tools Fail in Small Spaces
Your standard full-size wrench set and long screwdrivers are useless inside a control panel or machine cavity. They need too much space to swing and turn. Using them leads to rounded nuts, stripped screws, and sheer frustration. You need tools that are adapted to work within the limits of your space, not against them.
Your goal is to have a dedicated kit for close-quarters work. This saves you time because you’re not constantly swapping tools or trying to make the wrong tool fit.
The Essential Confined-Space Tool List
Here is a breakdown of the must-have tools and their specific job:
| Tool | Purpose | Why It’s Essential for Tight Spaces |
|---|---|---|
| Mini Tube Cutter | To make square, clean cuts on plastic or soft metal tubing. | A clean cut is critical for leak-free seals in push-fit or press-fit systems. A hacksaw in a tight space makes a messy, angled cut. |
| Deburring Tool | To remove sharp inside and outside edges from the cut tube. | A burr can damage an O-ring or prevent a tube from sealing fully. This simple tool ensures a perfect tube end. |
| Crowfoot Wrench Set | To tighten nuts where a normal wrench can’t swing. | It attaches to a ratchet handle, letting you turn nuts in deep recesses or against walls where a standard wrench won’t fit. |
| Right-Angle Screwdriver | To drive screws directly above or beside obstacles. | It lets you apply turning force where a straight screwdriver has no room. Some have a pivoting head for even more flexibility. |
| Gooseneck Pick & Hook Set | To guide O-rings into grooves, place small washers, or retrieve dropped parts. | Your fingers won’t fit. These long, slender tools are your fingertips in a deep, narrow cavity. |
| Head-Mounted LED Light | To illuminate your work area hands-free. | Shadows and poor light cause mistakes. A bright, directed light source is a safety and quality essential. |
Building an Efficient Work Process
With the right tools, your process becomes smooth. First, use your light to see the area clearly. Measure and cut your tubing on the bench with the mini cutter and deburr it. Then, feed the tube into the space.
When tightening connections, use the crowfoot wrench on its ratchet to get perfect torque without needing to swing your arm. Use the right-angle screwdriver to mount brackets or valve solenoids in awkward corners. If a tiny seal drops, use your pick to retrieve it without having to disassemble other parts.
Investing in this specific toolkit might seem small, but it has a huge impact. It turns a difficult, error-prone job into a series of simple, controlled actions. For professionals who regularly work in panels or machines, these tools are not optional; they are fundamental to a quality, secure installation.
Conclusion
Installing mini valves in tight spaces is easy with compact fittings, smart manifolds, modular valves, and the right small tools. For reliable mini valves and complete installation solutions, trust IFAN to provide the components and expertise you need.


Recent Comments